6.
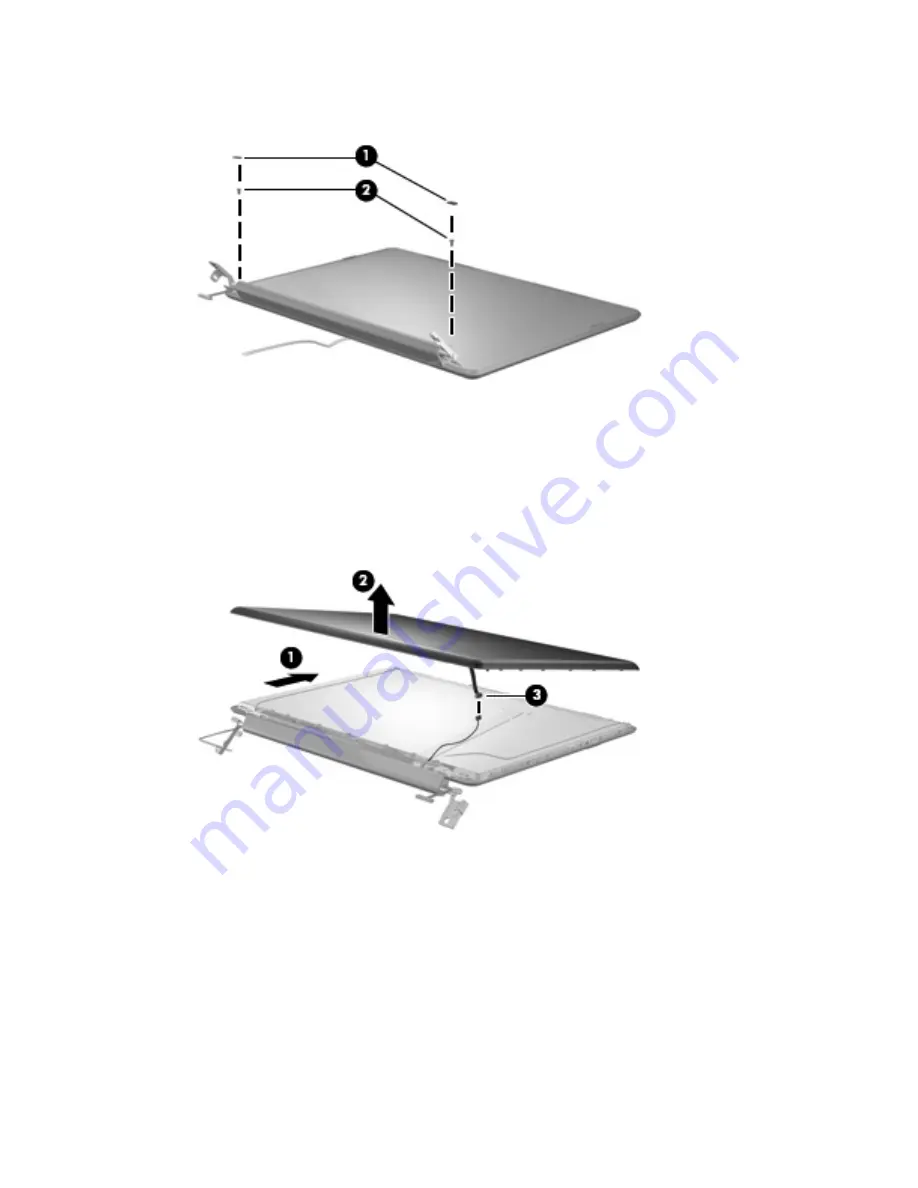
Remove the two Phillips PM2.5×5.0 screws
(2)
that secure the display enclosure to the
display assembly.
7.
Turn the display enclosure upside down, with the hinges toward you.
8.
Release the display enclosure
(1)
by sliding it toward the top of the display assembly until it
detaches from the display assembly.
9.
Lift the bottom edge of the display enclosure
(2)
until the display enclosure logo LED cable
is accessible.
10.
Disconnect the display enclosure logo LED cable
(3)
from the display panel cable.
11.
Remove the display enclosure. The display enclosure is available using spare part number
480445-001.
12.
If it is necessary to replace the webcam/microphone module, remove the two Phillips PM2.5×3.0
screws
(1)
that secure the webcam/microphone module to the display bezel.
13.
Release the webcam/microphone module
(2)
as far from the display bezel as the webcam/
microphone module cable allows.
Component replacement procedures
75
Содержание Pavilion dv7-1100 - Entertainment Notebook PC
Страница 1: ...HP Pavilion dv7 Entertainment PC Maintenance and Service Guide ...
Страница 4: ...iv Safety warning notice ...
Страница 26: ...Computer major components 18 Chapter 3 Illustrated parts catalog ...
Страница 113: ...Reverse this procedure to install the heat sink Component replacement procedures 105 ...
Страница 142: ...Where used 2 screws that secure the modem module to the system board 134 Chapter 7 Screw listing ...
Страница 153: ...Where used 6 screws that secure the top cover to the base enclosure Phillips PM2 5 6 0 screw 145 ...
Страница 167: ...Universal Serial Bus Pin Signal 1 5 VDC 2 Data 3 Data 4 Ground Universal Serial Bus 159 ...
Страница 181: ......


