Restoring default settings in the Setup Utility
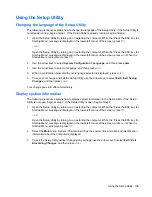
The following procedure explains how to restore the Setup Utility default settings. If the Setup Utility is
not already running, begin at step 1. If the Setup Utility is already running, begin at step 2.
1.
Open the Setup Utility by turning on or restarting the computer. While the “Press the ESC key for
Startup Menu” message is displayed in the lower-left corner of the screen, press
f10
.
– or –
Open the Setup Utility by turning on or restarting the computer. While the “Press the ESC key for
Startup Menu” message is displayed in the lower-left corner of the screen, press
esc
. When the
Startup Menu is displayed, press
f10
.
2.
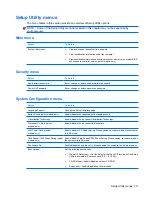
Use the arrow keys to select
Exit > Load Setup Defaults
, and then press
enter
.
3.
When the Setup Confirmation is displayed, press
enter
.
4.
To save your change and exit the Setup Utility, use the arrow keys to select
Exit > Exit Saving
Changes
, and then press
enter
.
The Setup Utility default settings go into effect when the computer restarts.
NOTE:
Your password, security, and language settings are not changed when you restore the factory
default settings.
Exiting the Setup Utility
You can exit the Setup Utility with or without saving changes.
●
To exit the Setup Utility and save your changes from the current session:
If the Setup Utility menus are not visible, press
esc
to return to the menu display. Then use the
arrow keys to select
Exit > Exit Saving Changes
, and then press
enter
.
●
To exit the Setup Utility without saving your changes from the current session:
If the Setup Utility menus are not visible, press
esc
to return to the menu display. Then use the
arrow keys to select
Exit > Exit Discarding Changes
, and then press
enter
.
After either choice, the computer restarts in Windows.
110 Chapter 5 Setup Utility
Содержание Pavilion dv7-1100 - Entertainment Notebook PC
Страница 1: ...HP Pavilion dv7 Entertainment PC Maintenance and Service Guide ...
Страница 4: ...iv Safety warning notice ...
Страница 26: ...Computer major components 18 Chapter 3 Illustrated parts catalog ...
Страница 113: ...Reverse this procedure to install the heat sink Component replacement procedures 105 ...
Страница 142: ...Where used 2 screws that secure the modem module to the system board 134 Chapter 7 Screw listing ...
Страница 153: ...Where used 6 screws that secure the top cover to the base enclosure Phillips PM2 5 6 0 screw 145 ...
Страница 167: ...Universal Serial Bus Pin Signal 1 5 VDC 2 Data 3 Data 4 Ground Universal Serial Bus 159 ...
Страница 181: ......

