Chapter 3 - Installing
3.3
Pinning media devices
3.3.1
Configure SCSI address for removable media drives
The workstation does not use a SCSI card option.
3.4
Installing workstation in Icon Series console
Perform the following procedure to install the workstation, air dam, and air gasket into the electronics
enclosure of the Icon Series console.
ATTENTION
In the following procedure, “left” and “right” refer to viewing the electronics enclosure from the
rear.
3.4.1
To install workstation in Icon Series console
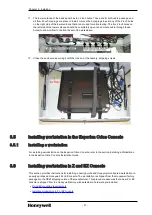
1. Place the workstation in the electronic enclosure with the back (connectors) of the workstation
facing the right side of the enclosure. Ensure the workstation is centered and pushed up against
the two elastomer bumpers at the bottom of the enclosure.
2. Fasten the tie-down straps into the slots of the enclosure cradle. Notice that there are multiple slots
for the ends of the tie-down straps. The straps may be moved inward or outward depending on the
size of the workstation. Attach the straps on the inward slots. Adjust the strap lengths so that when
the fastener is latched, the straps are snug against the workstation.
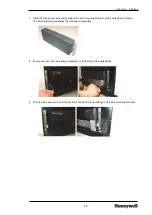
3. Remove the adhesive from the air gasket (“L” shaped foam) and place it on top of the workstation
as shown in the following “Air flow and air dam arrangement” figure. The adhesive keeps the
gasket in place. The gasket stops the exhaust air from re-circulating around the workstation.
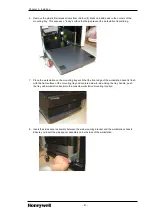
4. Remove the adhesive from the air dam (clear flat sheet with two chamfered corners). Cover the
ventilation slots at the bottom of the electronic enclosure near the front side of the workstation, with
the chamfers downward. For this workstation, the ventilation slots are at the right side. The dam
causes cooling air to be drawn down from the back panel area (refer to the following Air flow and
air dam arrangement figure).
- 28 -


