


14
NFS2-640/E Programming Manual —
P/N 52742:L2 7/17/14
Programming
How to Enter Programming
2.2 How to Enter Programming
To enter Program Change, follow these steps:
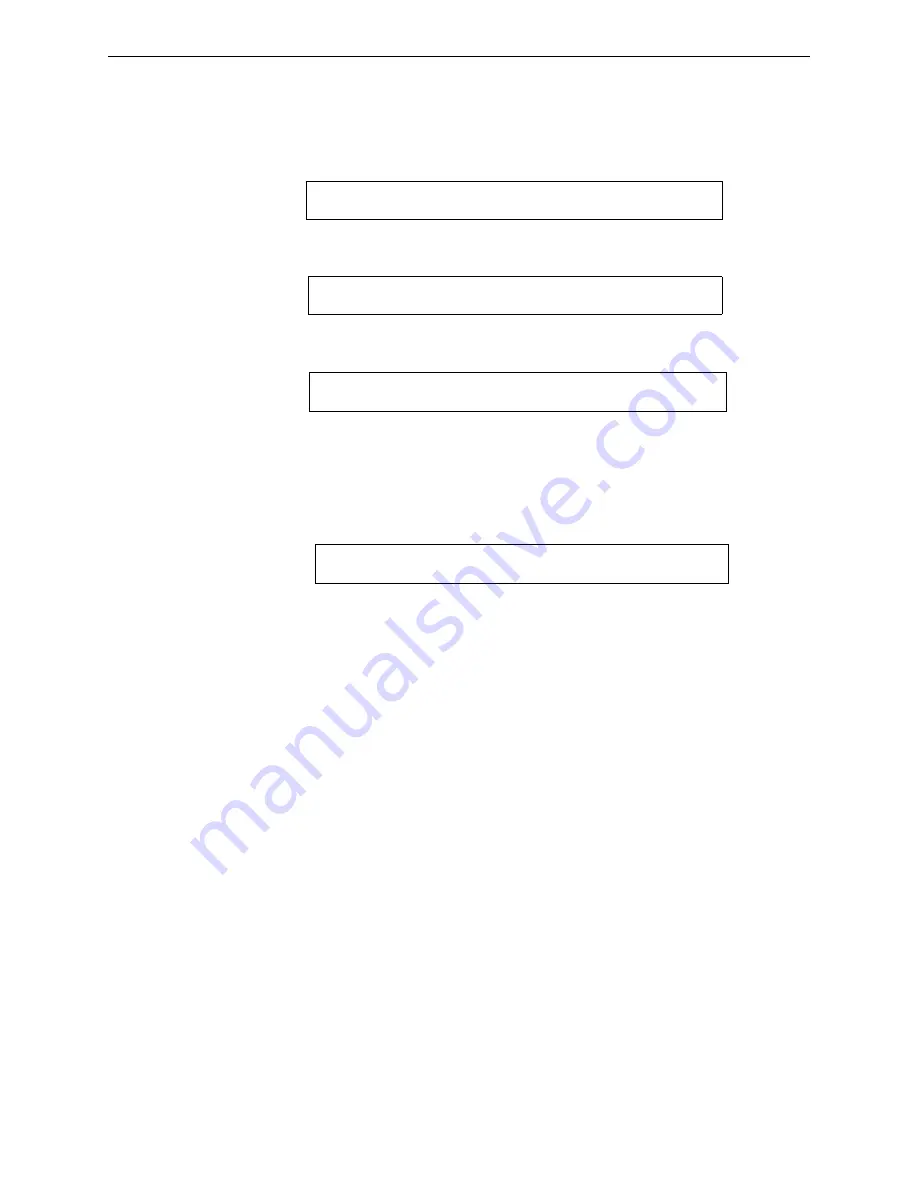
1. At the “SYSTEM NORMAL” screen, press the
ENTER
key. The control panel displays the
“Entry” screen, as shown below:
2. At the “Entry” screen, press the
1
key. The control panel displays the “Enter Password” screen
as shown below:
3. Enter your Program Change password (See “How to Enter a Password” on page 11). The
control panel displays the “Program Change Selection” screen, as shown below:
4. Select a Program Change selection:
1
,
2
,
3
or
4
.
2.3 Basic Program
From the “Program Change Selection” screen, press the
1
key to display the “Basic Program”
screen which provides nine (9) options as shown below:
Press the number of any one of the nine (9) options as detailed below
Option 0=CLR
- Clears all existing user programming. For details, refer to How to Clear Memory
(0=
CLR
) on page 15. Note: The user is prompted to double-check that this is what is really wanted.
Option 1=AUTO
- Add or remove addressable devices to the control panel program. For details,
refer to How to Autoprogram the Control Panel (1=
AUTO
Option 2=POINT
- Modify or delete a point. For details, refer to “How to Modify or Delete a
Point (2=
POINT
)” on page page 19.
Option 3=PASSWD
- Change the Program Change or the Alter Status password. For details, refer
to “How to Change a Password (3=
PASSWORD
Option 4=MESSAGE
- Edit the 40-character message that displays on the first line. For details,
refer to “How to Create a System Message (4=
MESSAGE
)” on page page 26.
Option 5=ZONES
- Edit the 20-character custom zone label for zones 01-99. For details, refer to
“How to Create a Custom Zone Label (5=
ZONE
Option 6=SPL FUNCT
- Program Releasing Zones and Special Zones. For details, refer to “How
to Program Special Zones (6=
SPL
FUNCT
)” on page page 27.
Option 7=SYSTEM
- Program Global System Functions. For details, refer to “How to Change
Global System Functions (7=
SYSTEM
)” on page page 31.
Option 8=CHECK PRG
- Check the program for errors. For details, refer to “How to Check the
Program for Errors (8=check prg)” on page 47.
1 = P R O G R A M M I N G
2 = R E A D S T A T U S E N T R Y
( E S C A P E T O A B O R T )
E N T E R P R O G O R S T A T P A S S W O R D , T H E N E N T E R .
( E S C A P E T O A B O R T ) _
1 = B A S I C P R O G R A M
2 = N E T W O R K
3 - U T I L I T Y
4 = F L A S H S C A N P O L L
0 = C L R 1 = A U T O 2 = P O I N T 3 = P A S S W D 4 = M E S S A G E
5 = Z O N E S 6 = S P L F U N C T 7 = S Y S T E M 8 = C H E C K P R G