


. . . . .
S E C U R I N G M A X P R O N V R
Step 5: Updating the Application pools in IIS
MAXPRO NVR 5.0 Installation and Configuration Guide
259
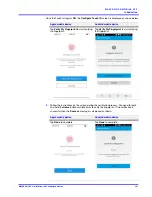
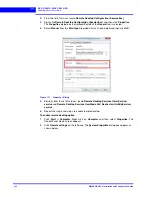
6.
Similarly repeat steps 2 through step 5 to update the account details for the following
services.
•
TrinitySmart VMD services
•
TrinityController
•
TrinityArchival (Applicable only for 4.0 Release version)
•
NeoStorageExtWDService
•
NEOStorageServer
•
NEOStorageServer2
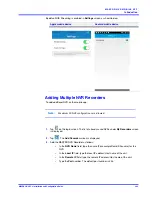
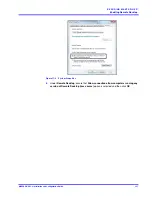
7.
After updating account details, restart the following services in the order mentioned.
•
TrinityServer
•
TrinitySmart VMD services
•
TrinityController
•
TrinityArchival (Applicable only for 4.0 Release version)
•
NeoStorageExtWDService
•
NEOStorageServer
•
NEOStorageServer2
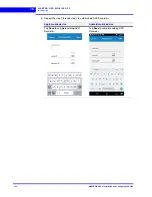
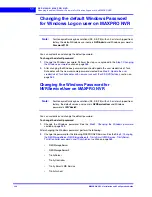
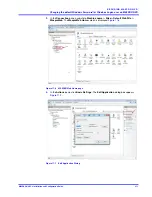
Step 5: Updating the Application pools in IIS
1.
Launch the Internet
Information Services (IIS) Manager
window. (Run > Inetmgr).
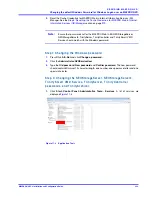
2.
Under
Connections
pane expand the main node and then click the
Application pools
node.The list of application pools are displayed in the Application Pools pane.
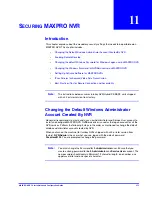
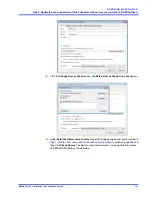
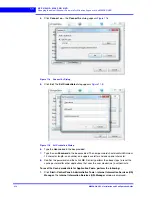
3.
Click
ISOM_Application
and then under
Actions
pane >
Edit Application Pool
, click
Advanced Settings
link. The
Advanced Settings
dialog appears.
4.
Under
Process Model
node, click
Identity
and then click the browse button,. The
Application Pool Identity
dialog appears.
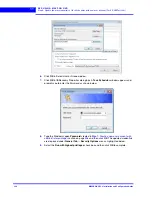
5.
Under
Custom account
option, click the
Set
button. The
Set Credentials
dialog is
displayed.
6.
Type the
User name
(For example:
NVRServiceUser2
),
Password
which is created in
Step 3: Create a new Service User and Deny log on
and then
Confirm the
Password
. Click
OK
.
7.
Click
OK
in the
Application Pool Identity
box and
Advanced Settings
box.
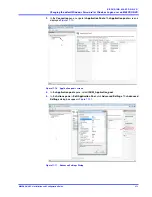
8.
Under
Connections
pane expand the
Sites
node and then navigate to
Default Web site
>
Live
node.
9.
Under
Actions
pane >
Manage Application/Browse Application
, click
Advanced
Settings
link. The
Advanced Settings
dialog appears.
10.
Under
General
, click
Physical Path Credentials
and then click the browse button. The
Connect as
dialog appears.
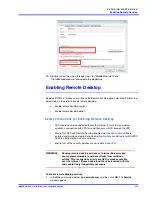
11.
Under
Specific User
option, click the
Set
button. The
Set Credentials
dialog is
displayed.
12.
Type the
User name
(For example:
NVRServiceUser2
),
Password
which is created in
Step 3: Create a new Service User and Deny log on
and then
Confirm the
Password
. Click
OK
.
13.
Click
OK
in the
Connect as
box and Advanced Settings box.
Содержание MAXPRO NVR Hybrid PE
Страница 1: ...Document 800 16419V5 Rev D 6 2018 MAXPRO NVR 5 0 Installation and Configuration Guide ...
Страница 2: ...This page is intentionally left blank ...
Страница 4: ...This page is intentionally left blank ...
Страница 14: ...M A X P R O N V R 5 0 Table of Contents This page is intentionally left blank ...
Страница 359: ......


