●
Startup 2-5
4
3
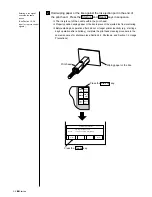
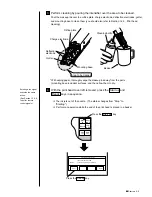
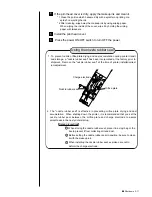
Pour the makeup ink over the orifice plate, charge electrode, deflection electrodes, gutter,
and mounting base to clean them (you should also refer to Section 1.2.3, Print head
cleaning).
Orifice plate
Charge electrode
Deflection
electrode
Mounting base
Beaker
Area to be cleaned
Cleaning bottle
Gutter
* With wiping paper, thoroughly wipe the makeup ink away from the parts
(mounting base included) surfaces, and then allow them to dry.
Perform cleaning by pouring the intensifier over the area to be cleaned.
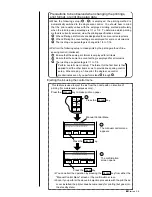
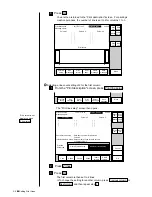
With the print head cover left removed, press the Start up and
Ready keys in sequence.
¡
The ink jets out of the nozzle. (The status changes from "Stop" to
"Starting.")
¡
Perform an operation while the end of the print head is placed in a beaker.
The ink jet will be turned ON.
Solution To turn the ink jet ON, press [Ready].
Ready
Cancel
=====
Ink Jet Startup Confirmation
=====
Start
up
Shut
down
Manual
Prev.
col.
Next
col.
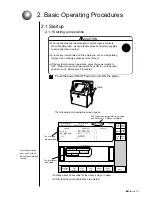
Press the Start up key.
Press the Ready key.
Comm
Om/Off
Entering a run signal
executes the same
action.
(See Section 1.5.3-9,
Input for remote
control signals.)
Содержание PXR-D
Страница 302: ... Outside Dimensions 13 1 13 Schematic Diagrams 13 1 Outside Dimensions Fig 13 1 Model PXR IJ printer outside dimensions ...
Страница 306: ... Electrical Connection Diagram 13 5 13 2 Electrical Connection Diagram Fig 13 5 Electrical connection diagram ...
Страница 307: ...13 6 Circulation System Diagram 13 3 Circulation System Diagram Fig 13 6 Circulation system diagram ...
Страница 319: ...3S23L1307 3B PXR D E7 HEC ...


