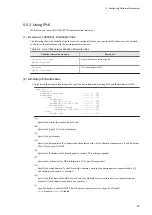
(a) Dividing the user area
Use the
gdisk
command to divide the user area (create partitions). For details about the procedure, see (2) Creating
partitions, (3) Displaying partitions, and (4) Deleting partitions in 5.11.3 Setting up the user area.
(b) Creating a file system
Create a file system by using the
mkfs
command.
<Format>
mkfs -t ext4
device
<Options>
•
-t ext4
Specifies the file system type.
• device
Specify the device name of the partition in which the file system is to be created.
<Display example>
The device name of the partition is
/dev/sda8
and the partition is formatted with ext4.
$ sudo mkfs -t ext4 /dev/sda8
(c) Changing the operation parameter for file system check
Even if the file system is not damaged, file system check is forcibly performed when a predefined period has passed
since the last check date and time. Considering the influence of the check operation on the OS start time, disable the
file system check that is triggered by the elapsed time in this unit.
<Format>
tune2fs -c 0 -i 0
device
<Options>
•
-c 0
Specifies the number of times the file system is to be checked. Specify
0
to disable the check.
•
-i 0
Specifies the interval for checking the file system. Specify
0
to disable the check.
• device
Specify the device name of the partition in which the file system is to be created.
<Display example>
$ sudo tune2fs -c 0 -i 0 device
(d) Specifying user area mount settings
If you want to automatically mount the user area when the OS starts, use the application area mount function. For
details, see (5) Specifying the definition to automatically mount the application area in 5.11.3 Setting up the user
area.
(2) Creating partitions
To create partitions:
1. Start the
gdisk
command with
/dev/sda
specified for the argument.
$ sudo gdisk /dev/sda
GPT fdisk (gdisk) version 1.0.3
Partition table scan:
MBR: not present
BSD: not present
APM: not present
5. Configuring Software Environment
57
Содержание CE50-10
Страница 1: ...Hitachi Industrial Edge Computer CE50 10 Instruction Manual CC 65 0171 ...
Страница 10: ......
Страница 16: ...H 1 List of log capacities 176 H 2 Updating the encryption algorithm 176 I Communication Sheet 178 Contents vi ...
Страница 23: ...Figure 1 6 Attaching mounting brackets 4 1 Installing the CE50 10 7 ...
Страница 26: ......
Страница 38: ......
Страница 42: ...4 2 5 Connection diagram Figure 4 2 Connection diagram 4 External Contact Functions 26 ...
Страница 44: ......
Страница 52: ... gsettings set org gnome desktop background show desktop icons true 5 Configuring Software Environment 36 ...
Страница 87: ... sudo etc init d netfilter persistent save 5 Configuring Software Environment 71 ...
Страница 117: ...version information 13 Log out from the unit exit 5 Configuring Software Environment 101 ...
Страница 143: ...6 Managing User Accounts This chapter describes how to add and delete user accounts for the CE50 10 127 ...
Страница 148: ......
Страница 149: ...7 Maintaining the CE50 10 This chapter describes maintenance of the CE50 10 133 ...
Страница 157: ...8 Troubleshooting This chapter describes troubleshooting of the CE50 10 141 ...
Страница 159: ...Figure 8 2 Troubleshooting flow chart 8 1 1 Smoke or unusual odor WARNING 8 Troubleshooting 143 ...
Страница 162: ...8 1 14 Cannot turn off the power to the unit Please contact us 8 Troubleshooting 146 ...


