
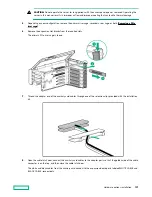


CAUTION: Before installing the riser cage into the server, be sure that the power cables are routed and
secured between the GPU card and the riser cage. Improper routing can result in damage to the cables and
connectors.
10. Install the riser cage.
11. Install the access panel (Installing the access panel).
12. Install the server into the rack (Installing the server into the rack).
13. Connect each power cord to the server.
14. Connect each power cord to the power source.
The installation is complete.
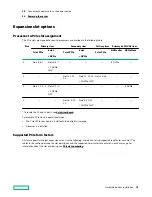
Installing the HPE NS204i-p NVMe OS Boot Device option
WARNING: To reduce the risk of personal injury, electric shock, or damage to the equipment, remove power from
the server by removing the power cord. The front panel Power On/Standby button does not shut off system power.
Portions of the power supply and some internal circuitry remain active until AC power is removed.
CAUTION: To prevent improper cooling or thermal damage, the server PCI slots must have an expansion slot blank
or an expansion board installed.
Prerequisites
Before you perform this procedure, make sure that you have the following items available:
• The components included with the hardware option kit
• T-10 Torx screwdriver
Before beginning installation, ensure that the server is updated with the latest operating system firmware and drivers.
Hardware options installation
112
Содержание HPE ProLiant DL580 Gen10
Страница 11: ...Eight bay SFF NVMe drive cage Six bay SFF HDD Two bay NVMe SSD Premium drive cage Component identification 11...
Страница 12: ...Two bay SFF Premium drive cage Front panel LEDs and buttons Power switch module Component identification 12...
Страница 106: ...Four processor configuration Hardware options installation 106...
Страница 161: ...Drive box 1 to butterfly riser cage Drive box 2 to primary riser cage 4 drive configuration Cabling 161...
Страница 163: ...Drive box 2 to 4 port mezzanine card Drive box 3 to primary 4 port riser Cabling 163...