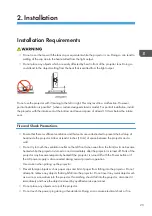
• The projector is designed to operate on a power supply of 100-240V AC 50/60 Hz. Ensure that
the power supply fits this requirement before attempting to use the projector.
• Do not look into the lens while the projector is on. Serious damage to your eyes could result.
• Keep any items (magnifying glass etc.) out of the light path of the projector. The light path being
projected from the lens is extensive, therefore any kind of abnormal object that can redirect light
coming out of the lens, can cause an unpredictable outcome such as a fire or injury to the eyes.
• Do not place any objects which are easily affected by heat in front of a projector exhaust vent.
Doing so could lead to the object melting or getting your hands burned from the heat that is emitted
from the exhaust.
• Handle the power cord carefully. A damaged or frayed power cord can cause electric shock or
fire.
• Do not use any power cord other than the one supplied with the projector.
• Do not bend or tug the power cord excessively.
• Do not place the power cord under the projector or any heavy object.
• Do not cover the power cord with soft materials such as rugs.
• Do not heat the power cord.
• Do not handle the power plug with wet hands.
• Turn off the projector, unplug the power cord and have the projector serviced by qualified service
personnel under the following conditions:
• When the power cord or plug is damaged or frayed.
• If liquid has been spilled into the projector, or if it has been exposed to rain or water.
• If the projector does not operate normally when following the instructions described in the
user’s manual.
• If the projector has been dropped or the cabinet has been damaged.
• If the projector exhibits a distinct change in performance, indicating a need for service.
• Disconnect the power cord and any other cables before carrying the projector.
• Turn off the projector and unplug the power cord before cleaning the cabinet or replacing the
lamp.
• Turn off the projector and unplug the power cord if the projector is not to be used for an extended
period of time.
• When using a LAN cable:
For safety, do not connect to a connector for peripheral device wiring that might have excessive
voltage.
• Do not use the tilt-foot for purposes other than originally intended. Misuses such as gripping the tilt-
foot or hanging on the wall can cause damage to the projector.
2. Installation
24
Содержание Sirius-PJ2
Страница 1: ...Model Sirius PJ2 Machine Codes Y076 Y077 Y078 Field Service Manual June 2015 ...
Страница 2: ......
Страница 12: ...10 ...
Страница 13: ...1 Product Information Specifications See Appendices for the following information General Specifications 11 ...
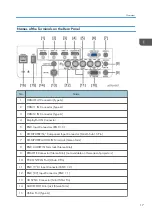
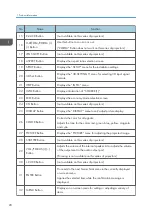
Страница 20: ...No Name 16 Ethernet Port RJ 45 Part Names of the Remote Controller 1 Product Information 18 ...
Страница 24: ...1 Product Information 22 ...
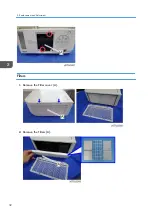
Страница 34: ...Filters 1 Remove the Filter cover A 2 Remove the Filters A 3 Replacement and Adjustment 32 ...
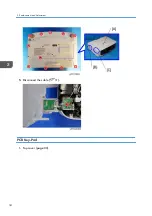
Страница 36: ...5 Disconnect the cable 1 PCB Key Pad 1 Top cover page 33 3 Replacement and Adjustment 34 ...
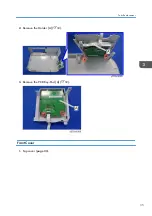
Страница 37: ...2 Remove the Holder A 2 3 Remove the PCB Key Pad A 2 Front Cover 1 Top cover page 33 Parts Replacement 35 ...
Страница 38: ...2 Front Cover A 4 3 Remove the two connectors 2 PCB SCAP 1 Front Cover page 35 3 Replacement and Adjustment 36 ...
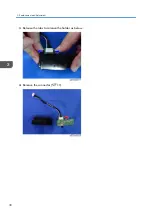
Страница 40: ...3 Release the tabs to remove the holder as below 4 Remove the connector 1 3 Replacement and Adjustment 38 ...
Страница 41: ...Lens Shift Dial 1 Remove the Lens Shift Dial A and spring Rear Panel 1 Top cover page 33 Parts Replacement 39 ...
Страница 52: ...4 Remove the bracket A 5 Remove the G LCD Fan A 2 6 Remove the cushion A 3 Replacement and Adjustment 50 ...
Страница 54: ...5 Remove the Duct Cover A 3 6 Remove the Duct Base A 3 3 Replacement and Adjustment 52 ...
Страница 67: ...3 Remove the bracket A 2 4 Remove the Power supply DC 6 Parts Replacement 65 ...
Страница 141: ...For Video Perform the following check after powering ON the projector Troubleshooting Guide 139 ...
Страница 145: ...Service Information Page 2 User mode Expert mode Service mode Display of lamp voltage added Error Log 143 ...
Страница 153: ...MEMO 151 ...
Страница 154: ...MEMO 152 EN ...
Страница 155: ...Model Sirius PJ2 Machine Codes Y076 Y077 Y078 Appendices June 2015 ...
Страница 156: ......
Страница 158: ...2 ...
Страница 172: ...MEMO 16 EN ...


