2. Installation
Installation Requirements
• Do not cover the lens with the lens cap or equivalent while the projector is on. Doing so can lead to
melting of the cap due to the heat emitted from the light output.
• Do not place any objects which are easily affected by heat in front of the projector lens. Doing so
could lead to the object melting from the heat that is emitted from the light output.
Do not use the projector with it leaning to the left or right. This may result in a malfunction. However,
portrait installation is possible* (when a custom-designed stand is made). For portrait installation, install
the projector with the intake vent at the bottom and leave a space of at least 130 mm below the intake
vent.
Fire and Shock Precautions
• Ensure that there is sufficient ventilation and that vents are unobstructed to prevent the build-up of
heat inside the projector. Allow at least 4 inches (10cm) of space between the projector and a
wall.
• Do not try to touch the ventilation outlet on the left front (when seen from the front) as it can become
heated while the projector is turned on and immediately after the projector is turned off. Parts of the
projector may become temporarily heated if the projector is turned off with the Power button or if
the AC power supply is disconnected during normal projector operation.
Use caution when picking up the projector.
• Prevent foreign objects such as paper clips and bits of paper from falling into the projector. Do not
attempt to retrieve any objects that might fall into the projector. Do not insert any metal objects such
as a wire or screwdriver into the projector. If something should fall into the projector, disconnect it
immediately and have the object removed by qualified service personnel.
• Do not place any objects on top of the projector.
• Do not touch the power plug during a thunderstorm. Doing so can cause electrical shock or fire.
23
Содержание Sirius-PJ2
Страница 1: ...Model Sirius PJ2 Machine Codes Y076 Y077 Y078 Field Service Manual June 2015 ...
Страница 2: ......
Страница 12: ...10 ...
Страница 13: ...1 Product Information Specifications See Appendices for the following information General Specifications 11 ...
Страница 20: ...No Name 16 Ethernet Port RJ 45 Part Names of the Remote Controller 1 Product Information 18 ...
Страница 24: ...1 Product Information 22 ...
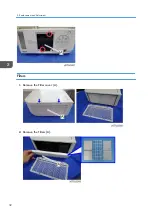
Страница 34: ...Filters 1 Remove the Filter cover A 2 Remove the Filters A 3 Replacement and Adjustment 32 ...
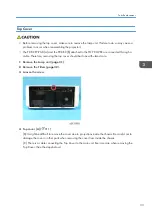
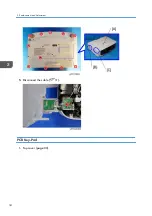
Страница 36: ...5 Disconnect the cable 1 PCB Key Pad 1 Top cover page 33 3 Replacement and Adjustment 34 ...
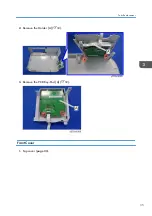
Страница 37: ...2 Remove the Holder A 2 3 Remove the PCB Key Pad A 2 Front Cover 1 Top cover page 33 Parts Replacement 35 ...
Страница 38: ...2 Front Cover A 4 3 Remove the two connectors 2 PCB SCAP 1 Front Cover page 35 3 Replacement and Adjustment 36 ...
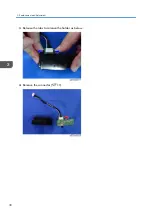
Страница 40: ...3 Release the tabs to remove the holder as below 4 Remove the connector 1 3 Replacement and Adjustment 38 ...
Страница 41: ...Lens Shift Dial 1 Remove the Lens Shift Dial A and spring Rear Panel 1 Top cover page 33 Parts Replacement 39 ...
Страница 52: ...4 Remove the bracket A 5 Remove the G LCD Fan A 2 6 Remove the cushion A 3 Replacement and Adjustment 50 ...
Страница 54: ...5 Remove the Duct Cover A 3 6 Remove the Duct Base A 3 3 Replacement and Adjustment 52 ...
Страница 67: ...3 Remove the bracket A 2 4 Remove the Power supply DC 6 Parts Replacement 65 ...
Страница 141: ...For Video Perform the following check after powering ON the projector Troubleshooting Guide 139 ...
Страница 145: ...Service Information Page 2 User mode Expert mode Service mode Display of lamp voltage added Error Log 143 ...
Страница 153: ...MEMO 151 ...
Страница 154: ...MEMO 152 EN ...
Страница 155: ...Model Sirius PJ2 Machine Codes Y076 Y077 Y078 Appendices June 2015 ...
Страница 156: ......
Страница 158: ...2 ...
Страница 172: ...MEMO 16 EN ...

