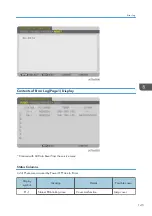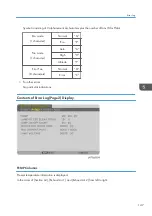
– Setup of [SEARCH]
• [SETUP] – [NETWORK SETTINGS]
– Setup of [FIREWALL]
– Setup of [PING]
• [SETUP] – [POWER OPTIONS]
– Setup of [STANDBY MODE SETTING]
• [SETUP] – [EXPERT]
– Setup of [POWER OFF CONFIRMATION]
– Setup of [SYNC TERMINATOR (BNC)]
– Setup of [DIGITAL EQULIZER]
– Setup of [EDGE BLENDING (TOOL)]
• [INFO.] – [USAGE TIME]
– Display of [PROJECTOR HOURS USED]
• [INFO.] – [VERSION(1)]
– Display of [BIOS]
– Display of [FIRMWARE2]
– Display of [HARDWARE1/2/3]
• [INFO.] – [VERSION(2)]
– Display of [BIOS(MM)]
– Display of [BOOTLOADER(MM)]
Factory reset
• When [SETUP] – [RESET] – [ALL DATA (INCLUDING ENTRY LIST)] – [YES] is carried out in Expert
Mode, all adjustments and setup values including the contents of registration data in the entry list
are restored to the status of factory shipment.
• The data restored to the status of factory shipment as a result of factory reset are all data other than
[LANGUAGE], [BACKGROUND], [FILTER MASSAGE], [SCREEN TYPE], [GEOMETRIC
CORRECTION], [EDGE BLENDING], [MULTI SCREEN], [ADMINISTRATOR MODE], [DATE AND
TIME SETTINGS], [NETWORK SETTING], [CONTROL PANEL LOCK], [SECURITY], [CONTROL
ID], [COMMUNICATION SPEED], [STANDBY MODE], [FAN MODE], [LAMP LIFE
REMAINING], [LAMP HOURS USED], [FILTER HOURS USED], [TOTAL CARBON SAVINGS] and
[PROJECTOR HOURS USED].
Menus and functions to be added by the Service Mode
Difference in the menu screen and its functions
• [INPUT] – [9:USB-A]
5. Troubleshooting
134
Содержание Sirius-PJ2
Страница 1: ...Model Sirius PJ2 Machine Codes Y076 Y077 Y078 Field Service Manual June 2015 ...
Страница 2: ......
Страница 12: ...10 ...
Страница 13: ...1 Product Information Specifications See Appendices for the following information General Specifications 11 ...
Страница 20: ...No Name 16 Ethernet Port RJ 45 Part Names of the Remote Controller 1 Product Information 18 ...
Страница 24: ...1 Product Information 22 ...
Страница 34: ...Filters 1 Remove the Filter cover A 2 Remove the Filters A 3 Replacement and Adjustment 32 ...
Страница 36: ...5 Disconnect the cable 1 PCB Key Pad 1 Top cover page 33 3 Replacement and Adjustment 34 ...
Страница 37: ...2 Remove the Holder A 2 3 Remove the PCB Key Pad A 2 Front Cover 1 Top cover page 33 Parts Replacement 35 ...
Страница 38: ...2 Front Cover A 4 3 Remove the two connectors 2 PCB SCAP 1 Front Cover page 35 3 Replacement and Adjustment 36 ...
Страница 40: ...3 Release the tabs to remove the holder as below 4 Remove the connector 1 3 Replacement and Adjustment 38 ...
Страница 41: ...Lens Shift Dial 1 Remove the Lens Shift Dial A and spring Rear Panel 1 Top cover page 33 Parts Replacement 39 ...
Страница 52: ...4 Remove the bracket A 5 Remove the G LCD Fan A 2 6 Remove the cushion A 3 Replacement and Adjustment 50 ...
Страница 54: ...5 Remove the Duct Cover A 3 6 Remove the Duct Base A 3 3 Replacement and Adjustment 52 ...
Страница 67: ...3 Remove the bracket A 2 4 Remove the Power supply DC 6 Parts Replacement 65 ...
Страница 141: ...For Video Perform the following check after powering ON the projector Troubleshooting Guide 139 ...
Страница 145: ...Service Information Page 2 User mode Expert mode Service mode Display of lamp voltage added Error Log 143 ...
Страница 153: ...MEMO 151 ...
Страница 154: ...MEMO 152 EN ...
Страница 155: ...Model Sirius PJ2 Machine Codes Y076 Y077 Y078 Appendices June 2015 ...
Страница 156: ......
Страница 158: ...2 ...
Страница 172: ...MEMO 16 EN ...


