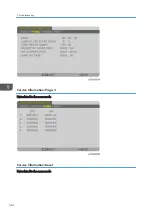
Flashin
g
Red (cycles of 4)
Fan problem
The POFAN4 connector is pulled out.
Make sure that the PCB Main Ass'y and R-
LCD Fan connectors are connected
correctly.
The POFAN5 connector is pulled out.
Make sure that the PCB EX and Lamp Fan
connectors are connected correctly.
The POFAN6 connector is pulled out.
Make sure that the PCB EX and IRIS Fan
connectors are connected correctly.
The POFAN7 connector is pulled out.
Make sure that the PCB EX and Reflector
Fan connectors are connected correctly.
The POFAN8 connector is pulled out.
Make sure that the PCB Main Ass'y and
Exhaust Fan connectors are connected
correctly.
The POEX connector is pulled out. Make
sure that the PCB Main Ass'y and PCB EX
connectors are connected correctly.
Flashin
g
Orange
Network conflict
It is not possible to connect the projector’s
built-in LAN and wireless LAN
simultaneously to the same network. To
connect the projector’s built-in LAN and
wireless LAN simultaneously, connect them
to different networks.
Lit
Green
Standby mode in sleep
mode*
Orange
Button has been pressed
while projector is in key
lock mode
The projector’s keys are locked. The setting
must be canceled to operate the projector.
Projector’s ID number
and remote control’s ID
number do not match
Check the control IDs.
LED Display
129
Содержание Sirius-PJ2
Страница 1: ...Model Sirius PJ2 Machine Codes Y076 Y077 Y078 Field Service Manual June 2015 ...
Страница 2: ......
Страница 12: ...10 ...
Страница 13: ...1 Product Information Specifications See Appendices for the following information General Specifications 11 ...
Страница 20: ...No Name 16 Ethernet Port RJ 45 Part Names of the Remote Controller 1 Product Information 18 ...
Страница 24: ...1 Product Information 22 ...
Страница 34: ...Filters 1 Remove the Filter cover A 2 Remove the Filters A 3 Replacement and Adjustment 32 ...
Страница 36: ...5 Disconnect the cable 1 PCB Key Pad 1 Top cover page 33 3 Replacement and Adjustment 34 ...
Страница 37: ...2 Remove the Holder A 2 3 Remove the PCB Key Pad A 2 Front Cover 1 Top cover page 33 Parts Replacement 35 ...
Страница 38: ...2 Front Cover A 4 3 Remove the two connectors 2 PCB SCAP 1 Front Cover page 35 3 Replacement and Adjustment 36 ...
Страница 40: ...3 Release the tabs to remove the holder as below 4 Remove the connector 1 3 Replacement and Adjustment 38 ...
Страница 41: ...Lens Shift Dial 1 Remove the Lens Shift Dial A and spring Rear Panel 1 Top cover page 33 Parts Replacement 39 ...
Страница 52: ...4 Remove the bracket A 5 Remove the G LCD Fan A 2 6 Remove the cushion A 3 Replacement and Adjustment 50 ...
Страница 54: ...5 Remove the Duct Cover A 3 6 Remove the Duct Base A 3 3 Replacement and Adjustment 52 ...
Страница 67: ...3 Remove the bracket A 2 4 Remove the Power supply DC 6 Parts Replacement 65 ...
Страница 141: ...For Video Perform the following check after powering ON the projector Troubleshooting Guide 139 ...
Страница 145: ...Service Information Page 2 User mode Expert mode Service mode Display of lamp voltage added Error Log 143 ...
Страница 153: ...MEMO 151 ...
Страница 154: ...MEMO 152 EN ...
Страница 155: ...Model Sirius PJ2 Machine Codes Y076 Y077 Y078 Appendices June 2015 ...
Страница 156: ......
Страница 158: ...2 ...
Страница 172: ...MEMO 16 EN ...


