No.
Name
Function
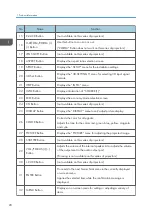
15 R-CLICK Button
(not available on this series of projectors)
16
D-ZOOM/ZOOM (+)
(−) Button
Use this button to zoom in or out.
(“ZOOM” Button does not work on this series of projectors)
17 LENS SHIFT Button
(not available on this series of projectors)
18 ASPECT Button
Displays the aspect ratio selection screen.
19 SETUP Button
Displays the “SETUP” menu for the installation settings.
20 3D Set. Button
Displays the “3D SETTINGS” menu for selecting 3D input signal
formats.
21 HELP Button
Displays the “INFO.” menu.
22 INFO Button
Displays information of “SOURCE(1)”.
23 ECO Button
Displays the economy mode selection screen.
24 CTL Button
(not available on this series of projectors)
25 DISPLAY Button
Displays the “DISPLAY” menu to set/adjust picture display.
26 COLOR Button
Corrects the color for all signals.
Adjusts the tone for the colors red, green, blue, yellow, magenta
and cyan.
27 PICTURE Button
Displays the “PICTURE” menu for adjusting the projected image.
28 SHUTTER Button
(not available on this series of projectors)
29
VOL./FOCUS (+)(−)
Button
Adjusts the volume of the internal speaker. Also adjusts the volume
of the output sent to the audio output port.
(Focusing is not available on this series of projectors)
30 L-CLICK Button
(not available on this series of projectors)
31 ENTER Button
Proceeds to the next hierarchical menu in the currently displayed
on-screen menu.
Applies the selected item while the confirmation message is
displayed.
32 MENU Button
Displays an on-screen menu for setting or adjusting a variety of
items.
1. Product Information
20
Содержание Sirius-PJ2
Страница 1: ...Model Sirius PJ2 Machine Codes Y076 Y077 Y078 Field Service Manual June 2015 ...
Страница 2: ......
Страница 12: ...10 ...
Страница 13: ...1 Product Information Specifications See Appendices for the following information General Specifications 11 ...
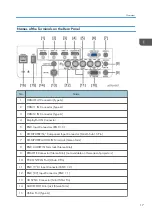
Страница 20: ...No Name 16 Ethernet Port RJ 45 Part Names of the Remote Controller 1 Product Information 18 ...
Страница 24: ...1 Product Information 22 ...
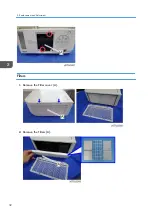
Страница 34: ...Filters 1 Remove the Filter cover A 2 Remove the Filters A 3 Replacement and Adjustment 32 ...
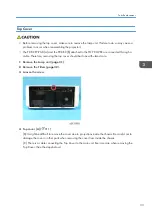
Страница 36: ...5 Disconnect the cable 1 PCB Key Pad 1 Top cover page 33 3 Replacement and Adjustment 34 ...
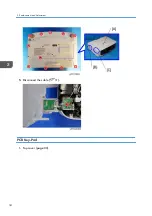
Страница 37: ...2 Remove the Holder A 2 3 Remove the PCB Key Pad A 2 Front Cover 1 Top cover page 33 Parts Replacement 35 ...
Страница 38: ...2 Front Cover A 4 3 Remove the two connectors 2 PCB SCAP 1 Front Cover page 35 3 Replacement and Adjustment 36 ...
Страница 40: ...3 Release the tabs to remove the holder as below 4 Remove the connector 1 3 Replacement and Adjustment 38 ...
Страница 41: ...Lens Shift Dial 1 Remove the Lens Shift Dial A and spring Rear Panel 1 Top cover page 33 Parts Replacement 39 ...
Страница 52: ...4 Remove the bracket A 5 Remove the G LCD Fan A 2 6 Remove the cushion A 3 Replacement and Adjustment 50 ...
Страница 54: ...5 Remove the Duct Cover A 3 6 Remove the Duct Base A 3 3 Replacement and Adjustment 52 ...
Страница 67: ...3 Remove the bracket A 2 4 Remove the Power supply DC 6 Parts Replacement 65 ...
Страница 141: ...For Video Perform the following check after powering ON the projector Troubleshooting Guide 139 ...
Страница 145: ...Service Information Page 2 User mode Expert mode Service mode Display of lamp voltage added Error Log 143 ...
Страница 153: ...MEMO 151 ...
Страница 154: ...MEMO 152 EN ...
Страница 155: ...Model Sirius PJ2 Machine Codes Y076 Y077 Y078 Appendices June 2015 ...
Страница 156: ......
Страница 158: ...2 ...
Страница 172: ...MEMO 16 EN ...

