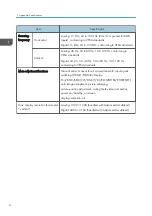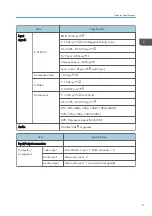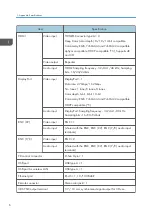
Item
Specification
Usage environment
Operating temperature: 41 to 104°F (5 to 40°C) (*6)
Operating humidity: 20 to 80% (with no condensation)
Storage temperature: 14 to 122°F (-10 to 50°C)
Storage humidity: 20 to 80% (with no condensation)
Operating altitude: 0 to 3650 m/12000 feet
(1700 to 3650 m/5500 to 12000 feet: Set [FAN MODE]
to [HIGH ALUTITUDE])
Power supply
100-240 V AC, 50/60Hz
Power consumption Eco mode off
483 W (100-130 V)/460W (200-240 V)
Eco mode on
377 W (100-130 V)/362 W (200-240 V)
Standby
Normal : 0.11 W (100-130 V)/0.16 W (200-240 V)
Network standby: 7.4 W (100-130 V)/4.9 W (200-240 V)
Rated input current
5.5A - 2.2A
External dimensions
19.7" (width) × 5.68" (height) × 14.1" (depth)/499 (width)
× 142 (height) × 359 (depth) mm (not including protruding
parts)
19.7" (width) × 6.38" (height) × 14.5" (depth)/499 (width)
× 162 (height) × 368 (depth) mm (including protruding
parts)
Weight
18.5 lbs/8.4 kg (not including lens)
*1 Effective pixels are more than 99.99%.
*2 This is the light output value (lumens) when the [PRESET] mode is set to [HIGH-BRIGHT]. The light
output values will drop to 80% when [ON] is selected for [ECO MODE]. If any other mode is selected
as the [PRESET] mode, the light output value may drop slightly.
*3 Compliance with ISO21118-2005
*4 Full color (approx. 16.77 million colors or greater) when the Ethernet input connector is selected.
*5 HDMI® (Deep Color, Lip Sync) with HDCP
What is HDCP/HDCP technology?
General Specifications
7
Содержание Sirius-PJ2
Страница 1: ...Model Sirius PJ2 Machine Codes Y076 Y077 Y078 Field Service Manual June 2015 ...
Страница 2: ......
Страница 12: ...10 ...
Страница 13: ...1 Product Information Specifications See Appendices for the following information General Specifications 11 ...
Страница 20: ...No Name 16 Ethernet Port RJ 45 Part Names of the Remote Controller 1 Product Information 18 ...
Страница 24: ...1 Product Information 22 ...
Страница 34: ...Filters 1 Remove the Filter cover A 2 Remove the Filters A 3 Replacement and Adjustment 32 ...
Страница 36: ...5 Disconnect the cable 1 PCB Key Pad 1 Top cover page 33 3 Replacement and Adjustment 34 ...
Страница 37: ...2 Remove the Holder A 2 3 Remove the PCB Key Pad A 2 Front Cover 1 Top cover page 33 Parts Replacement 35 ...
Страница 38: ...2 Front Cover A 4 3 Remove the two connectors 2 PCB SCAP 1 Front Cover page 35 3 Replacement and Adjustment 36 ...
Страница 40: ...3 Release the tabs to remove the holder as below 4 Remove the connector 1 3 Replacement and Adjustment 38 ...
Страница 41: ...Lens Shift Dial 1 Remove the Lens Shift Dial A and spring Rear Panel 1 Top cover page 33 Parts Replacement 39 ...
Страница 52: ...4 Remove the bracket A 5 Remove the G LCD Fan A 2 6 Remove the cushion A 3 Replacement and Adjustment 50 ...
Страница 54: ...5 Remove the Duct Cover A 3 6 Remove the Duct Base A 3 3 Replacement and Adjustment 52 ...
Страница 67: ...3 Remove the bracket A 2 4 Remove the Power supply DC 6 Parts Replacement 65 ...
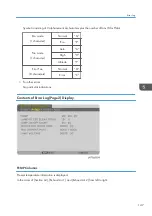
Страница 141: ...For Video Perform the following check after powering ON the projector Troubleshooting Guide 139 ...
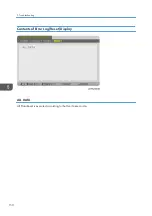
Страница 145: ...Service Information Page 2 User mode Expert mode Service mode Display of lamp voltage added Error Log 143 ...
Страница 153: ...MEMO 151 ...
Страница 154: ...MEMO 152 EN ...
Страница 155: ...Model Sirius PJ2 Machine Codes Y076 Y077 Y078 Appendices June 2015 ...
Страница 156: ......
Страница 158: ...2 ...
Страница 172: ...MEMO 16 EN ...

