


34
SYSTEM CONFIGURATION
System Configuration
Sub Mode Setting
When the Front Left/Right speakers are con-
figured as “Large” and a subwoofer is detected
by EzSet/EQ or manually configured as being
available, additional options are available to
further customize bass redirection. To change
these settings, first make sure that the
SPEAKER SIZE
menu (Figure 19) is on the
screen, and then press the
⁄
/
¤
Navigation
Button
E
so that the cursor is pointing to
SUB MODE
. Press the
‹
/
›
Navigation
Button
E
to begin the selection process, and
note that the warning message (Figure 20) will
appear reminding you to rerun EzSet/EQ after all
changes have been made.
The following options are available:
• The default setting for Large front left/right
speakers when a subwoofer is present is
SUB
L/R + LFE
. In this mode, all sounds below
the crossover point set on the
LFE L P FLT
line will be sent to BOTH the subwoofer and
the front left/right speakers.
• To send only the LFE channel information to
the subwoofer, but have all other (“derived”)
low-frequency sounds sent to the front
left/right speakers, select the
SUB (LFE)
setting.
• To have low-frequency information sent to the
subwoofer only when Large speakers are
selected, choose
SUB (L/R)
. This option is
only available when the unit is set to
SURROUND OFF
so that a pure analog
audio path is provided.
• When no subwoofer is present and Large
speakers are configured for the front left/right
position, select
NONE
. This will route all low-
frequency information to the front left/right
speakers.
When the
SPEAKER SIZE
menu returns to
the screen, replacing the warning message, press
the
‹
/
›
Navigation Button
E
to make your
selection. When the desired setting appears,
press the
⁄
/
¤
Navigation Button
E
to
move the cursor to any other line on this menu
where you wish to make a setting change, or go
to the
BACK T O MANUAL SETUP
menu
and then press the
Set Button
F
to continue
with overall configuration.
Subwoofer Size
The final setting on the
SPEAKER SIZE
menu enables you to change the setting for the
subwoofer size. In the event that EzSet/EQ did
not accurately enter the correct size, or if you
wish to experiment with a different setting, first
make sure that the
SPEAKER SIZE
menu
(Figure 19) is on the screen; then press the
⁄
/
¤
Navigation Button
E
so that the cursor is
pointing to
SUB SIZE
and then press the
‹
/
›
Navigation Button
E
to begin the selection
process. Note that a warning message will
appear for 4 seconds to remind you to rerun
EzSet/EQ after all changes have been made.
Select a setting that best matches the diameter
of your subwoofer’s driver, or which provides the
appropriate high-pass filter setting for your sys-
tem. In each case, the frequency of the high-pass
filter determines the frequencies below which no
information is sent to the subwoofer:
• The setting for an 8-inch/200mm driver
activates a 38Hz subwoofer high-pass filter.
• The setting for a 10-inch/250mm driver
activates a 30Hz subwoofer high-pass filter.
• The setting for a 12-inch/305mm driver
activates a 20Hz subwoofer high-pass filter.
• The setting for a 15-inch/380mm driver
activates a 15Hz subwoofer high-pass filter.
When all changes to Speaker-related settings
have been made, press the
⁄
/
¤
Navigation
Button
E
until the cursor is on the
BACK
T O MANUAL SETUP
menu and then
pressing the
Set Button
F
so that you may
make any other adjustments to the system
parameters. It is also important to remember to
rerun the EzSet/EQ system if any changes have
been made to the settings on this menu,
following the instructions shown on page 33 for
using the Manual mode.
The Speaker Configuration may also be changed
at any time without using the full-OSD on-screen
menu system by pressing the
Speaker Selector
6
on the front panel or
on the remote
control. Once the button is pressed,
FRONT
SPEAKER
will appear in both the lower third
of the video display and the
Main Information
Display
˜
.
Within five seconds, either press the
‹
/
›
buttons
7 $
on the front panel or the
⁄
/
¤
buttons
E
on the remote to select a different speaker
position, or press the
Set
Button
@
F
to
begin the adjustment process for the front left
and right speakers.
When the
Set
button
@
F
has been pressed
and the system is ready for a change to the front
speaker setting, the on-screen display and
Main
Information Display
˜
will read
FRONT
LARGE
or
FRONT SMALL
depending on
the current setting. Press the
‹
/
›
buttons
7 $
on the front panel or the
⁄
/
¤
buttons
E
on
the remote until the desired setting is shown,
using the instructions for “large” or “small”
shown earlier, then press the
Set
button
@
F
.
If another speaker position needs to be changed,
press the
‹
/
›
buttons
7 $
on the front panel
or the
⁄
/
¤
buttons
E
on the remote to
select a different speaker position, press the
Set
button
@
F
and then the
‹
/
›
buttons
7 $
on the front panel or the
⁄
/
¤
buttons
E
on
the remote until the correct speaker setting is
shown and press the
Set
button
@
F
again
to confirm the selection.
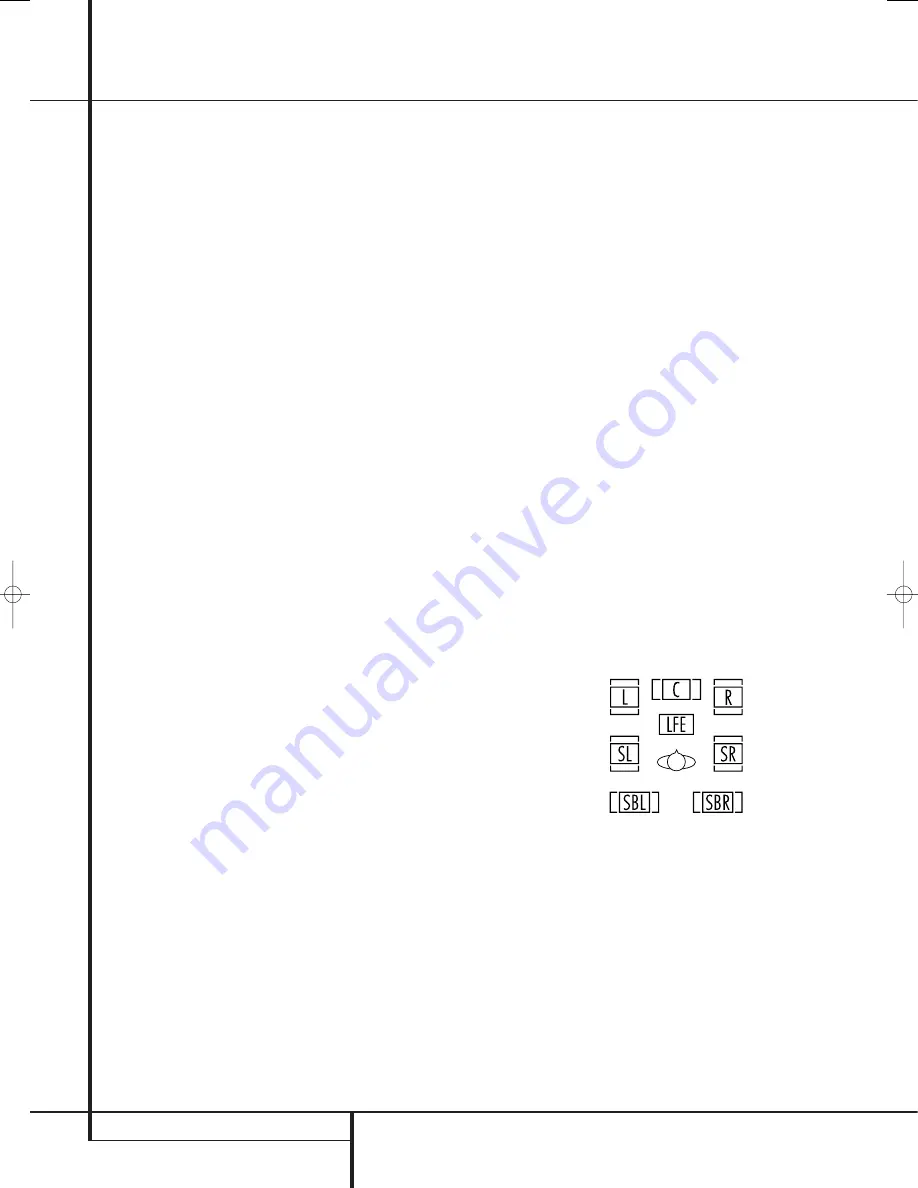
To assist in making these settings, the icons in
the
Speaker/Channel Input Indicators
Ú
will change as the speaker type is selected at
each position. When only the inner icon box is lit,
the speaker is set for “small.” When the inner box
and the two outer boxes with circles inside them
are lit, the speaker is set for “large." When no
indicator appears at a speaker location, that
position is set for “none” or “no” speaker.
Note:
These icons are available only when
making setup changes without the use of the full
OSD mode.
As an example, in the Figure below, all speakers
are set for “large,” and a subwoofer is set.
Delay Settings
Due the different distances between the listening
position for the front channel speakers and the
surround speakers, the amount of time it takes
for sound to reach your ears from the front or
surround speakers is different. You may
compensate for this difference through the use of
the delay settings to adjust the timing for the
specific speaker placement and acoustic
conditions in your listening room or home
theater.
29851_AVR645_ENG 30/10/06 9:46 Side 34


