34
Hangar 9 F4U-1D Corsair 50 ARF
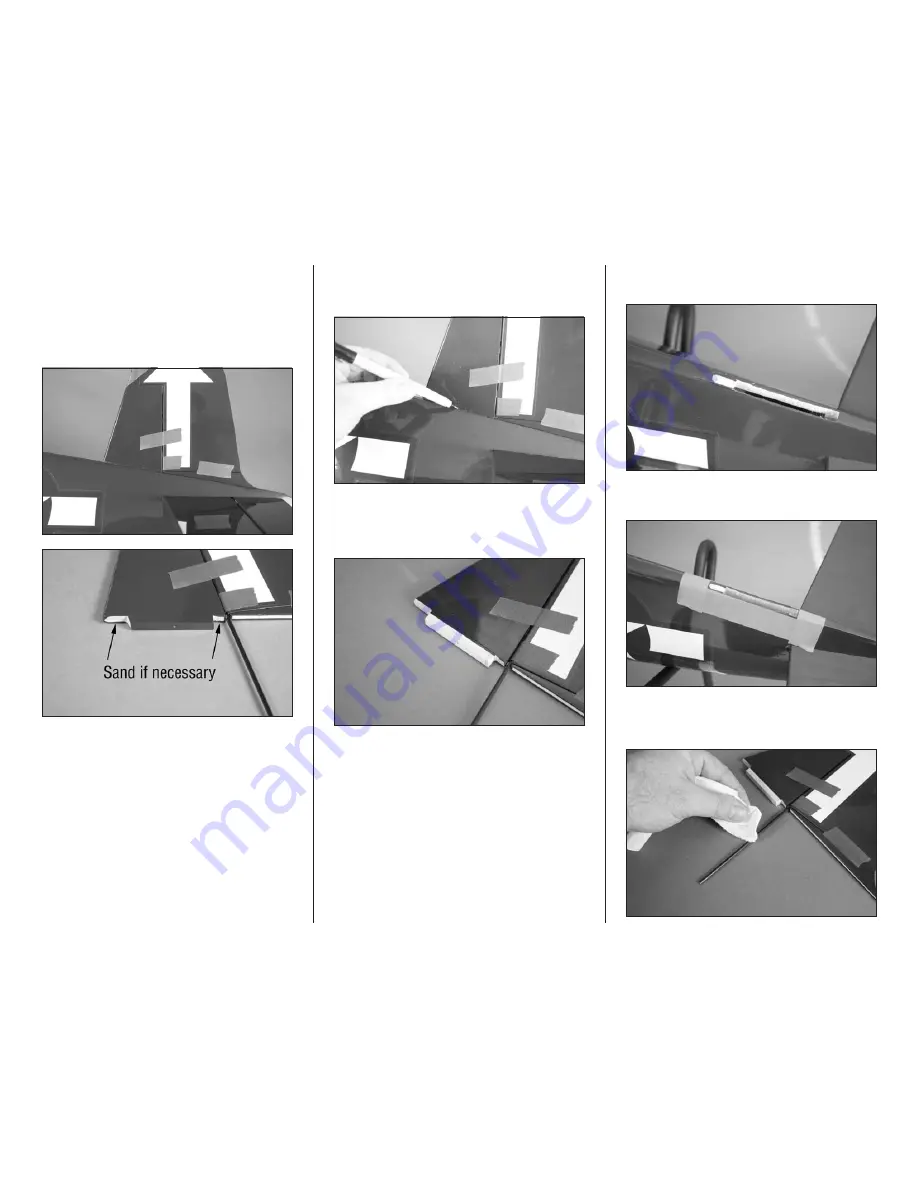
12. Test fit the rudder assembly into the fuselage. Make
sure to slide the torque rod into the tube inside the fuselage.
Check that the bottom edge of the balsa fairing rests flat on
the fuselage. The fin will also rest tightly against the top of
the fuselage. If not, remove the covering from the bottom
of the fin or even lightly sand the bottom of the fin where it
contacts the fuselage to correctly position the balsa fairing.
13. Use a felt-tipped pen to trace the outline of the
fuselage on the bottom of the fin. Also trace the outline of
the front of the fin where it contacts the fuselage.
14. Remove the rudder assembly from the fuselage. Use
a hobby knife and a #11 blade to trim the covering 1/16-inch
(1.5mm) inside the lines drawn in the previous step. Remove
the covering, exposing the wood at the bottom of the fin.
Note
: Make sure to use a new #11 blade and
use light pressure to trim only the covering.
Avoid cutting into the underlying wood, which
could weaken the structure of your model.
15. Use a hobby knife and #11 blade to remove the
covering from the top of the fuselage for the fin.
16. Place low-tack tape 1/16-inch (1.5mm) around the
outside of the opening in the fuselage for the fin.
17. Apply a thin coat of petroleum jelly to the torque rod
to prevent accidentally gluing the rod into the bushing if
epoxy happens to run down into the fuselage.


