www.HandiQuilter.com
Installation | 3.9
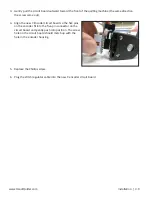
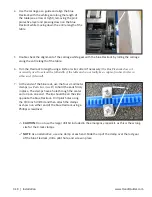
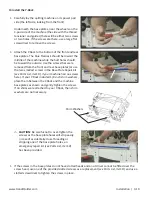
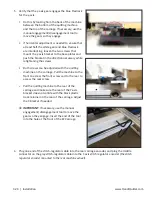
3. Gently pull the circuit board outward toward the front of the quilting machine (the same direction
the screw came out).
4. Align the new Y-Encoder circuit board so the five pins
on the encoder fit into the five-pin connector on the
circuit board and gently push into position. The screw
hole on the circuit board should match up with the
hole in the encoder housing.
5. Replace the Phillips screw.
6. Plug the stitch regulator cable into the new Y-encoder circuit board.
Содержание Pro-Stitcher QM30010-2
Страница 43: ...3 32 Installation www HandiQuilter com...
Страница 53: ...4 10 Overview www HandiQuilter com...
Страница 57: ...6 4 Art Stitch www HandiQuilter com...
Страница 105: ...7 12 Quilt Menu www HandiQuilter com...
Страница 127: ...HQ Pro Stitcher User Manual 10 4 Warranty Training Checklist This page intentionally left blank...
Страница 129: ...HQ Pro Stitcher User Manual 10 6 Warranty Training Checklist This page intentionally left blank...
Страница 131: ...HQ Pro Stitcher User Manual 10 8 Warranty Training Checklist...
Страница 133: ...HQ Pro Stitcher User Manual 11 2 HQ Printouts...
Страница 135: ...www HandiQuilter com 12 2 Tutorials...
Страница 137: ...HQ Pro Stitcher User Manual 13 2 Designs...

