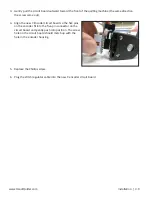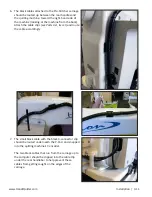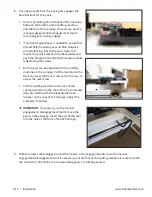
www.HandiQuilter.com
Installation | 3.23
Set Up the New Carriage
1.
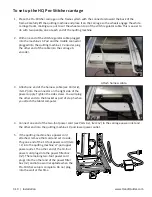
Place the Pro-Stitcher carriage in place on the table tracks if it is not already there.
Â
IMPORTANT: If a new set of black wheels was purchased to replace the metal wheels on the
quilting machine, please be sure those are installed prior to placing the quilting machine on the
Pro-Stitcher carriage. You should not have metal wheels on metal tracks.
2.
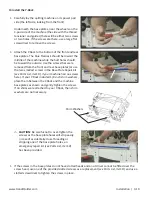
Carefully lift the quilting machine and place it on the carriage so the wheels engage the carriage
tracks (this is easier to do with two people – one at each end of the quilting machine).
3.
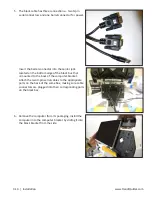
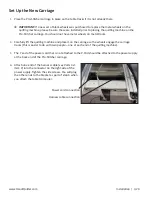
The Y end of the power cord that is not attached to the P-Pod should be attached to the power supply
at the back end of the Pro-Stitcher carriage.
4. Attach one end of the harness cable (see Parts List,
item P) into the connector on the right side of the
power supply. Tighten the side screws. You will plug
the other ends to the bracket as part of step 6 when
you attach the tablet computer.
Power cord connection
Harness cable connection
Содержание Pro-Stitcher QM30010-2
Страница 43: ...3 32 Installation www HandiQuilter com...
Страница 53: ...4 10 Overview www HandiQuilter com...
Страница 57: ...6 4 Art Stitch www HandiQuilter com...
Страница 105: ...7 12 Quilt Menu www HandiQuilter com...
Страница 127: ...HQ Pro Stitcher User Manual 10 4 Warranty Training Checklist This page intentionally left blank...
Страница 129: ...HQ Pro Stitcher User Manual 10 6 Warranty Training Checklist This page intentionally left blank...
Страница 131: ...HQ Pro Stitcher User Manual 10 8 Warranty Training Checklist...
Страница 133: ...HQ Pro Stitcher User Manual 11 2 HQ Printouts...
Страница 135: ...www HandiQuilter com 12 2 Tutorials...
Страница 137: ...HQ Pro Stitcher User Manual 13 2 Designs...

