HQ Amara User Manual
| 17
Configurable Handlebar Buttons
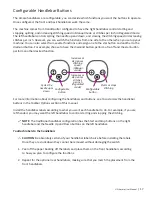
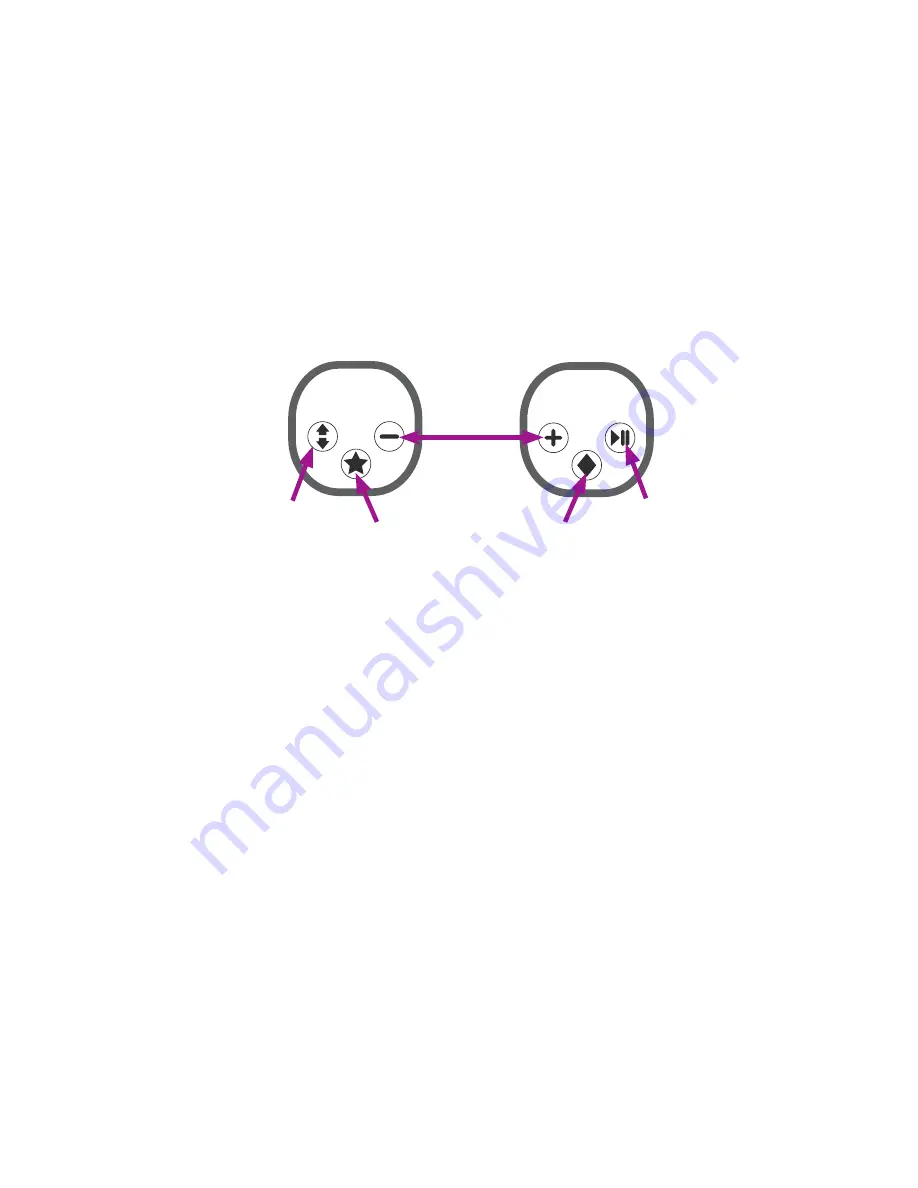
The Amara handlebars are configurable; you can decide which functions you want the buttons to operate.
Once configured, the front and back handlebars work the same.
The machine comes from Handi Quilter configured to have the right handlebar control starting and
stopping quilting, and increasing stitching speed in Manual mode or stitches per inch in Regulated mode.
The left handlebar controls cycling the needle up and down, and slowing the stitching speed or decreasing
stitches per inch. However, you can switch the functions from one side to the other when you set up your
machine. You can also select from several functions and assign one to the star button and another to the
diamond button. For example, choose to have the diamond button perform a tie-off and the star button
perform another desired function.
Cycles the
needle up or
down
Configurable
button
Starts or stops
stitching
Configurable
button
Increases or
decreases
stitching
speed
(Manual
mode)
Increases or
decreases
stitches
per inch
(Regulated
mode)
For more information about configuring the handlebars and buttons, see To customize the handlebar
buttons in the Toolbar Options section of this manual.
Install the handlebar labels according to what you want each handlebar to do. For example, if you are
left-handed, you may want the left handlebar to control starting and stopping the stitching.
NOTE: The traditional handlebar configuration has the Start and Stop buttons on the right
handlebar and the Needle Up and Down buttons on the left handlebar.
To attach labels to the handlebars
U
CAUTION: Be absolutely certain of your handlebar label choice before installing the labels.
Once they are stuck down they cannot be removed without damaging the switch.
1. Peel off the paper backing off the labels and place them on the front handlebars according
to how you plan to configure the functions.
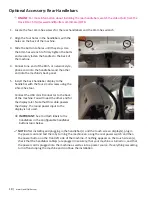
2. Repeat for the optional rear handlebars, making sure that you match the placement from the
front handlebars.


