


STEP 5 - BRIDGE AND END TRUCK INSTALLATION (CONTINUED)
Standard End Trucks (continued)
5.14
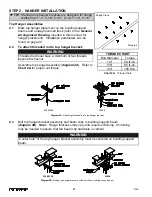
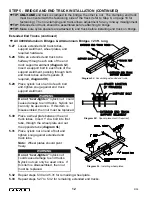
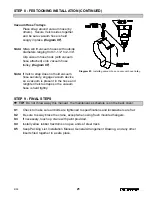
Assemble the tow arm weldment on the end truck that
will be located on the festooning side of the system
(
diagram 5D
). Be sure that the tow arm is located on
the festooning side of the end truck itself when
installed.
5.15
Assemble the tow arm spacer on the end truck located
at the opposite end of the bridge (
diagram 5E
). Be
sure the spacer is mounted on the same side of the
end truck as the tow arm weldment.
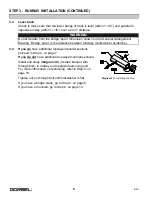
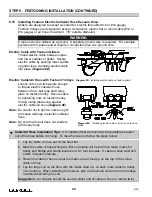
5.16
After the bridge has been installed, loosen the nuts
on the end of the U-bolt enough to thread cable/air
hose between the two legs of the U-bolt and the
festoon clamp plate. Secure cable/air hose by
tightening nuts at the end of the U-bolt, forcing the
festoon clamp plate snug against the cable/air hose.
Extended End Trucks
All 4000# Steel Bridges & All Steel Bridges
> 23 ft. long
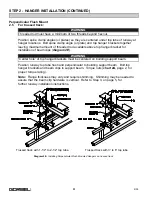
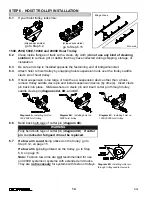
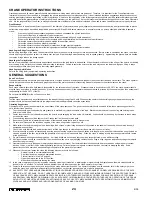
5.17
Locate extended end truck tubes, support
weldment, wheel plates, and required
hardware.
5.18
Slide an extended end truck tube halfway
through each side of the end truck support
weldment (
diagram 5F
). Insert a support
bolt in each hole of the support weldment,
passing through both end truck tubes and
all spacers (if required,
diagram 5G
).
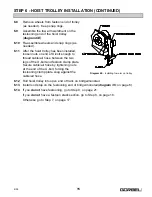
5.19
Place nylock nut on end of each bolt and
tighten snug against end truck support
weldment.
TIP:
ONLY ONE
end truck is clamped to the bridge: the other is not. The clamping end truck
must be oriented with the festooning side of the track (refer to Step 8, on page 18 for
festooning). The non-clamping end truck allows adjustment for any runway misalignment.
TIP:
Extended end truck should be assembled before attaching to bridge.
Æ
Æ
Æ
Diagram 5F.
Assembling extended end truck.
Diagram 5G.
Spacer placement (if required)
WARNING
Do not “over-tighten”
nylock nut: could
cause damage to end trucks. Nylock nut
can only be used once. If this item is
disassembled, then nut must be replaced.
10
9/05
Diagram 5D.
Installing tow arm on end truck.
Diagram 5E.
Installing tow arm spacer on
end truck.
Содержание AL 1000
Страница 1: ......


