GEK-99044
Chapter 7 Operator Care and Maintenance
7-17
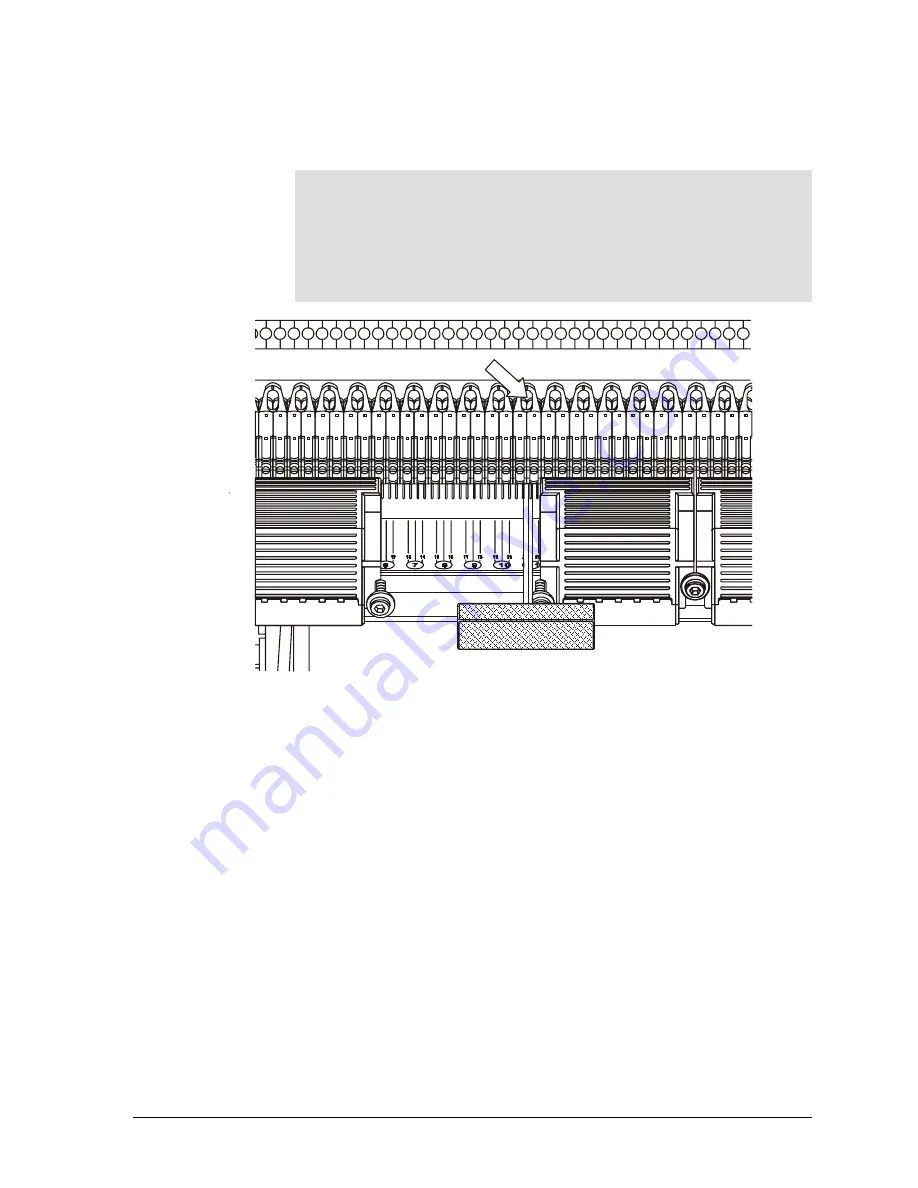
12.
Place the new print head over the print head screw. Press down
and to the right on the barrels of the print head and tighten the
screw. See Figure 7-6.
Note
If there is not enough or too much clearance for the new print
head, loosen the print head screws on all of the heads to the left
of the one being replaced. When the new print head is in place,
tighten all print head screws starting with the new one and
working towards the left side of the printer. Keep each print
head snug against the print head immediately to the right.
13.
Push the cable cover/connector over the connecting pins on the
print heads. Wiggle the cover from side to side while pushing the
connector onto the pins. When in place, press down on the end of
the cover while tightening the cover screws.
14.
Install the ribbon deck and a ribbon cartridge. Make sure the
thumbscrews are tight on the ribbon deck.
15.
Apply power and run the printer again to verify correct operation.
1
2
3
4
5
6
7
8
9 10 11 12 13 14 15 16 17 18 19 20 21 22 23 24 25 26 27 28 29 30 31 32 33 34 35 36 37
PRESS DOWN AND TO THE
RIGHT ON BOTH BARRELS
FIGURE 7-6 REPLACEMENT PROCEDURE (3 OF 3)


