4 - 30
Genie Z-60/34
Part No. 75861
November 2003
Section 4 • Repair Procedures
REV A
SECONDARY BOOM COMPONENTS
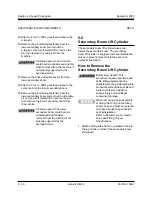
49 Attach a 5 ton / 5,000 kg overhead crane to the
mid-pivot.
50 Remove the pin retaining fasteners from the
lower secondary boom pivot pin at the
mid-pivot. Use a soft metal drift to remove the
pin, then remove the mid-pivot from the
machine.
Crushing hazard. The mid-pivot
could become unbalanced and fall
when removed from the machine if
not properly supported by the
overhead crane.
51 Remove the hose and cable covers from the
lower secondary boom.
52 Attach a 5 ton / 5,000 kg overhead crane to the
center point of the lower secondary boom.
53 Remove the pin retaining fasteners from the
lower secondary boom pivot pin at the turntable
pivot. Use a soft metal drift to remove the pin,
then remove the lower secondary boom from
the machine.
Crushing hazard. The lower
secondary boom could become
unbalanced and fall when
removed from the machine if not
properly supported by the
overhead crane.
5-2
Secondary Boom Lift Cylinder
The secondary boom lift cylinder raises and
lowers the secondary boom. The secondary
boom lift cylinder is equipped with counterbalance
valves to prevent movement in the event of a
hydraulic line failure.
How to Remove the
Secondary Boom Lift Cylinder
Bodily injury hazard. This
procedure requires specific repair
skills, lifting equipment and a
suitable workshop. Attempting this
procedure without these skills and
tools could result in death or
serious injury and significant
component damage.
When removing a hose assembly
or fitting, the O-ring on the fitting
and/or hose end must be replaced
and then torqued to specification
during installation.
Refer to Section Two, Hydraulic
Hose and Fitting Torque
Specifications.
1 Attach a lifting strap from an overhead crane to
the lug on the rod end of the secondary boom
lift cylinder.
Содержание Z-60/34
Страница 1: ...Part No 75861 November 2003 Rev A Service Manual Refer to inside cover for serial number information ...
Страница 12: ...Genie Z 60 34 Part No 75861 November 2003 This page intentionally left blank ...
Страница 154: ...5 18 GenieZ 60 34 PartNo 75861 November 2003 Section 5 Fault Codes This page intentionally left blank ...
Страница 157: ......
Страница 160: ...Electrical Schematic Deutz F4L 1011F Models November 2003 Section 6 Schematics ...
Страница 162: ...Ground Control Box Wiring Diagram Deutz F4L 1011F Models November 2003 Section 6 Schematics ...
Страница 164: ...Platform Control Box Wiring Diagram Deutz F4L 1011F Models November 2003 Section 6 Schematics ...
Страница 165: ......
Страница 168: ...Electrical Schematic Ford LRG 425 EFI Models November 2003 Section 6 Schematics ...
Страница 170: ...Ground Control Box Wiring Diagram Ford LRG 425 EFI Models November 2003 Section 6 Schematics ...
Страница 172: ...Platform Control Box Wiring Diagram Ford LRG 425 EFI Models November 2003 Section 6 Schematics ...
Страница 173: ...November2003 Section 6 Schematics PartNo 75861 GenieZ 60 34 6 11 ...
Страница 176: ...Hydraulic Schematic 2WD Models before serial number 4461 November 2003 Section 6 Schematics ...
Страница 178: ...Hydraulic Schematic 4WD Models before serial number 4461 November 2003 Section 6 Schematics ...
Страница 180: ...Hydraulic Schematic 2WD Models after serial number 4460 November 2003 Section 6 Schematics ...
Страница 182: ...Hydraulic Schematic 4WD Models after serial number 4460 November 2003 Section 6 Schematics ...


