DigitalFlow™ GF868 Programming Manual (2-Channel)
101
Appendix C. Programming with PanaView
C.3 Setting Up the Communications Port (cont.)
4.
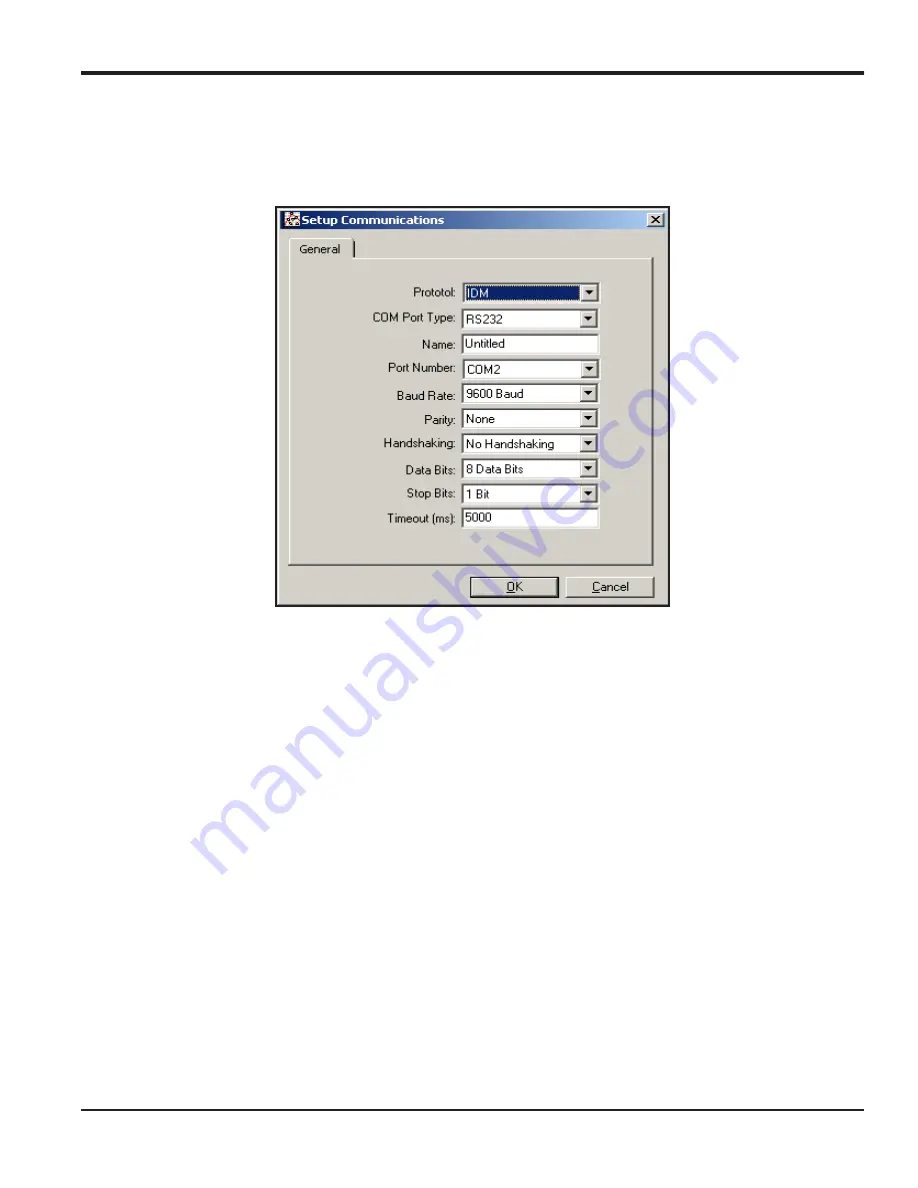
Click on the
“Communications Port”
option to select it. The
Setup Communications
screen appears similar to
Figure 19:
Setup Communications
Screen
5.
Open the Protocol menu (the first of the drop-down menus) and click on
IDM.
6.
Open the COM Port Type menu and click on the desired type (or on
TCP/IP
, if the GF868 is using an Ethernet
connection).
Note:
If you select TCP/IP, the menu changes. Proceed to the next page.
7.
Select any suitable available baud rate. A baud rate of 19,200 is appropriate for almost all applications. However, if
you experience periodic communication reliability problems, you may wish to consider lowering the baud rate on
your instrument and in PanaView.
IMPORTANT:
Be sure all the communications port settings match those made in setting up the meter’s serial port.
8.
Click
[OK]
to complete data entry.
Содержание DigitalFlow GF868
Страница 2: ......
Страница 4: ...ii no content intended for this page ...
Страница 10: ...Contents viii DigitalFlow GF868 Programming Manual 2 Channel no content intended for this page ...
Страница 60: ...Chapter 2 Displaying Data 50 DigitalFlow GF868 Programming Manual 2 Channel no content intended for this page ...
Страница 95: ...DigitalFlow GF868 Programming Manual 2 Channel 85 Appendix A Menu Maps Appendix A Menu Maps ...
Страница 96: ...86 DigitalFlow GF868 Programming Manual 2 Channel no content intended for this page ...
Страница 104: ...Appendix A Menu Maps DigitalFlow GF868 Programming Manual 2 Channel 94 ...
Страница 108: ...98 DigitalFlow GF868 Programming Manual 2 Channel no content intended for this page ...
Страница 146: ...Warranty 136 DigitalFlow GF868 Programming Manual 2 Channel no content intended for this page ...
Страница 150: ......
Страница 151: ......


