5-4
6.
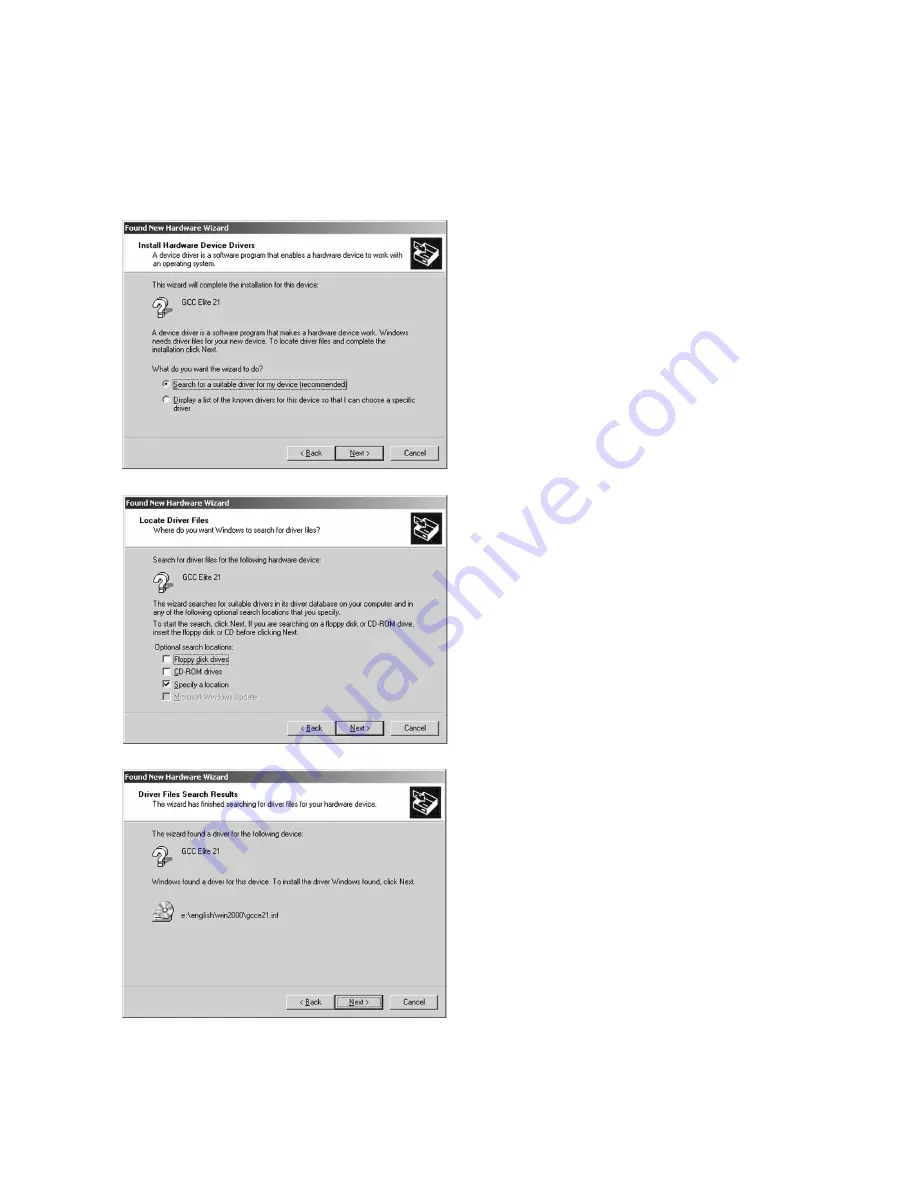
The next window will ask what you want
the Wizard to do. Check “Search for a
suitable driver for my device” and click
Next to continue.
7.
The system will then ask where to look for
new drivers. Make sure that the Elite 21
Series CD-ROM is in the drive. Check off
“Specify a Location.” Use the Browse
button to select your Elite 21 Series CD-
ROM. Open the folder on the CD that
corresponds to the language being used
(English, French, German, Italian or Spanish).
Open the Win2000-XP folder within this
folder. Select the GCCE21.INF item in this
folder. Click OK. Click Next.
8.
A window will appear showing the driver
that the Wizard found for the printer. Click
Next to continue the installation.
A dialog may follow stating that a Digital
Signature was not found for the printer.
Click Yes to continue the installation.
Содержание Elite 21DN
Страница 1: ...GCC Elite 21 Series User s Manual Elite 21N Elite 21DN...
Страница 14: ...1 6 Step 4 Remove Tape 1 Remove packaging tape from the front and rear covers of the printer...
Страница 17: ...1 9 6 Close the front cover Press on the center part of the front cover until the cover locks securely...
Страница 143: ...5 20 Clicking on Device Settings brings up the following window...
Страница 159: ...6 13...
Страница 163: ...6 17 Clicking on Device Settings brings up the following window...


