13--8--625
Page 29
humidity, etc.), it will be necessary to change the oil
more frequently. Operating conditions and the appear-
ance of the drained oil must be surveyed and the oil
change intervals planned accordingly by the user. Gar-
dner Denver offers a free oil analysis program with the
AEON lubricants and we recommend a sample be sent
in at 100 hours on a new unit.
DRAINING AND CLEANING OIL SYSTEM
Air/oil under pressure will cause
severe personal injury or death. Shut
down compressor, relieve system of
all pressure, disconnect, tag and
lockout power supply to the starter
before removing valves, caps, plugs,
fittings, bolts, and filters.
Always drain the complete system. Draining when the
oil is hot will help to prevent varnish deposits and carry
away impurities.
To drain the system, use one of the following methods:
1.
If the unit is not elevated high enough to use the
oil reservoir drain line to drain oil, a small hand,
electric or air operated pump should be used to
drain reservoir through the oil filler opening or from
the drain valve.
2.
If the unit is elevated so that the oil reservoir drain
can be used, empty the oil reservoir through the
drain valve to a suitable container or sump.
3.
If the drained oil and/or the oil filter element are
contaminated with dirt, flush the entire system:
reservoir, oil cooler, mixing valve and lines. In-
spect the oil separator elements for dirt accumula-
tion; replace if necessary. If a varnish deposit ex-
ists, contact the factory for recommendations for
removal of the deposit and prevention of varnish.
FILLING OIL RESERVOIR
Air/oil under pressure will cause
severe personal injury or death. Shut
down compressor, relieve system of
all pressure, disconnect, tag and
lockout power supply to the starter
before removing valves, caps, plugs,
fittings, bolts, and filters.
Compressor, air/oil reservoir, separa-
tion chamber and all piping and tub-
ing may be at high temperature during
and after operation.
1.
Be sure the unit is completely off and that no air
pressure is in the oil reservoir.
2.
Disconnect, tag and lockout the power supply to
the starter.
3.
Wipe away all dirt around the oil filler plug.
4.
Remove the oil filler plug and add oil as required
to return the oil level to the top of the white section
of the oil gauge.
5.
Install the oil filler plug and operate the unit for
about a minute allowing oil to fill all areas of the
system. Check for leaks.
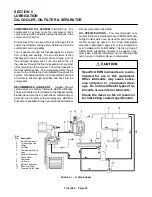
FIGURE 5--3 -- OIL CHANGE INTERVAL
Discharge
AEON 2000
AEON 4000
AEON 9000SP
Temperature
Change Interval
Change Interval
Change Interval
Up to 180
_
F (82
_
C)
2000 hrs.
4000 hrs.
8000 hrs.
180
_
to 190
_
F (82
_
to 88
_
C)
1500 hrs.
3000 hrs.
6000 hrs.
190
_
to 200
_
F (88
_
to 93
_
C)
1000 hrs.
2000 hrs.
4000 hrs.
200
_
F+ (93
_
C)
500 hrs.
1000 hrs.
2000 hrs.
Содержание EFD-25 HP
Страница 13: ...13 8 616 Page 4 DECALS 206EAQ077 212EAQ077 218EAQ077 211EAQ077 207EAQ077...
Страница 14: ...13 8 616 Page 5 DECALS 216EAQ077 217EAQ077 222EAQ077 221EAQ077 208EAQ077...
Страница 30: ...13 8 625 Page 21 FIGURE 4 4 COMPRESSOR RUNNING FULLY LOADED...
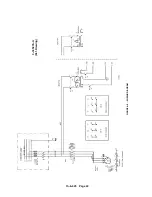
Страница 32: ...13 8 625 Page 23 FIGURE 4 5 WIRING DIAGRAM 3 305865 Ref Drawing...
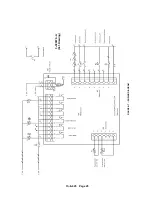
Страница 33: ...13 8 625 Page 24 FIGURE 4 6 WIRING DIAGRAM 3 305979 A Ref Drawing...
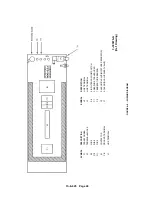
Страница 34: ...13 8 625 Page 25 FIGURE 4 7 WIRING DIAGRAM 3 305979 A Ref Drawing...
Страница 54: ...13 8 625 Page 45 AIREND GROUP...
Страница 60: ...13 8 625 Page 51 AIREND AND INLET FILTER ASSEMBLY...
Страница 62: ...13 8 625 Page 53 DRIVE GROUPS For list of Common Parts see page 54 For Drive Groups see pages 55 through 62...
Страница 72: ...13 8 625 Page 63 COOLING GROUP...
Страница 74: ...13 8 625 Page 65 CONTROL SYSTEM ASSEMBLY AND MOUNTING...
Страница 78: ...13 8 625 Page 69 CONTROL BOX 3 305979 A Ref Drawing...
Страница 80: ...13 8 625 Page 71 ENCLOSURE GROUP...

