background image

13--8--625

Page 12

7.

System Pressure -- The discharge pressure of
the unit is set at the factory. To change the dis-
charge pressure, set the controls to the desired
load pressure. DO NOT EXCEED THE MAXI-
MUM OPERATING PRESSURE ON THE COM-
PRESSOR NAMEPLATE. See Section 4, “Setting
the Load--Unload Pressure Setpoints,” for proce-
dure.

Operation at excessive discharge air
pressure can cause personal injury or
damage to equipment. Do not adjust
the full discharge air pressure above
the maximum stamped on the unit
nameplate.

8.

Operating Mode -- Refer to Section 4 for detailed
information on the control system.

9.

Enclosure -- Check for damaged panels or doors.
Check all screws and latches for tightness. Be
sure doors are closed and latched.

STARTING THE UNIT -- Observe the following starting
procedures.

The compressor starts and stops
automatically.

Automatic restarting

can cause injury or death. Open, tag
and lockout main disconnect and any
other circuits before servicing the
unit.

The enclosure doors must be in place
and fastened down to keep the com-
pressor package from overheating
when the compressor is running.

After an emergency stop, be sure that
the pressure in the air/oil reservoir is
less than 5 psig. Wait one minute or
more before restarting.

The controller has an automatic start/
stop sequence built in. You do NOT
need to close the air service valve.
Closing the air service valve on start--
up or prior to shutdown will cause
rapid cycling, and could cause a high
pressure shutdown.

1.

Turn the main switch on.

2.

Push the Start button.

DAILY CHECK -- Refer to Section 8, “Maintenance
Schedule,” page 39.

STOPPING THE UNIT:

1.

Push the Stop button.

2.

Wait one minute to allow the compressor to stop.

3.

Turn the main switch off.

EMERGENCY STOP -- The compressor stops when
the Emergency Stop button is pushed.

To restart the compressor, wait one (1) minute after
Emergency Stop, then turn the Emergency Stop button
clockwise to release it. Then, start the compressor per
the instructions above. If an alarm has been set, press
the Reset button before starting.

Содержание EFD-25 HP

Страница 1: ...GARDNER DENVERR ELECTRA SCREW STATIONARY BASE MOUNTED COMPRESSORS MODELS EFD 25 30 40 50 HP PARTS LIST OPERATING AND SERVICE MANUAL 13 8 625 1st Edition March 24 2000...

Страница 2: ...er Denver is committed to supplying you with the highest quality factory remanufactured airends that are guaranteed to save you time aggravation and money Immediately Available Repair downtime costs y...

Страница 3: ...time Danger is used to indicate the presence of a hazard which will cause severe personal injury death or substantial property damage if the warning is ignored Warning is used to indicate the presence...

Страница 4: ...on 3 Starting Operating Procedures 11 Section 4 Controls Instrumentation 13 Section 5 Lubrication Oil Cooler Oil Filter Separator 27 Section 6 Air Filter 35 Section 7 Belt Drive 36 Section 8 Maintenan...

Страница 5: ...is with liberal core credit available for the re placement unit 3 A full line of factory tested AEON compressor lubricants specifically formulated for use in Gardner Denver compressors 4 Repair and ma...

Страница 6: ...unning Fully Loaded 14 Compressor Running Unloaded 14 Compressor System Air Flow 1 Control Devices 19 Blowdown Valve 19 20 Changing Minimum Pressure Check Valve Seals 20 Inlet Valve 20 Inlet Valve Sol...

Страница 7: ...tem Compressor 27 Draining and Cleaning 29 Oil System Check 34 Air and Oil Discharge Temperature 34 Compressor Oil Inlet Temperature 34 Oil Cooler Oil Pressure Differential 34 Oil Cooler Temperature D...

Страница 8: ...n 39 Every 2000 Hours Operation 39 Every 8 Hours Operation 39 Every Year 39 Motor Lubrication 39 Solenoid Inlet Valve 20 Specifications Oil 27 Starter 14 STARTING OPERATING PROCEDURES SECTION 3 11 Sta...

Страница 9: ...re 4 3 Air Pilot Electronic Controller 16 Figure 4 4 Compressor Running Fully Loaded 21 Figure 4 5 Wiring Diagram 23 Figure 4 6 Wiring Diagram 24 Figure 4 7 Wiring Diagram 25 Figure 4 8 Wiring Diagram...

Страница 10: ...B As meshing continues more of the main rotor lobe enters the sec ondary rotor grove normal volume is reduced and pressure increases Oil is injected into the cylinder to remove the heat of compression...

Страница 11: ...lief valve Protects receiver against overpressure 9 Oil cooler Cools down oil 10 Aftercooler Cools down pressurized air 11 Fan Circulates cooling air 12 Oil filter Cleans oil 13 Instrument panel Contr...

Страница 12: ...g in accordance with the National Electrical Code NFPA 70 and any applicable local electrical codes Wiring and electrical service must be performed only be qualified electricians D Open main disconnec...

Страница 13: ...13 8 616 Page 4 DECALS 206EAQ077 212EAQ077 218EAQ077 211EAQ077 207EAQ077...

Страница 14: ...13 8 616 Page 5 DECALS 216EAQ077 217EAQ077 222EAQ077 221EAQ077 208EAQ077...

Страница 15: ...ifting points The eyebolts or lugs provided on the motor are for lifting the motor only and should not be used to lift any additional weight All eyebolts must be securely tightened When lifting the mo...

Страница 16: ...t near level Temporary installation may be made at a maximum 10_ angle lengthwise or 10_ sidewise Mounting bolts are not normally required However installation conditions such as piping rigidity angle...

Страница 17: ...achieved without the aftercooler 3 Provide at least some simple shelter such as aply wood windbreak to protect against drifting snow 4 Use only Gardner Denver AEON 9000SP lubri cant 5 Monitor unit car...

Страница 18: ...y screw units on the same line each unit is isolated by the minimum pressure check valve mounted on each compressor package If a rotary screw unit is manifolded to another compres sor be sure the othe...

Страница 19: ...en main disconnect tag and lockout power supply to starter before working on the electric motor ELECTRIC MOTOR GREASE RECOMMENDATIONS Standard High Service Temperature Worked Penetration 265 296 220 2...

Страница 20: ...ter Inspect the air filter tobe sureit isclean and tightly assembled Refer to Section 6 Air Fil ter page 35 for complete servicing instructions Be sure the inlet line if used is tight and clean 3 Pipi...

Страница 21: ...and any other circuits before servicing the unit The enclosure doors must be in place and fastened down to keep the com pressor package from overheating when the compressor is running After an emerge...

Страница 22: ...ion of its condition AIRPILOT ELECTRONIC CONTROLLER Descrip tion of Operation The controller controls all the func tions connected to the regulation of the compressor The unit adjusts the following pa...

Страница 23: ...nd for compressed air rises enough to drop the pressure below the load pres sure programmed into the controller the compressor automatically starts STARTER CONTROL BOX FIGURE 4 2 page 15 The following...

Страница 24: ...ROLLER has five menus four of which can be accessed by the oper ator The fifth menu contains the factory settings of the com pressor Access to the factory settings menu requires a special code See FIG...

Страница 25: ...ched on the unit shows the basic display If the motor is run ning the display shows a dot and the output pressure the dot is shown when the compressor is loaded not when unloading If the motor is stop...

Страница 26: ...s sure is changed the pressure differential remains constant The unload pressure set at the factory is equal to the compressor s maximum pressure which can not be exceeded Setting the discharge pressu...

Страница 27: ...in dicator lights on the display start flashing then select code 03 The settings in this menu are used when the compres sor is connected to the optional Multipilot control through an RS 485 communicat...

Страница 28: ...To test the relief valve raise the system operating pressure to 75 of the relief valve set pressure and manually open the valvewith thehand lever Hold the valve open for a few seconds and allow it to...

Страница 29: ...NTROLLER through the inlet valve solenoid When the discharge pressure reaches the unload pres sure programmed into the controller the inlet solenoid valve opens the connection between the back side of...

Страница 30: ...13 8 625 Page 21 FIGURE 4 4 COMPRESSOR RUNNING FULLY LOADED...

Страница 31: ...age 21 This transducer is connected after the minimum pressure check valve It converts the pressure in the plant air system into an electrical signal for use by the controller Indication on the contro...

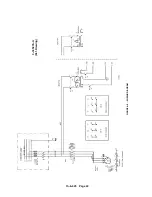
Страница 32: ...13 8 625 Page 23 FIGURE 4 5 WIRING DIAGRAM 3 305865 Ref Drawing...

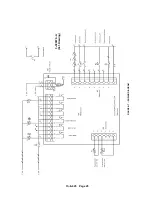
Страница 33: ...13 8 625 Page 24 FIGURE 4 6 WIRING DIAGRAM 3 305979 A Ref Drawing...

Страница 34: ...13 8 625 Page 25 FIGURE 4 7 WIRING DIAGRAM 3 305979 A Ref Drawing...

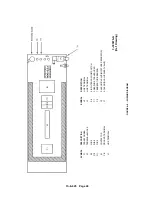
Страница 35: ...ESCRIPTION T1 TRANSFORMER L2 LINE TERMINAL X1 TERMINAL BLOCKS L3 LINE TERMINAL F9 FUSE S5 AIR FILTER VACUUM SWITCH F10 FUSE P1 PRESSURE TRANSDUCER F11 FUSE P2 TEMPERATURE SENSOR K1 CONTACTOR Y3 SOLENO...

Страница 36: ...ricants These lubricants are formulated to the highest quality standards and are factory authorized tested and ap proved for use in rotary screw compressors AEON lu bricants are available through your...

Страница 37: ...r supply to the starter 3 Wipe away all dirt around the oil filler plug It is lo cated by the oil filter 4 Remove the oil filler plug and add oil as required to return the oil level to the top of the...

Страница 38: ...nated with dirt flush the entire system reservoir oil cooler mixing valve and lines In spect the oil separator elements for dirt accumula tion replace if necessary If a varnish deposit ex ists contact...

Страница 39: ...and drain oil from pipe runs Dump Oil from filter and reinstall used filter 4 Fill system with a 50 percent charge of the new lu bricant Start the machine and stay there to observe Allow the machine t...

Страница 40: ...controls the oil temper ature and prevents moisture contamination of the oil Unusual cooling of the oil reservoir short loaded cycle in high humidity or malfunctions of the thermal valve may result i...

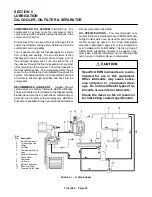
Страница 41: ...2 feet 6M clearance around the cooler Keep both faces of the cooler core clean for effi cient cooling of compressor oil THERMAL CONTROL THERMOSTATIC MIXING VALVE FIGURE 5 1 page 27 is installed in th...

Страница 42: ...separation and cause oil carry over Oil separator element life cannot be predicted it will vary greatly depending on the conditions of operation the quality of the oil used and the maintenance of the...

Страница 43: ...PRESSOR OIL SYSTEM CHECK The follow ing readings are based on ambient temperature of 80_F 27_C with the system in good condition The compressor should be at operating temperature at the time of the ch...

Страница 44: ...er the com pressor package discharge 3 Disconnect tag and lockout the power supply to the starter 4 Remove the air filter cover FIGURE 6 1 and re move the old filter elements 5 Clean the inside of the...

Страница 45: ...top position When the handle is in the top position the new belts are au tomatically at the correct tension The spring tension is adjusted to the correct value at the factory Do not change the tightne...

Страница 46: ...t and debris Bushing size Torque 2012 31 Nm 2517 49 Nm 3020 92 Nm CHECKING BELT TENSION Using a spring scale apply a perpendicular force to each belt at the midpoint of the span and measure the deflec...

Страница 47: ...13 8 625 Page 38 No Deflection Deflection Motor Of Force Pounds In H P Belts per belt Inches 25 30 3 6 8 5 1 3 1 9 3 8 9 5 40 50 3 7 10 1 5 2 2 3 8 9 5 FIGURE 7 5 BELT TENSION 5 V SECTION V BELTS...

Страница 48: ...hange oil filter element Every 4000 Hours Operation Change the compressor lubricant UNDER ADVERSE CONDITIONS CHANGE MORE FREQUENTLY re fer to Oil Change Interval Section 5 page 29 Flush system if requ...

Страница 49: ...arter 3 Replace fuse control box investigate if fuses continue to blow 4 Motor starter overload 4 Reset and investigate heaters or thermistor in cause of overload motor tripped 5 Compressor stopped be...

Страница 50: ...r clogged 4 Replace 5 Intervals of moisture separator 5 Check the setting in the drainage incorrectly set Air Pilot controller 6 Condensate drain solenoid 6 Replace valve is faulty 7 Leaks in the comp...

Страница 51: ...sket 3 Shaft Seal leaking 3 Replace shaft seal Oil Carry Over 1 Overfilling the reservoir 1 Drain excess oil from system Air oil under pressure will cause severe personal injury or death Shut down com...

Страница 52: ...7 Replace seals in valve pressure valve 8 Operation at elevated 8 Reduce temperature See discharge temperatures High Discharge Air Temperature page 41 this section 9 Water condensate in oil 9 Check oi...

Страница 53: ...No Name of Part 1 CYLINDER 2 MAIN ROTOR 3 SECONDARY ROTOR 4 DISCHARGE BEARING HOUSING 5 DRIVE SHAFT SEAL 6 DISCHARGE END PLATE For Replacement Airend order Part Number 306EFD6013 See page 75 For Peri...

Страница 54: ...13 8 625 Page 45 AIREND GROUP...

Страница 55: ...906369 22 OIL FILTER 1 2117915 23 O RING 1 EFC89565109 24 LOCK WASHER 2 EFC80015909 25 HEX SOCKET SCREW 2 EFC44580140 26 HEX SOCKET SCREW 4 EFC89563199 27 O RING 1 EFC89562879 28 HEX SOCKET PLUG 1 EFC...

Страница 56: ...13 8 625 Page 47 Order by Part Number and Description Reference Numbers are for your convenience only INLET VALVE REPAIR PARTS...

Страница 57: ...SEAL KIT ITEMS 1 6 18 19 EFC30816408 INLET VALVE REPAIR KIT ITEMS 1 6 10 12 15 16 18 19 EFC89555469 1 O RING 1 2 O RING 2 3 O RING 1 4 RING 1 5 PISTON GASKET 1 6 O RING 1 7 FRAME 1 8 SPRING 1 9 PISTO...

Страница 58: ...13 8 625 Page 49 Order by Part Number and Description Reference Numbers are for your convenience only MINIMUM PRESSURE CHECK VALVE...

Страница 59: ...PRESS CHECK VALVE ASSY KIT ITEMS 2 20 1 EFC37609908 MIN PRESS CHECK VALVE SEAL KIT ITEMS 2 4 5 6 8 EFC89573249 MIN PRESS CHECK VALVE REPAIR KIT ITEMS 2 4 14 EFC89573379 2 O RING 1 3 O RING 1 4 PISTON...

Страница 60: ...13 8 625 Page 51 AIREND AND INLET FILTER ASSEMBLY...

Страница 61: ...5 CLAMP 1 EFC87905389 6 HOSE CLAMP 2 EFC28068490 7 HOSE TUBE 1 EFC87905539 8 WING NUT 1 EFC80220059 9 BEARING INNER RACE 1 EFC87089639 10 GASKET AIREND SEAL HOUSING 1 EFC30805908 11 HOUSING AIREND SE...

Страница 62: ...13 8 625 Page 53 DRIVE GROUPS For list of Common Parts see page 54 For Drive Groups see pages 55 through 62...

Страница 63: ...23 BRACKET 1 EFC30903738 24 HOUSING BELT TENSION LOWER 1 EFC37606038 25 ADJUSTING NUT 1 EFC03493668 26 SET SCREW 1 EFC89563509 27 SPRING PIN 1 EFC89563479 28 SPRING 1 EFC89571769 29 WASHER 3 EFC421199...

Страница 64: ...NG AIREND 1 22K35G 22K35G 22K35G 22K35G 7 BELT 3 300EFC811 300EFC811 300EFC811 300EFC811 8 WASHER 4 EFC80092329 EFC80092329 EFC80092329 EFC80092329 9 SCREW 4 EFC85838329 EFC85838329 EFC85838329 EFC858...

Страница 65: ...AIREND 1 22K35G 22K35G 22K35G 22K35G 7 BELT 3 13AM1400 13AM1400 13AM1500 13AM1500 8 WASHER 4 EFC80092329 EFC80092329 EFC80092329 EFC80092329 9 HEX SCREW 4 EFC85838329 EFC85838329 EFC85838329 EFC858383...

Страница 66: ...22K55G 5 SHEAVE AIREND 1 73R3SPB150 73R3SPB170 73R3SPB180 73R3SPB200 6 BUSHING AIREND 1 22K35G 22K35G 22K35G 22K35G 7 BELT 3 13AM1400 13AM1400 13AM1400 13AM1500 8 WASHER 8 EFC42119960 EFC42119960 EFC4...

Страница 67: ...22K55G 5 SHEAVE AIREND 1 73R3SPB150 73R3SPB170 73R3SPB180 73R3SPB200 6 BUSHING AIREND 1 22K35G 22K35G 22K35G 22K35G 7 BELT 3 13AM1500 13AM1500 13AM1600 13AM1600 8 WASHER 8 EFC42119960 EFC42119960 EFC4...

Страница 68: ...BUSHING AIREND 1 22K35F 22K35G 22K35G 22K35G 7 BELT 3 13AM1500 13AM1600 13AM1600 13AM1600 8 WASHER 4 EFC80092329 EFC80092329 EFC80092329 EFC80092329 9 HEX SCREW 4 EFC85838329 EFC85838329 EFC85838329 E...

Страница 69: ...BUSHING AIREND 1 22K35F 22K35G 22K35G 22K35G 7 BELT 3 13AM1400 13AM1400 13AM1400 13AM1500 8 WASHER 4 EFC80092329 EFC80092329 EFC80092329 EFC80092329 9 HEX SCREW 4 EFC85838329 EFC85838329 EFC85838329 E...

Страница 70: ...22K55G 5 SHEAVE AIREND 125 mm 1 73R3SPB125 73R3SPB140 73R3SPB150 73R3SPB170 6 BUSHING AIREND 1 22K35F 22K35F 22K35G 22K35G 7 BELT 3 13AM1500 13AM1500 13AM1600 13AM1600 8 WASHER 8 EFC42119960 EFC421199...

Страница 71: ...G 22K55G 5 SHEAVE AIREND 125 mm 1 73R3SPB125 73R3SPB140 73R3SPB160 73R3SPB170 6 BUSHING AIREND 1 22K35F 22K35F 22K35G 22K35G 7 BELT 3 13AM1500 13AM1500 13AM1500 13AM1500 8 WASHER 8 EFC42119960 EFC4211...

Страница 72: ...13 8 625 Page 63 COOLING GROUP...

Страница 73: ...EFC89571899 6 BUSHING 1 EFC81288429 EFC81288429 7 HEX SOCKET SCREW 8 EFC44572670 EFC44572670 8 MOUNTING FLANGE 4 Bolt SAE Split 4 EFC89516059 EFC89516059 9 O RING 2 EFC89507729 EFC89507729 10 HOSE AS...

Страница 74: ...13 8 625 Page 65 CONTROL SYSTEM ASSEMBLY AND MOUNTING...

Страница 75: ...ING NUT 1 EFC80220059 10 PRESSURE DIFFERENTIAL SWITCH 1 EFC85196699 11 ELBOW 3 EFC81744279 12 REDUCING TUBE FITTING 1 EFC80236859 13 ELBOW 1 EFC62336080 14 CONNECTOR 4 EFC81744309 15 DOUBLE NIPPLE 5 E...

Страница 76: ...r your convenience only WATER SEPARATOR ASSEMBLY Ref No Name of Part Qty Part No 1 MOISTURE SEPARATOR 1 EFC81708999 2 HOSE FITTING 3 EFC62540220 3 VALVE MOISTURE DRAIN 1 EFC81344809 4 STRAINER 1 EFC81...

Страница 77: ...ION T1 TRANSFORMER L2 LINE TERMINAL X1 TERMINAL BLOCKS L3 LINE TERMINAL F9 FUSE S5 AIR FILTER VACUUM SWITCH F10 FUSE P1 PRESSURE TRANSDUCER F11 FUSE P2 TEMPERATURE SENSOR K1 CONTACTOR Y3 SOLENOID VALV...

Страница 78: ...13 8 625 Page 69 CONTROL BOX 3 305979 A Ref Drawing...

Страница 79: ...CUUM SWITCH S5 1 EFC85196699 EFC85196699 EFC85196699 EFC85196699 SELECTOR SWITCH 1 EFC89528409 EFC89528409 EFC89528409 EFC89528409 SELECTOR SWITCH 1 EFC89528539 EFC89528539 EFC89528539 EFC89528539 TRA...

Страница 80: ...13 8 625 Page 71 ENCLOSURE GROUP...

Страница 81: ...8 8 FRAME UPPER RIGHT 1 EFC37604278 9 PANEL RIGHT 1 EFC37604688 10 PANEL AIR DISCHARGE GRILL BOTTOM 1 EFC22399858 11 PANEL AIR INLET GRILL TOP 1 EFC22399578 12 SCREW 4 EFC89571639 13 SCREW 8 EFC802421...

Страница 82: ...venience only QUIET ENCLOSURE Ref No Name of Part Qty Part No QUIET ENCLOSURE ASSEMBLY EFC03812103 QUIET ENCLOSURE SIDE ADD ON EFC03812101 1 BAFFLE SIDE 1 EFC03813708 2 TUBE 1 EFC30905758 3 SILENCER 1...

Страница 83: ...13 8 625 Page 74 MAIN MOTOR MOTOR 25 HP 230 460 VOLT ABB EFC89618809 MOTOR 30 HP 230 460 VOLT ABB EFC89618929 MOTOR 40 HP 230 460 VOLT ABB EFC89562189 MOTOR 50 HP 230 460 VOLT ABB EFC89562469...

Страница 84: ...TAT ELEMENT 1 EFC89560169 SPRING 1 EFC89565369 GASKET 1 EFC28335250 O RING 1 EFC89560299 O RING 1 EFC89565109 O RING 1 EFC86906369 O RING 1 EFC89534789 O RING 2 EFC89507729 DRIVE SHAFT SEAL KIT 300EFD...

Страница 85: ...9529679 LUBRICANT AEON 2000 5 GALLON PAIL 1 28G36 55 GALLON DRUM 1 28G37 LUBRICANT AEON 4000 STANDARD 5 GALLON PAIL 1 28H57 55 GALLON DRUM 1 28H36 LUBRICANT AEON 6000FG 5 GALLON PAIL 1 28H99 55 GALLON...

Страница 86: ...ent of any product or part thereof which in the Company s judgment is proved not to be as warranted Labor shall be limited to the amount specified in the Company s labor rate schedule Labor costs in e...

Страница 87: ...ntative or Gardner Denver Customer Service Department 1800 Gardner Expressway Quincy Illinois 62301 Telephone 800 682 9868 FAX 217 224 7814 Sales and Service in all major cities For parts information...

Отзывы: