background image

102

SECTION 2

8

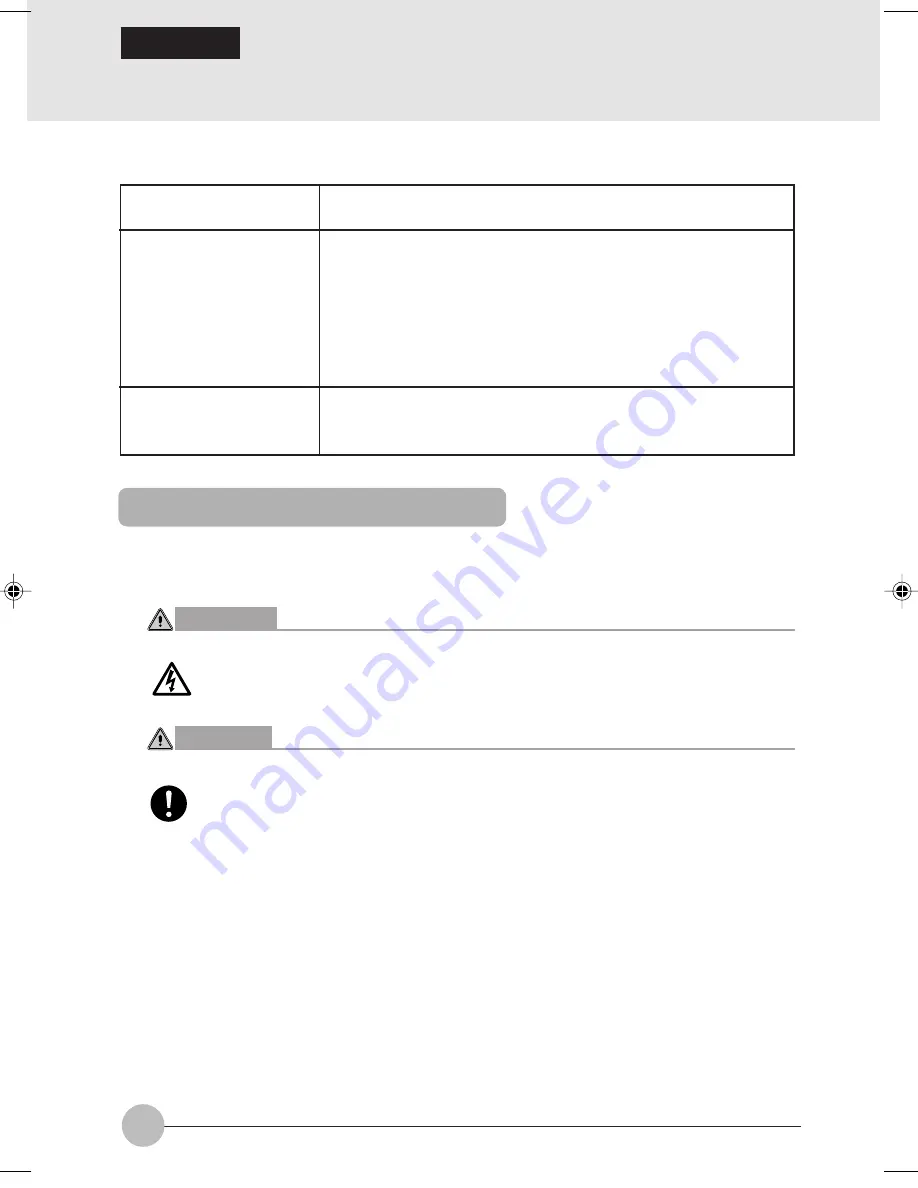
Connecting an External Monitor

Preparing necessary items

This section explains how to connect a CRT monitor to your computer via the external monitor port
on its back.

 WARNING

ELECTRIC SHOCK

Before connecting or disconnecting an external monitor, always turn off your computer
and disconnect the AC adapter from it to avoid shock hazards.

 CAUTION

BREAKAGE

Connect cables correctly according to the instructions in this manual.
Incorrect connection of the cable could result in damage to your computer and monitor.

1

Turn off the computer and disconnect the AC adapter from it.

2

Plug the monitor cable in the external monitor port on the back of the computer.

External monitor

Monitor cable

Instruction manual for
your external monitor

Your computer supports PC/AT-compatible and DOS/V-compatible
monitors.

Used to connect an external monitor to your computer. Most
external monitors come with this cable, as a separate part for
some monitors and already connected for others.

If this cable is not included with your monitor or it cannot be
plugged in the external monitor port of your computer, prepare a
PC/AT-compatible or DOS/V-compatible monitor cable with a
connector that fits the external monitor port of your computer.

Ways of connecting cables vary from monitor to monitor. For the
way of connecting your monitor, therefore, refer to the documentation
supplied with it.

Connecting an external monitor

Clove Sec 2 (100-104)

17/10/02, 4:41 PM

102

Содержание LifeBook S6110

Страница 1: ...nd the double D symbol are trademarks of Dolby Laboratories Copyrights 1992 1999 Dolby Laboratories All rights reserved Phoenix is a registered trademark of Phoenix Technologies Corporation of the United States K56flex is a trademark of Rockwell International Corporation and Lucent Technologies Corporation Other product names are trademarks or registered trademarks of their respective companies Ot...

Страница 2: ...equipment requires a standard modular jack type USOC RJ 11C which is FCC Part 68 compliant 4 The FCC Registration Number This equipment is designed to be connected to the telephone network or premises wiring using a standard modular jack type USOC RJ 11C which is FCC Part 68 compliant and a line cord between the modem and the telephone network with a minimum of 26AWG The REN is used to determine t...

Страница 3: ...INDUSTRY CANADA NOTICES Notice to Users of Radios and Television This Class B digital apparatus meets all requirements of the Canadian Interference Causing Equipment Regulations CET appareil numérique de la class B respecte toutes les exigence du Réglement sur le matérial brouilleur du Canada Notice to Users of the Canadian Telephone Network The Canadian Industry Canada label identifies certified ...

Страница 4: ...verti que même la conformité aux normes de certification ne peut dans certains cas empêcher la dégradation du service Les réparations de l équipement de télécommunications doivent être eVectuées par un service de maintenance agréé au Canada Toute réparation ou modification qui n est pas expressément approuvée par Fujitsu PC Corp ou toute défaillance de l équipement peut entraîner la compagnie de t...

Страница 5: ...ateurs ne doivent pas tenter d é tablir ces connexions eux mêmes mais doivent contacter les services d inspection d installations électriques appropriés ou un électricien Ceci peut être particulièrement important en régions rurales CAUTION To reduce the risk of fire use only 26 AWG or larger telecommunications line cord CAUTION For continued protection against risk of fire replace only with the sa...

Страница 6: ...tal rating of all products plugged into the wall outlet does not exceed 15 amperes 11 Never push objects of any kind into this product through cabinet slots as they may touch dangerous voltage points that could result in a fire or electric shock Never spill liquid of any kind on the product 12 Do not attempt to service this product yourself as opening or removing covers may expose you to dangerous...

Страница 7: ... high safety is secured could lead directly to death personal injury severe physical damage or other loss hereinafter High Safety Required Use including without limitation nuclear power reactioncore control in nuclear atomic facility airplane automatic aircraft flight control air traffic control operation control in mass transport control system medical instrument for life support system missile l...

Страница 8: ...or used on any media or part of any Product returned to Fujitsu or its service providers for Warranty Service or other repair including but not limited to the costs of recovering such programs data or other information It is solely your responsibility as the Purchaser to back up any software programs data or information stored on any storage media or any part of a Product returned for Warranty Ser...

Страница 9: ...ted below To do so would result in your modem being operated in a non compliant manner Call Attempts Retries Applications software shall be configured so that no more than 3 attempts are made to establish a connection to a given number Note if the modem can detect service tones up to 10 attempts can be made If the call sequence is unsuccessful there shall be a delay of at least 30 minutes before a...

Страница 10: ...ed with pulse dialling while the New Zealand standard is DTMF tone dialling There is no guarantee that Telecom lines will always continue to support pulse dialling It is strongly recommended that pulse dialling is not used Some parameters required for compliance with Telecom s Telepermit requirements are dependent on the equipment PC associated with this device The associated equipment shall be se...

Страница 11: ...g is not possible Please see below instruction for quick modem setup A If you are located in Australia 1 Go to Control panel select modem icon 2 Choose Australia in What country region are you in now 3 Select Phone system as Tone Dialing 4 Close B If you are located in New Zealand 1 Go to Control panel select modem icon 2 Choose New Zealand in What country region are you in now 3 Select Phone syst...

Страница 12: ...one system as Tone Dialing 5 Click OK and Apply Note The screens and illustrations shown in this examples may slightly vary depending on the operating environment that you have installed B If you are located in New Zealand 1 Click start select Control panel select Phone and Modem Options 2 Double click New Location 3 Choose New Zealand in Country region pull down menu bar 4 Select Phone system as ...

Страница 13: ...tes the concrete nature of the warning The example on the left is a caution for electric shock The circle and slash indicates prohibited behavior The symbol inside the circle indicates the concrete nature of the prohibition The example on the left indicates that disassembly is prohibited The indicates instructions that must be followed The symbol inside indicates the concrete nature of those instr...

Страница 14: ...ers indicates that a space needs to be left in the entry by pressing the space bar the long key with nothing written on it at the center of the front of the keyboard Commands are written in this manual as lowercase latin letters but uppercase letters may be used Product names The following product names are abbreviated as follows in this manual Microsoft Windows XP operating system is written as W...

Страница 15: ...and their functions flat point operation methods floppy disk unit handing and battery operation SECTION 2 This section explains installation of options for this computer SECTION 3 This section explains what to do when trouble occurs with this computer and when messages are displayed Read this section as the necessity arises SECTION 1 SECTION 2 SECTION 3 ...

Страница 16: ...Point 16 How to use the Flat Point 17 4 Keyboard 19 Keyboard 19 5 Changing the Internal Battery Pack 23 6 Running the computer on its battery 25 7 Using a LAN 29 Using a wired LAN 29 8 About the Integrated Wireless Lan For selected model 32 Before Using This Device 32 Wireless Lan Modes 32 Connecting Windows 2000 Systems 34 Workflow 34 Setting Parameters 34 Network Connection 37 Sharing 39 Checkin...

Страница 17: ...esktop Control Panel 70 1 Options 74 Options 74 Peripherals 75 2 Using a PC Card 76 Precautions for PC Cards 76 Inserting a PC card 78 Removing a PC card 79 3 Using the CD DVD drive 81 Cautions in using CD DVDs 81 Inserting a disc 83 Removing a disc 85 4 Adding Memory 88 5 Using a Mobile Multi Purpose bay Unit 94 6 Connecting a USB Device 98 Connecting a USB device 99 7 Connecting a Mouse 100 Conn...

Страница 18: ... using this computer including the names of the parts and their functions Flat point operation methods floppy disk unit handing and battery operation SECTION SECTION SECTION SECTION SECTION SECTION SECTION SECTION SECTION SECTION 1 1 1 1 1 1 1 1 1 1 SECTION 1 ...

Страница 19: ...en may have pixels that do not light and pixels that are always lit which however does not indicate that your LCD screen is faulty Colors reproduced by LCD screens for computers vary to some extent from product to product for reasons of manufacture Also a slight unevenness of density may show up because of changes in temperature Using the LCD screen in low light for a long period of time could sho...

Страница 20: ...esume your notebook from suspend mode and power on your LifeBook notebook when it has been shut down 5 Speakers Sound output devices of the computer 6 Keyboard Used to type characters and enter commands in your computer 7 Flat Point Used to control the mouse pointer The scroll button in the middle allows you scroll up and down through the document in the active window Critical Points Some applicat...

Страница 21: ...l audio output terminal Used to plug in the fiber optic cable from an audio unit e g an MD recorder provided with an optical digital input terminal Compatible with optical mini plugs CAUTION HEARING LOSS When you are listening to music with headphones do not to turn up the volume excessively Listening to very loud sounds for a long time can adversely affect your hearing HEARING LOSS When you are w...

Страница 22: ...a few seconds When the temperature in the computer rises high it automatically starts to rotate to discharge heat from the computer CAUTION BREAKAGE Do not block the air outlet Doing so prevents heat from being discharged and could result in damage to your computer 4 Air inlet Allows the cooling fan to draw outside air into your computer CAUTION BREAKAGE Do not block the air inlet Doing so prevent...

Страница 23: ...cannot remove the mobile multi purpose bay unit 2 Mobile multi purpose bay Your computer came with an internal optical disk drive which may vary between countries Please check with your local distributor for actual configuration You may change the unit installed in this bay Critical Points To avoid damage to your computer do not leave the mobile multi purpose bay empty when using the computer 3 Ba...

Страница 24: ...n wireless LAN antenna A wireless LAN antenna is built in here Your computer or situation may not look exactly like this illustration 1 Expansion RAM module slot Accommodates the memory of your computer 2 Internal battery pack bay Accommodates an internal battery pack 1 2 ...

Страница 25: ... device radio signals transmitted or to the left to turn it off radio signals not transmitted Always keep this switch in the OFF position where the use of electronic devices is restricted e g in hospitals and on airplanes 5 Line In jack This is an analog input terminal used to connect the computer to the Line Out terminal of an AV system with a 3 5mm mini plug CAUTION HEARING LOSS Before connectin...

Страница 26: ... as an optionally available USB floppy disk drive and a USB printer 8 LAN port Used to connect the computer to a LAN local area network via an optional LAN cable for using Online service or navigating the Internet 9 External monitor port Used to connect an optionally available external monitor IMPORTANT When connecting an external device to your computer insert its connector straight into the port...

Страница 27: ...er Indicator Lights when the computer is powered from the AC adapter 3 Battery loading indicator 1 2 Lights when a battery pack is installed in your computer The numbers 1 and 2 denote the internal battery pack and the add on battery unit optional installed in the mobile multi purpose bay respectively Charging status indicator Lights when the internal battery is being charged Battery life indicato...

Страница 28: ...yboard is locked in Num Lock mode in which you can use the keyboard as a ten digit keypad To enter or exit Num Lock mode press the key 9 Caps Lock Key A Lights when the keyboard is locked in Caps Lock mode in which you can enter uppercase letters without pressing and holding down the Shift key To enter or exit Caps Lock mode press the Caps Lock key while holding down the key Scroll Lock Indicator ...

Страница 29: ...erial devices 4 Parallel Port The parallel port allows you to connect paralle devices 5 External VGA Port The external Vga port allows you to connect an external VGA or SVGA CRT monitor 6 USB Port The USB allows you to connect USB devices 7 Lan RJ 45 Jack The LAN port allows you to connect a LAN RJ 45 Note that when your notebook is connected to the Port Replicator the LAN port on the system is no...

Страница 30: ...nel components 1 Docking Port The docking port connects the Port Replicator to your notebook IMPORTANT Certain peripheral devices connected to the port replicator may operate unstably if the port replicator is installed removed while the PC power is on If this happens switch the PC power off prior to installing removing the port replicator 1 ...

Страница 31: ...e PC bottom side Fitting the connectors on the PC and the port replicator lower the PC horizontally 1 lightly press the parts shown below 2 and firmly set the port replicator IMPORTANT To install a peripheral device to or remove it from the port replicator be sure to switch the PC power off and disconnect the AC adapter in advance Do not carry the PC with the port replicator installed The connecto...

Страница 32: ...he port replicator switch the power off 2 Release the port replicator lock Release the lock by sliding the port replicator removal lever 3 Remove the port replicator While keeping the removal lever in the unlocking position 1 lift the side having the connector first 2 then the other side of the PC 3 to remove the port replicator Removal lever ...

Страница 33: ...left and right buttons of a mouse and their functions vary from application to application Pressing the scroll button forward or backward enables you to easily scroll a window up or down Critical Points The Flat Point may malfunction if condensation occurs or if it is moistened In addition if you operate it with a moistened or sweaty finger or if the Flat Point surface is dirty the mouse pointer m...

Страница 34: ...ems are marked with the submenu appears Drag To drag an object move the mouse pointer onto the object move the object to the desired location by sliding the finger on the touch pad while holding the left button down and then move the finger off the pad Or move the mouse pointer onto the object and tap the touch pad twice in a row After that without moving the finger off the pad slide it to move th...

Страница 35: ... finger on the touch pad If the finger reaches one edge of the pad before you move the pointer to the desired location move the finger off the pad temporarily put it in an adequate place on the pad and start sliding the finger again Using the scrolling function The scroll button enables you to easily scroll a window 1 Click any place in the area of the window that you want to scroll 2 Move the scr...

Страница 36: ...pecify whether to overwrite an existing string or to insert a new string Prt Sc Print Screen key Used to save the currently displayed windows as pictorial data bitmap file To do so press the key while holding the key down To save only the active window as pictorial data press the key while holding the and keys down Using painting software e g Paint you can edit save and print pictorial data To do ...

Страница 37: ...tivate the English Capital mode press these key again 8 Shift key Used in combination with other keys By pressing a key while holding the Shift key down you can enter the character or symbol printed in the upper case of the key 9 Back Space key Used to delete the character on the left of the cursor 0 Enter key Used to confirm the string entered In text processing pressing this key inserts a hard r...

Страница 38: ...ok FN F10 Pressing F10 while holding FN allows you to change your selection of where to send your display video Each time you press the combination of keys you will step to the next choice The choices in order are built in display panel only both built in display panel and external monitor or external monitor only There are eight brightness levels There are 17 audio levels Ctrl key Used in combina...

Страница 39: ...ownward to right and left About the ten key mode The ten key mode refers to the mode that enables you to use certain character entry keys as ten keys a key arrangement that makes it easy to type in figures To activate the ten key mode simply press the key In the ten key mode 1 is displayed on the status indicator LCD The figure you can enter with a ten key is marked on the front surface of the key...

Страница 40: ...l battery packs to the mobile multi purpose bay Changing the internal battery pack 1 Turn off the computer and disconnect the AC adapter from it 2 Close the LCD panel and place your computer upside down IMPORTANT Close the LCD panel gently to avoid damage due to shock Failure to do so could result in damage to the LCD panel 3 Remove the battery pack while pressing the lugs in the direction of the ...

Страница 41: ... After removing the internal battery pack take measures to prevent it from shorting for example sealing its connector with an insulating tape After removing the battery pack do not mix it with other batteries The internal battery pack lithium ion battery contains precious resources Therefore you should dispose of the disused battery pack as a recyclable material whenever possible Internal battery ...

Страница 42: ...be recharged even if the AC adapter is connected The battery can be recharged when its remaining life is 89 or less When your computer is turned off all indicators on the operating status indicator LCD will go off automatically soon after the charging of the internal battery pack has been completed The chargeability of the battery degrades when it is used in an extremely hot or cold place When the...

Страница 43: ... life is approximately between 75 and 51 The remaining battery life is approximately between 50 and 26 The remaining battery life is approximately between 25 and 13 During charging it indicates that the remaining battery life is approximately between 0 and 25 Indicates that the battery is weak remaining life 12 or less blinks Indicates that the battery is completely exhausted remaining life 0 Crit...

Страница 44: ...ly save the data you are working with exit all programs and turn off your computer Reading or writing data on the hard disk requires a large amount of electrical power Therefore when the battery is weak connect the AC adapter to your computer before reading or writing data on the hard disk Leaving the battery weak for a certain period of time causes the computer to automatically go into standby mo...

Страница 45: ...approaching the end of its useful life it goes dead in a very short time When the battery has reached the end of its useful life remove it from the computer Leaving it in the computer could result in an electric shock or fire Disposal of the battery pack Before disposing of the battery pack take measures to prevent it from shorting for example sealing its connector with an insulating tape After re...

Страница 46: ...ng necessary items LAN cable Network connection device Instruction manual for network connection device SECTION 1 There are two types of LAN cables straight type and cross type Select a cable appropriate to the data transfer rate of the network you want to use Prepare a device that serves your purpose of connecting to a LAN Here are some examples of network connection devices Cable modem ADSL mode...

Страница 47: ...port 1 Turn off the computer and disconnect the AC adapter from it 2 Plug a LAN cable in the LAN port on the back of the computer 3 Connect the LAN cable to the network connection device Plug the other end of the cable connected in step 2 in the port on the network connection device and turn on the network connection device 4 Connect the AC adapter to the computer and turn on the computer 5 Click ...

Страница 48: ... and then turn your com puter back on If you want to keep the wired LAN features always ready for use modify the settings of BIOS Setup When you want to connect to an existing network ask the network administrator what and how you should set up If you want to use an ADSL to connect to the Internet through your network set up your computer for network connections following the instructions from you...

Страница 49: ...AN cards This connection is called an AdHoc network Using an AdHoc network you can obtain a network connection easily and at a low cost In the AdHoc mode you can use the function supported by Microsoft Network such as File and Print Sharing to exchange files and share a printer or other peripheral devices To use the AdHoc Mode you must set the same SSID and the same encryption key for all the comp...

Страница 50: ...LAN has been configured to support the operating system with which your system shipped Critical Points The default BIOS setting for Wireless LAN is disabled In order to enable the Wireless LAN function please enter BIOS setup by press F2 when the system restart From the BIOS menu select Advanced select Internal Device Configurations select Wireless Lan and Enabled the device save the BIOS and rest...

Страница 51: ...ile Mode SSID Transmit Rate Power Save Enabled AdHoc Channel Description Enter the system file name in which the parameter information is to be saved Ad Hoc Network Click the down arrow and select 802 11 AdHoc Infrastructure Network Click the down arrow and select Infrastructure Enter the network name to which you want to connect Obtain the information from your network administrator If you do not...

Страница 52: ...ther Create keys with Passphrase Create keys manually or ASCII Input and enter the encryption keys 128 bit The encryption is set Select either Create keys with Passphrase Create keys manually or ASCII Input and enter the encryption keys Not supported Not supported Select this to use hexadecimal character codes to set the encryption keys Keys 1 4 Enter a 10 digit value when you have selected 64 bit...

Страница 53: ...loses You have completed the parameter settings Critical Points When you are using ADSL PPPoE with the infrastructure network to connect to the Internet you need to change the MTU size set for the computer To change the MTU size refer to the manual that comes with the access point ...

Страница 54: ...f more than one Local Area Connection entry is displayed In this case select the Local Area Connection entry with Intersil PRISM Wireless LAN PCI Card displayed under Device Name 4 Set an IP address as indicated in Table 7 Ask your network administrator to check the setting Item For AdHoc Network For Infrastructure Network Description Set the IP address and subnet mask Click Use the following IP a...

Страница 55: ...y any name to each computer For easier identification use the model name or user name A name for the network group AdHoc Network Specify the same name to all computers within the same network Infrastructure Network Specify a workgroup name to connect to To change the setting click Properties and follow the instructions on the screen System Properties appears again Table 8 Checking computer name an...

Страница 56: ...e sure that it is checked If it is not checked check it and click OK You do not have to perform the following steps Go to the next section entitled Sharing Files If File and Printer Sharing for Microsoft Networks is not found in the list click Install and perform Step 5 and subsequent steps When you click Install the Select Network Component Type window appears 5 Perform the following steps Click ...

Страница 57: ...t for the number of sharing users Table 9 Sharing Files 4 Click OK The folder is set shared and the Work folder icon changes Printer Sharing 1 Click Start Settings Printers The Printers window appears showing the printers that are connected 2 Right click the printer that you want to share then click Sharing from the menu that appears 3 Click Sharing and select necessary items Item Not Shared Share...

Страница 58: ...n is displayed Item State Current Channel Current Tx Rate Radio Off Radio On Rescan button Throughput Bytes sec Link Quality Signal Strength Description Shows the current condition of connection The MAC address of the other computer to which you are connected is displayed when the connection is successful If you are connected to more than one computer the computer that has the best connectivity is...

Страница 59: ...PRISM Wireless LAN PCI Card in the list and click Properties from the menu that is displayed Wireless Network Connection 2 Properties appears 5 Click the Wireless Networks tab The Wireless Networks tab appears 6 Perform the following steps Make sure that Use Windows to configure my wireless network settings is checked Click Add under Preferred networks Wireless Network Properties appears 7 Set par...

Страница 60: ...is when using hexadecimal characters for the Network Key Use this if there is a wireless LAN card in the network that has the Network Key set to a character code In Network Key input the same value as the other wireless LAN card Table 12 Setting parameters 8 When you finish your entry click OK Wireless Network Connection 2 Properties appears again 9 Make sure the network name you specified for the...

Страница 61: ...ault gateway follow the network administrator s instructions if any Table 13 Setting an IP address 5 Click OK Checking the Full Computer Name and Workgroup 1 Click Start Control Panel Make sure the Classic View is selected 2 Double click the System icon System Properties appears 3 Click the Computer Name tab 4 Check Full computer name and Workgroup Ask your network administrator and check the sett...

Страница 62: ... files or a printer with other computers on the network When you share a drive folder or printer you can use these from any computer on the network Setting File and Printer Sharing for Microsoft Networks 1 Click Start Control Panel Make sure the Classic View is selected 2 Double click the Network Connection icon Make sure that it is checked If it is not checked check it and click OK You do not hav...

Страница 63: ...e menu that appears The properties of the printer to be shared will be displayed Set printer sharing On the display the printer sharing setting is recommended by the Network SetupWizard but for the wireless LAN network security is maintained by network name SSID or network key The following steps allow you to set up printer sharing without using the Network Setup Wizard 2 Click OK If you understan...

Страница 64: ...appears 3 Check the connectivity on the Link tab The current condition of connection is displayed Item State Current Channel Current Tx Rate Radio Off Radio On Rescan Throughput Bytes sec Link Quality Signal Strength Description Shows the current condition of connection The MAC address of the other computer that you are connected to is displayed when the connection is successfully made If you are ...

Страница 65: ... or the IP address is not set correctly Possible Solution Restart the computer Restart the computer Make sure that you enter user name and password and click OK when starting Windows If you forget your password enter another user name A new user name and password is registered in the computer Check the setting for the protocol workgroup and sharing To check this you need a different procedure depe...

Страница 66: ...following to check the IP address 1 Windows 2000 Click Start Programs Accessories Command Prompt Windows XP Click Start All Programs Accessories Command Prompt 2 Enter IPCONFIG command and press Enter If your hard disk is C drive enter C ipconfig Check that the IP address is correctly displayed under the IP Address Example IP address 10 0 1 3 Subnet Mask 255 255 255 0 Default Gateway 10 0 1 1 Shor...

Страница 67: ...IP address for your system will be contained in the file 4 To check that your IP address is functioning properly go back to the DOS prompt and type ping IP address then press Enter You will receive several replies followed by the PING statistics similar to below 5 To check that your system is communicating with other systems go to the DOS prompt and type ping XXX XXX XXX XXX With the destination I...

Страница 68: ...puter icon on the desktop and then click Properties from the menu that appears System Properties appears 2 Click the Hardware tab 3 Click Device Manager The Device Manager window appears 4 Click beside Network adapters 5 Right click Intersil PRISM Wireless LAN PCI Card and click Uninstall from the menu that is displayed Confirm Device Removal appears 6 Click OK 7 Close System Properties 8 Make sur...

Страница 69: ...LAN PCI Card and click Uninstall from the menu that is displayed Confirm Device Removal appears 6 Click OK 7 Close System Properties 8 Make sure that the icon has disappeared from the task tray in the lower right corner of the screen 9 Click Start Control Panel Control Panel appears 10 Double click Add Remove Programs Add Remove Programs appears 11 Perform the following steps Click PRISM 11Mbps Wi...

Страница 70: ...twork administrator to check the IP address to be set for the computer If no access point is found in the network An IP address is expressed with four values in the range between 1 and 255 Set the each computer as follows The value in parentheses is a subnet mask Example Computer A 192 168 100 2 255 255 255 0 Computer B 192 168 100 3 255 255 255 0 Computer C 192 168 100 4 255 255 255 0 Computer X ...

Страница 71: ...ansfer Rate 11 5 5 2 1Mbps auto change Frequency Range 2 400 2 483 MHz Channels One of 13 channels is used Card Type Non intelligent VCC Class B Security Network name encryption key Supported Operating Systems Windows 2000 Windows XP Power Current Max 350mA Maximum number of units recommended 10 or less for wireless LAN AdHoc network ...

Страница 72: ... cable in any port other than the modem port Plugging in a modular cable 1 Plug the supplied modular cable in the modem port on the left hand side of your computer Insert the connector until it clicks into place 2 Unplug the telephone s modular cable from the phone jack on the wall Your computer or situation may not look exactly like this illustration Pull out the cable while holding down the stop...

Страница 73: ... So do not forget to plug it again after using the built in modem If you run the modular cable close to a household electrical appliance or tie it in a bundle a communications error could occur If the supplied modular cable is too short to connect your computer to the phone jack on the wall use a commercially available modular cable instead Note that the use of a long modular cable could result in...

Страница 74: ...end mode the security system requires you to enter a password code using the buttons on the Security Application Panel After entering a correct password your LifeBook resumes system operation Refer diagram above LifeBook Security Application Panel Setting up your LifeBook Security Panel Numbered Buttons Use these buttons to enter your password Refer diagram above Enter Button After entering the bu...

Страница 75: ...on strokes using more than one button 2 3 1 enter 4 enter 1 3 2 3 4 1 4 2 enter Setting Passwords When shipped from the factory no passwords are set You have a choice of having no password or setting a supervisor and user password You must set the supervisor password before the user password Critical Points The purpose of supervisor password is to be able to bypass the user password in case the us...

Страница 76: ... Indicator flashes enter the password and press Enter button The LifeBook should resume normal operation Incorrect Password Entry If an invalid supervisor or user password is entered three times in succession the system will beep for about one minute If a valid password is entered within a minute while system beeps the beeping will stop and the LifeBook will resume normal operation If no or an inv...

Страница 77: ... application Uninstall the security panel application software This will disable all security feature Uninstall the security panel application with password still active This will not allow any changes to the password Uninstalling the Security Panel Application Software Remove passwords when User wants no password protection whatsoever and doesn t want to give anybody the utility to set a password...

Страница 78: ...will appear Follow the instructions on the screen Supervisor and user passwords can be set by the Windows Software which are FJSECS EXE and FJSECU EXE respectively FJSECU EXE for user password cannot run without supervisor password First you need to run FJSECS EXE to set supervisor password before setting user password Follow instructions under Setting Passwords The LifeBook Security Panel is desi...

Страница 79: ...ation Panel is very flexible giving you a variety of options To set up the Panel to best suit your needs we have provided the Application Panel Setup utility that quickly and easily helps you make the most of this valuable feature To configure your LifeBook Application Panel with Application Panel Setup 1 Click on Start 2 Click on Control Panel 3 Click on Application Panel ...

Страница 80: ...Internet browser box 2 Click on Browse from Start Menu 3 Scroll down the list of applications and the click on the application you wish to launch with this button 4 Click OK Critical Points The tabs in Application Panel Setup may not be in the same order as the buttons on your LifeBook notebook Please carefully select the tab you wish to change Label Button Function Default Application 1 Applicati...

Страница 81: ...ion Panel Setup click on OK and the new settings will take effect You can reconfigure your LifeBook Application Panel as often as you like Critical Points The Internet or E mail buttons can be configured to launch any application you wish not just an Internet browser or e mail program Enabling disabling Application Launcher button Select Models Only At the bottom of each application setup page are...

Страница 82: ... Server with no Security Password Authentication Contact your service provider to determine if they support POP3 without Security Password Authentication Connection To configure the E mail Account Settings 1 Click on Start 2 Click on Control Panel 3 Click on Application Panel 4 Click on the E Mail tab 5 Click on E Mail Account Settings 6 The E Mail Setup screen appears Choose the type of connectio...

Страница 83: ...information you entered in the Dial Up configuration After all the information has been entered test the connection by clicking on Testing connection with current setting If an error occurs check the settings and information on Dial Up Network and E mail LED notification After the setup Dial Up Networking E mail is completed you are ready to retrieve mail When you press the E mail button your syst...

Страница 84: ... day and time for checking new mail Only applicable when the PC stays Standby To configure Mail Check Interval This function allow you to specify an interval minutes for checking for a new mail during you use the computer Recommendation of this function use with LAN connection ...

Страница 85: ...on the Address List You have to specify from the Mail Check Interval to check the check box of Periodically check for New Mail from the menu Mail Check Interval There is an icon like envelop appear on the taskbar When you received the email from the special recipients that you configure ...

Страница 86: ...ook Application icon s color on the taskbar and beeps each time you receive a new message To configure Important Mail Only applicable for CoolView Panel model This function allow you to change the icon color on the taskbar to notifies you that an important mail comes ...

Страница 87: ...Player will automatically start over at the beginning as soon as it finishes the last track By default the Eject Button is disable from the CD Player Options Once you click the Eject button from the CD Player the drive will not eject If you want the Eject Button to be function uncheck this options Desktop Control Panel Your LifeBook notebook includes a CD Player control panel You may use this pane...

Страница 88: ... Disc Player the Disc Player may fail to play the first audio track The Volume Up Volume Down and Mute controls for the Disc Player desktop control panel ad justs the volume of the CD audio line only It does not adjust your notebook s master software volume control or the manual volume on the LifeBook notebook The Disc Player desktop control panel is designed to be displayed in High Color 16 bit o...

Страница 89: ...This section explains installation of options for this computer SECTION SECTION SECTION SECTION SECTION SECTION SECTION SECTION SECTION SECTION 2 2 2 2 2 2 2 2 2 2 SECTION 2 ...

Страница 90: ...ptions USB devices Supported byWindows XP Windows 2000 Windows 98 and Windows Me only Printer External display Mouse Numerical keypad FDD unit USB USB mouse Battery PC card Combo drive unit DVD CD R RW CD R RW drive unit Memory PC Card Slot unit Optional 2nd Battery Optional Weight Saver unit Optional ...

Страница 91: ...genuine products Use genuine optional device from our company We cannot guarantee proper function on this PC for the peripherals from other sources When it is necessary to use the peripheral from the other source consult with the manufacturer of the product Use the peripherals that conform to ACPI standard This PC is set to ACPI mode for Windows XP and Windows 2000 Power save and other functions m...

Страница 92: ...ards in high temperature locations and locations subject to direct sunlight Do not subject PC cards to strong shocks Avoid rubbing PC cards and building up static electricity Do not place heavy objects on top of PC cards Be careful to avoid spilling coffee and other liquids on PC cards When storing a PC card always place it in its special case ...

Страница 93: ...cards Your computer supports PC Card Standard compliantType I andType II PC cards which include for example the following Adopter card This type of PC card is needed to insert a smart media designed for digital cameras into your PC card slot to capture images into your computer SCSI Card This type of PC card is needed to connect a storage device such as an SCSI compliant hard disk or MO magneto op...

Страница 94: ... manual To install a driver you might need a CD or floppy disk that contains it 3 Click remove hardware safely in the notification area in the bottom right corner of the screen to make sure that the name of the PC card inserted is displayed correctly If the name of the PC card inserted is displayed the PC card is installed properly Click a blank area on your desktop to close the window If not the ...

Страница 95: ...n removing a PC card be careful not to put your finger into the PC card slot otherwise you could injure your finger 1 Click remove hardware safely in the notification area in the bottom right corner of the screen Critical Points Do not remove a PC card by performing these steps double click remove hardware safely in the notification area in the bottom right corner of the screen and click Stop in t...

Страница 96: ...button The PC card eject button springs out 4 Remove the PC card Press the PC card eject button again and pull out the PC card that came out a little Your computer or situation may not look exactly like this illustration PC card eject button PC card eject lock button PC card ...

Страница 97: ...VD Videos from being played back normally Do not stick any label to a disc or do not write anything on it with a pencil or ballpoint pen Be careful not to spill coffee or any other liquid on a disc When a disc is dirty or wet wipe it outward from the center with a slightly moistened cloth and then with a dry cloth Do not dry it with a hairdryer or do not let it dry itself Do not use benzene thinne...

Страница 98: ...s CD DVDs of irregular form could prevent your CD DVD drive from reading or writing data correctly or could result in damage to your drive Some copy protected audio CDs may not be played back on your CD DVD drive Dropouts may occur during the playback of an audio CD If they occur follow the steps below to switch to analog play mode Note that in analog play mode no audio files can be recorded direc...

Страница 99: ...D Videos with a region code other than 3 by default may not be played back on your CD DVD drive Some DVDs are protected from unauthorized copying For copyright protection your computer has descramble and authentication functions So if attempt is made to play an audio or video file copied from a copy protected disc an authentication error will occur to stop if from being played back Inserting a dis...

Страница 100: ...omputer is turned off turn it on and then press the CD eject button You can press the eject button at any time even when the on the operating status indicator LED blinks 3 Place a disc on the tray while holding the tray with a hand Fit the hole in the disc on the stopper at the center of the tray with the title printed face up and push it down until it clicks into place Failure to do so may make i...

Страница 101: ...ick OK Multi session discs may take a little longer to start than other types of discs When you insert an audio CD while Windows is running Windows CD Player may automatically start and play the CD You can use either CD Player or the one touch buttons to control the playback of the CD Removing a disc 1 Exit all programs started from the disc if any 2 Press the CD eject button The tray springs out ...

Страница 102: ...ress the CD eject button You can press the eject button at any time even when on the operating status indicator LED blinks 4 Remove the disk while holding the tray with a hand Lift the edge of the disc while pressing down the stopper at the center of the tray At that time be careful not to hit the disc against the computer main unit 5 Push the tray gently into the drive Tray Tray Stopper ...

Страница 103: ...Drives with Removable Storage area 3 Click Eject The tray springs out abit 4 Pull out the tray gently and remove the disc If this does not work well perform these steps 1 Turn off your computer 2 Insert a straightened paperclip into the pinhole by the side of the CD eject button The tray springs out 3 Pull out the tray gently and remove the disc CD eject button ...

Страница 104: ...uter To avoid damage to screw heads use a screwdriver appropriate to the size of the screws M2 5 Critical Points Table of combinations of memory The table below shows combinations of memory that can be installed on your computer The installation of any combination of memory other than the combinations shown below can impair the functioning of your computer Model with 256MB as standard memory Total...

Страница 105: ...stall memory perform these steps WARNING ELECTRIC SHOCK When installing or removing memory be sure to turn off your computer and disconnect the AC adapter from it to avoid shock hazards SUFFOCATION Keep small objects such as a cover caps and screws out of the reach of babies and children to avoid the danger of suffocation In case a baby or child has swallowed such an object consult the doctor imme...

Страница 106: ...efore touching memory always touch an appropriate metal object to discharge static from your body When installing or removing memory be sure to turn off your computer If you install or remove memory with the computer placed in standby or hibernation mode data not saved could be lost or the computer or memory could be broken Critical Points To avoid damage do not to touch internal components unnece...

Страница 107: ... step 3 Checking the memory capacity IMPORTANT In case memory is not installed properly the error message Expansion memory error or another message will be displayed in English when you first turn on the computer after installing the memory If such a message appears press the power button to shut down the computer and reinstall the memory 1 Turn on the computer 2 Click the Start button and select ...

Страница 108: ...l Points If the numeric value displayed does not agree with the memory capacity of your computer check to see if the memory is installed properly Changing memory The memory installed on your computer can be replaced with a larger size of memory 1 Turn off your computer and disconnect the AC adapter from it 2 Close the LCD panel and place the computer upside down 3 Remove the screws two securing th...

Страница 109: ...mory module Insert the memory diagonally into the slot with the notch in the memory aligned with the projection on the connector and then turn the memory down until it clicks into place 6 Attach the expansion RAM module slot cover Attach the cover removed in step 3 Critical Points After you have changed memory check the memory capacity of you computer to be sure that the memory is installed proper...

Страница 110: ...sed to direct sunlight Do not keep mobile multi purpose bay units in a shock or vibration prone place Do not use mobile multi purpose bay units in a damp or dusty environment Never use a mobile multi purpose bay unit if a foreign object such liquid or metal chips has gotten in it If a foreign object has gotten into your multi purpose bay unit consult Fujitsu Customer Support Center or your retaile...

Страница 111: ...urned off perform only step 4 When your computer is in standby or hibernation mode perform all the steps below starting from step 1 To remove one of the following units without shutting down your computer perform all the steps below starting from step 1 Critical Point Before removing the add on battery unit without shutting down your computer make sure that the internal battery pack is charged eno...

Страница 112: ...on area where a clock is displayed 3 Select the device you want to unplug or eject and then click Stop XXX refers to the name of the mobile multi bay unit currently in use 4 Remove the unit 1 Raise the mobile multi bay unit release lever and 2 Safely pull out the DVD CD RW drive 1 2 Bay unit release lever Your computer or situation may not look exactly like this illustration ...

Страница 113: ...s far as it will go with its connector side facing to the back of the bay 3 After that press the Sus Res button to wake up the system now you can use the new device Critical Point The icon of the unit in the multi purpose bay may disappear from the My Computer window immediately after changing the drive However it reappears in a while notifying you that the drive is ready for use IMPORTANT Do not ...

Страница 114: ...er Scanner Keyboard Used to connect a USB device to your computer Some USB devices come standard with a cable as separate part and others come with a cable already connected like a mouse For more information refer to the documentation supplied with the your USB device Some USB devices come with a CD or floppy disk containing their respective drivers If necessary install a Windows compatible driver...

Страница 115: ...face marked with up 3 Install the driver Some USB devices require no driver to be installed For information about this refer to the documentation supplied with your USB device Critical Points If the Install Hardware dialog box appears when you connect the USB cable click Continue to continue the installation of the driver USB port Your computer or situation may not look exactly like this illustrat...

Страница 116: ...a USB mouse enables you to use two pointing devices at the same time USB mouse and Flat Point However if you want to use only the mouse follow these steps to disable Flat Point 1 Press the key while holding down the key Each time you press the key Flat Point is switched back and force between on and off The message Internet pointing device Enable is displayed when Flat Point is enabled while the m...

Страница 117: ... Point again press the key again while holding down the Fn key Flat Point can be enabled or disabled only when Manual ssis selected under Internal pointing device of the Keyboard Mouse Setup dialog box which is an Advanced menu item of BIOS Setup If Manual is not selected click it to select it If you want to keep Flat Point disabled start BIOS Setup select Keyboard Mouse Setup from the Advanced me...

Страница 118: ...r cable in the external monitor port on the back of the computer External monitor Monitor cable Instruction manual for your external monitor Your computer supports PC AT compatible and DOS V compatible monitors Used to connect an external monitor to your computer Most external monitors come with this cable as a separate part for some monitors and already connected for others If this cable is not i...

Страница 119: ... Connect the AC adapter to your computer and turn on the computer After that switch from the LCD monitor to the external CRT monitor if you like If the Add New Hardware Wizard appears after you have connected the external display perform these steps Some external monitors come with a CD or floppy disk containing files necessary for using them If a CD or floppy disk is included with your monitor in...

Страница 120: ...to do when trouble occurs with this computer and when messages are displayed Read this section as the necessity arises SECTION SECTION SECTION SECTION SECTION SECTION SECTION SECTION SECTION SECTION 3 3 3 3 3 3 3 3 3 3 SECTION 3 ...

Страница 121: ...on then the battery is running low LOW BATTERY Connect the AC adaptor When using the computer for the first time after leaving it unused for a long time connect the AC adaptor and switch on the main switch to switch on the power Nothing displayed on the LCD panel Checkpoint Is displayed on the LCD panel Is anything displayed on the status indicator LCD Cause and Solution Displayed Adjust the brigh...

Страница 122: ...charged Checkpoint Is the AC adaptor con nected Is the battery overheated The on the LCD display flashes Is the computer too cold The on the LCD display flashes Was the charging stopped midway Cause and Solution Check that the AC adaptor is correctly plugged into the power socket and into the computer If the ambient temperature is high and the battery temperature becomes too high during use the ba...

Страница 123: ...et to Not Installed in the BIOS setup Is Diskette access set to Supervisor only in the BIOS setup Is the floppy disk write inhibited Does it work with a different floppy disk Cause and Solution Insert the floppy disk with its label facing up into the drive shutter and keep inserting firmly until you hear a clicking sound New floppy disks can not be used until they are formatted initialized Format ...

Страница 124: ...ll does not solve the problem then double click the task bar sound indicator and adjust the volume LCD panel does not close Checkpoint Is something caught in the LCD display panel Cause and Solution Forcing the LCD display panel closed can damage it Check for something caught in the LCD display panel Also a metal object such as a paper clip can cause a breakdown if it gets caught in between the ke...

Страница 125: ...t be ejected from the CD ROM Checkpoint Is it in operating mode Cause and Solution The CD can only be ejected when the personal computer main unit is in operating mode because its CD ROM drive has an electronic lock Check that the personal computer main unit is in operating mode and press the EJECT button If for some reason the CD tray does not come out even when you press the EJECT button insert ...

Страница 126: ... or longer if needed 4 If your notebook will not boot after it has dried out call your support representative Do not use your LifeBook notebook in a wet environment near a bathtub swimming pool Always use the AC adapter and batteries that are approved for your notebook Avoid exposure to sand dust and other environmental hazards Do not expose your LifeBook notebook to direct sunlight for long perio...

Страница 127: ... you travel If you experience system software problems while travelling you may need it to correct any problems Never put your LifeBook notebook through a metal detector Have your notebook hand inspected by security personnel You can however put your LifeBook notebook through a properly tuned X ray machine To avoid problems place your notebook close to the entrance of the machine and remove it as ...

Страница 128: ... in hot locations for more than a day or two Intense heat can shorten battery life Do not leave a battery in storage for longer than 6 months without recharging it Increasing Battery Life Power your LifeBook notebook through the AC or optional auto airline adapater whenever possible If your LifeBook notebook is running on battery power all day connect it to the AC adapater overnight to recharge th...

Страница 129: ...W CDs DVD CD RW CDs are precision devices and will function reliably if given reasonable care Always store your DVD CD RW CDs in its case when it is not in use Always handle DVD CD RW CDs by the edges and avoid touching the surface Avoid storing any DVD CD RW CDs in extreme temperatures Do not bend DVD CD RW CDs or set heavy objects on them Do not spill liquids on DVD CD RW CDs Do not scratch DVD ...

Страница 130: ...ields Avoid using or storing the drive where it will be subjected to shock or vibration Do not disassemble or dismantle the DVD CD RW D ROM drive PC CARDS Caring for your PC Cards PC Cards are durable but you must treat them with care The documentation supplied with your PC Card will provide specific information but you should pay attention to the following points To keep out dust and dirt store P...

Страница 131: ...m an automobile cigarette lighter or aircraft DC power outlet to the DC voltage needed to power your notebook BIOS Basic Input Output System A program and set of default parameters stored in ROM which tests and operates your notebook when you turn it on until it loads your installed operating system from disk Information from the BIOS is transferred to the installed operating system to provide it ...

Страница 132: ... technology for manufacturing random access memory which requies very low level power to operate COMM Port Abbreviation for communication port This is your serial interface connection Command An instruction which you give your operating system Example run a particular application or format a floppy disk Configuration The combination of hardware and software that make up your system and how it is a...

Страница 133: ...he communication such as IP address The sender of IP address is called a DHCP server and the receiver is called a DHCP client DNS Domain Name System A function to control the association between the IP address and the name assigned to the computer If you do not know the IP address but if you know the computer name you can still communicate to that computer Data The information a system stores and ...

Страница 134: ...ronic Engineers promotes standardization of LAN and its standards committee IEEE 802 11 has promoted 1 Mbps and 2 Mbps wireless LAN Currently another standards committee IEEE 802 11b is working for standardization of the faster 11 Mbps wireless Lan Infrastructure A name of a wireless LAN configuration This type of communication uses an access point Another type of communication is called AdHoc IP ...

Страница 135: ...nection of computers within a relatively limited area such as the same floor or the same building LAN Local Area Network An interconnection of computers and peripherals within a single limited geographic location which can pass programs and data amongst themselves LCD Liquid Crystal Display A type of display which makes images by controlling the orientation of crystals in a crystalline liquid Lith...

Страница 136: ... is too large MB Megabyte Megahertz 1 000 000 cycles per second Memory A repository for data and applications which is readily accessible to your notebook CPU MHz Megahertz MIDI Musical Instrument Digital Interface A standard communication protocol for exchange of information between computers and sound producers such as synthesizers Modem A contraction for MOdulator DEModulator The equipment whic...

Страница 137: ...ter Memory Card International Association The Personal Computer Memory Card International Association is an organization that sets standards for add in cards for personal computers Peripheral Device A piece or equipment which performs a specific function associated with but not integral to a computer Examples a printer a mode a CD ROM Pitch keyboard The distance between the centers of the letter k...

Страница 138: ...pension states ROM Read Only Memory A form of memory in which information is stored by physically altering the material Data stored in this way can not be changed by your notebook and does not require power to maintain it SSID Service Set Identifier Specifies which network you are joining Some systems allow you to specify any SSID as an option so you can join any network SDRAM Synchronous Dynamic ...

Страница 139: ...hardware On your notebook this is an LCD screen just above the keyboard Stereo audio A system using two channels to process sound from two different sources Stroke keyboard The amount of travel of a key when it is pressed from resting to fully depressed Suspend To make inoperative for a period of time Your notebook uses various suspension states to reduce power consumption and prolong the charge o...

Страница 140: ...te at www wirelessethernet com WFM Wired for Management is Intel s broad based initiative to reduce the total cost of ownership TCO of business computing without sacrificing power and flexibility Write Protect Prevent alteration of the binary state of all bits in a storage media Example all information on a device such as a floppy diskette a block of space in a storage media such as partition of a...

Отзывы: