51
5. Inspection
FinePix F601 Zoom (U/E/EG) SERVICE MANUAL
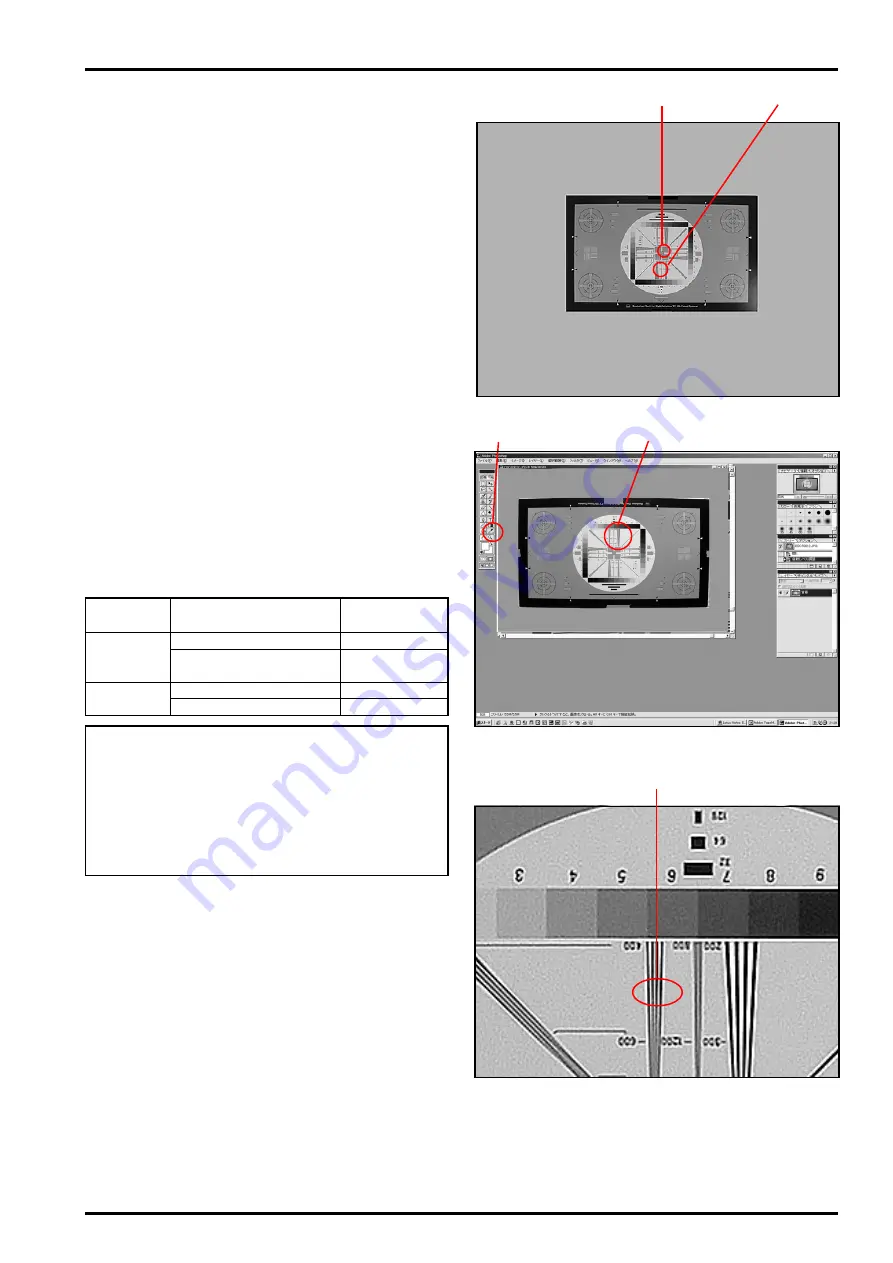
5-4-2. Resolution Check Method
<Step 1>
Load each resolution inspection image into the com-
puter.
<Step 2>
This description uses the Maximum Wide Center
Resolution Check Image. Check the other images in
the same way.
<Step 3>
* Enlarging the [Maximum Wide Center Resolution
Check Image (Fig.J-(2))]
(1) Open the image in Photoshop 5.0.
(2) Displays as in Fig.N (display will vary with settings).
(3) Enlarge the portion in Fig.N-(2) to approximately
300% with the zoom tool in Fig.N-(1).
(4) The enlarged view is shown in
[Enlarged Image
(Fig.O)]
.
<Step 4>
A resolution of 500 lines in
[Enlarged Image (Fig.O-
(1))]
is considered normal. Check the resolution of
the other images as noted in the table below.
<Fig.J> Maximum Wide Center Resolution Check Image
(2)
(1)
(1)
(2)
<Fig.N> Enlargement Using Photoshop
<Fig.O> Enlargement to 300%
(1)
(note!)
The resolution values used in this description are
not those for the FinePix F601 (TV resolution), but
are for the high-resolution chart set with the jig.
The values in the table above are therefore for ser-
vice use and are restricted to use in internal com-
pany inspections.
Check location
Center (horizontal/vertical)
Peripheral (horizontal/
vertical)
Center (horizontal/vertical)
Center (horizontal/vertical)
Service reso-
lution value
500
300
300
300
Lens
position
Wide
Tele


