43
4. Adjustment
FinePix F601 Zoom (U/E/EG) SERVICE MANUAL
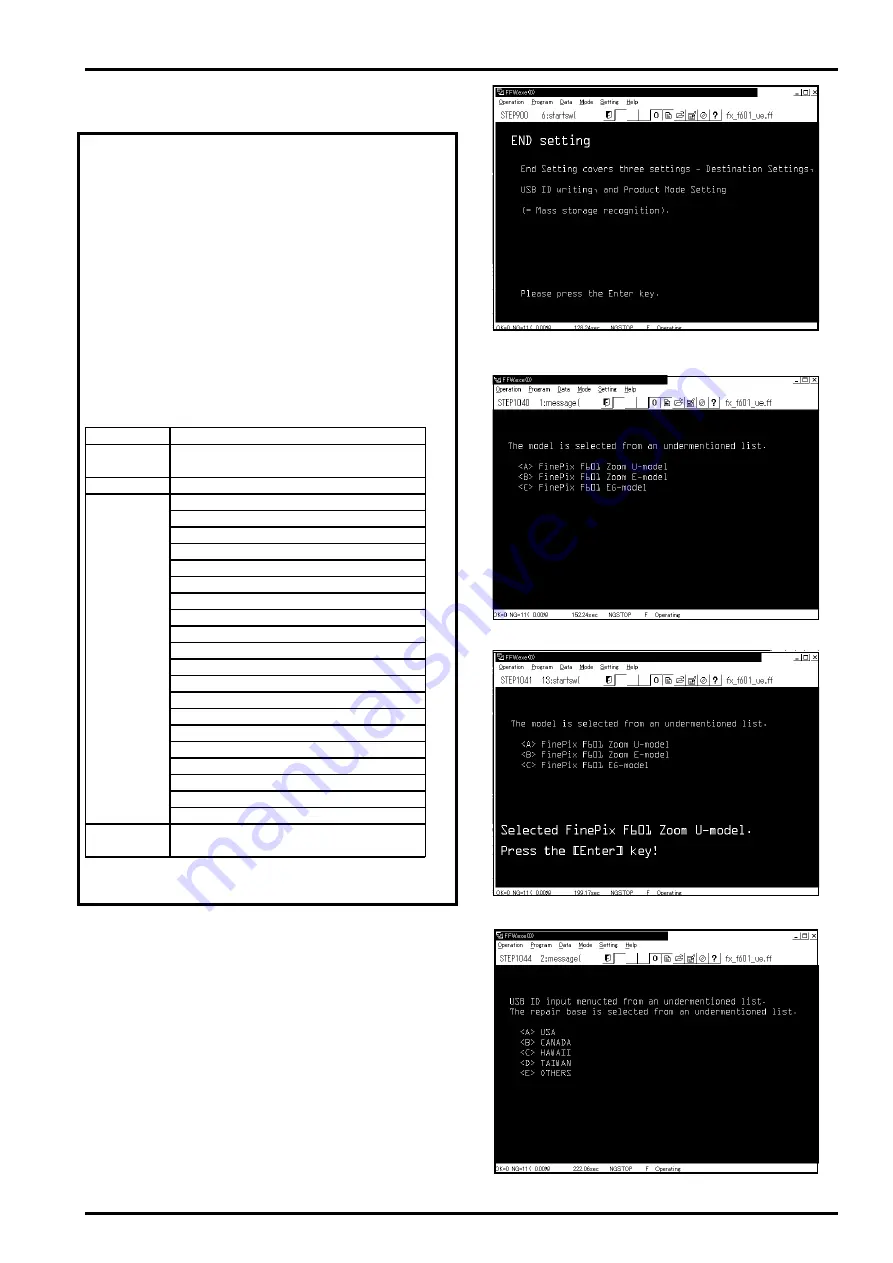
<Fig.34> Destination Settings Screen
<Fig.36> Save USB ID Screen (U.S.A)
<Fig.33> End Setting Start Screen
4-19. [F12]: End Setting
(Destination setting, USB ID write, Product mode setting)
O The End setting consist of the following settings.
* Destination setting
* USB ID write
* Product mode setting (mass storage identification)
O The setting must always be run when the adjustment soft-
ware is terminated. Failure to run Terminal Setting will pre-
vent identification as Mass Storage when the camera is
connected to the PC.
O USB ID write details
1) USB ID write requires that the USB device (in this case
FinePix F601 Zoom) be unique throughout the world.
For this reason, each device has a unique ID as deter-
mined by the USB standard. If multiple devices with the
same USB ID are connected to a single PC, the PC will
be unable to identify each USB device, thus preventing
operation.
2) Automatically written USB IDs are as follows.
Numbers in ( ) indicate decimal numbers. Other numbers
are ASCII numbers.
Item
Details
Repair Date
Date information is acquired from
the PC and written.
Administrator ID
C(43)
Repair
<U_model>
Station
U.S.:61(a)
Canada:62(b)
Hawaii:63(c)
Taiwan:64(d)
Others:65(e)
<E_EG model>
England:66(f)
Germany:67(g)
France:68(h)
Spain:69(i)
Italy:6A(j)
Netherlands:6B(k)
Belgium:6C(l)
Sweden:6D(m)
Switzerland:6E(n)
Norway:6F(o)
Finland:70(p)
Singapore:71(q)
Others:72(r)
Repair
A serial No. is assigned
SerialNo.
automatically and written
<Fig.35> U-MODEL Select Screen
<Step 1>
Select
[F12]
from
[Adjustment Select Screen (Fig.4)]
(ie
press the [F12] key on the computer).
---> The
[End Setting Start Screen (Fig.33)]
is displayed.
<Step 2>
Follow instructions on the [End Setting Start Screen
(Fig.33)], and press the [Enter] key on the computer.
---> The
[Destination Settings Screen (Fig.34)]
is displayed.
* This example uses U-MODEL and U.S.A as the repair site.
<Step 3>
Follow instructions on the [Destination Settings Screen
(Fig.34)], and press the [A] key on the computer.
---> The
[U-MODEL Select Screen (Fig.35)]
is displayed.


