4. Adjustment
44
FinePix F601 Zoom (U/E/EG) SERVICE MANUAL
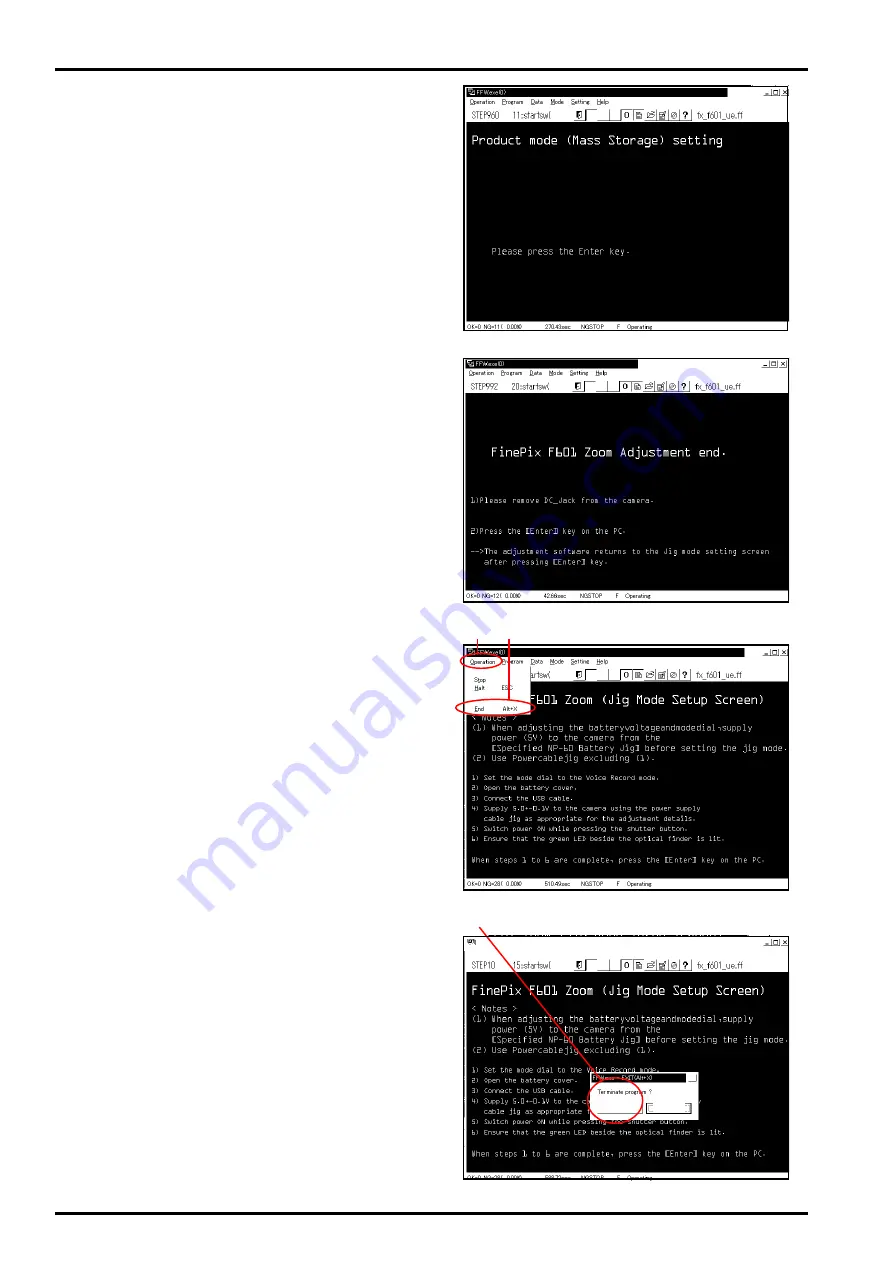
<Fig.38> FinePix F601 Adjustment end Screen
<Fig.39> Adjustment Software Termination Method Screen
<Fig.40> Select Adjustment Software Termination Screen
(1)
(1) (2)
<Fig.37> Product Mode Setting Screen
YES
NO
<Step 4>
Follow instructions on the [U-MODEL Select Screen
(Fig.35)], and press the [Enter] key on the computer.
---> The
[Save USB ID Screen (U.S.A) (Fig.36)]
is displayed.
<Step 5>
Press the [A] key on the computer while in the
[Save USB
ID Screen (U.S.A) (Fig.36)]
.
Because the screen where U.S.A was selected (No fig-
ure) is displayed, press the Enter key on the computer.
---> The
[Product Mode Setting Screen (Fig.37)]
is displayed.
<Step 6>
Press the [Enter] key on the computer while in the [Prod-
uct Mode Setting Screen (Fig.37)].
---> When the settings are completed normally they are
saved to the flash ROM, and the
[FinePix F601 Adjust-
ment end Screen (Fig.38)]
is displayed.
<Step 7>
Follow the instructions on the [FinePix F601 Adjustment
end Screen (Fig.38)].
(1)Remove the DC jack from the camera.
(2)Press the [Enter] key on the computer.
---> The display returns to the
[Jig Mode Setup Screen
(Fig.3)]
after pressing the [Enter] key on the computer.
<Step 8>
When adjustment is complete, select Operation (Fig.39-
(1))
→
End (Fig.39-(2)) on the adjustment software menu
bar in the [Jig Mode Setup Screen (Fig.3)] to terminate
the adjustment software.
---> The [Select Adjustment Software Termination Screen
(Fig.40)] is displayed.
<Step 9>
Press the [Enter] key on the computer while in the [Select
Adjustment Software Termination Screen (Fig.40)], or
click on Yes (Fig.40-(1)) to terminate the adjustment soft-
ware.


