195
Scanning
• For Windows Server 2003
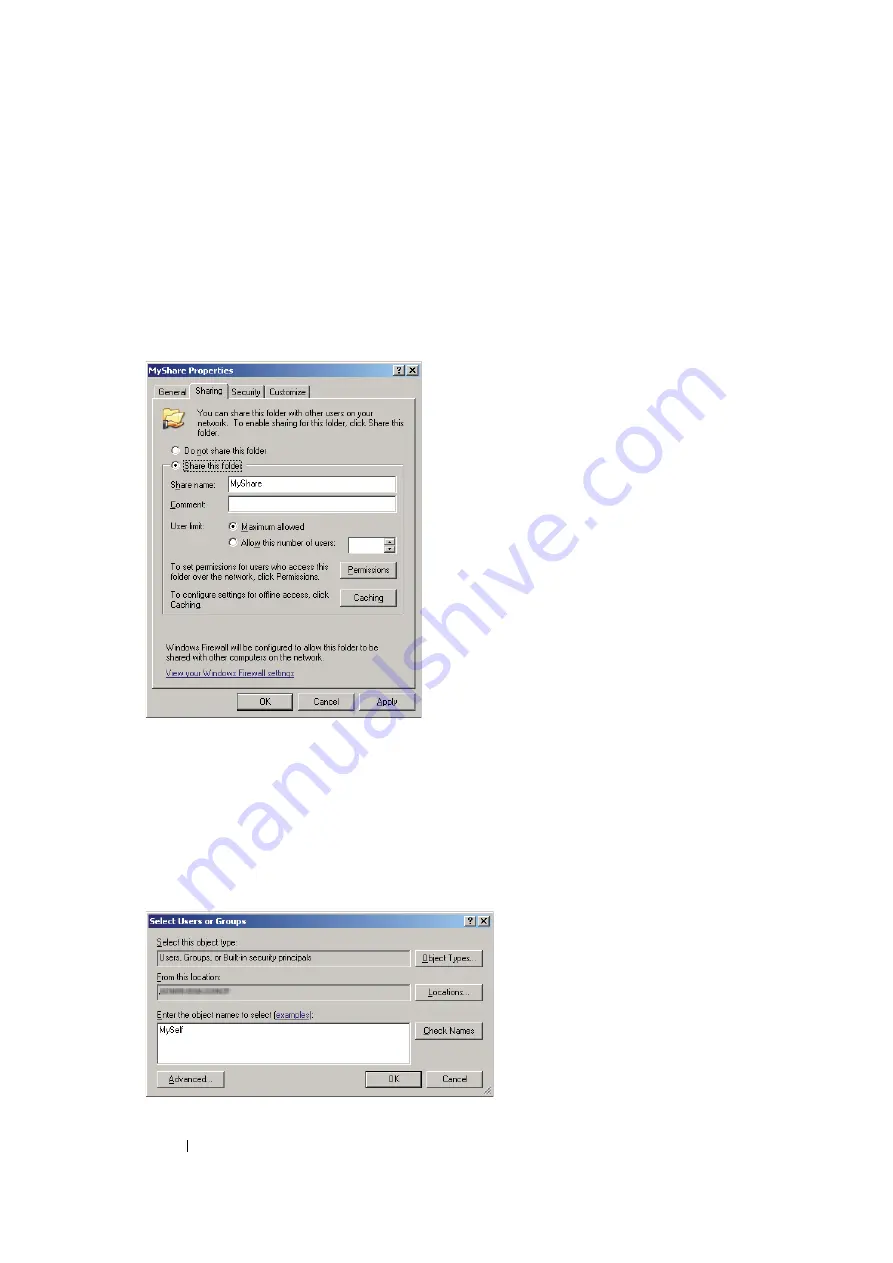
1
Create a folder in the desired directory on your computer (Example of folder name,
MyShare
).
2
Right-click the folder, and then select
Properties
.
3
Click the
Sharing
tab, and then select the
Share this folder
.
4
Enter a shared name in the
Share name
box.
NOTE:
•
Note down the shared name as you need to use this name in the next setting procedure.
5
Click
Permissions
to give write permission for this folder.
6
Click
Add
.
7
Search user login name by clicking
Advanced
, or enter the user login name in the
Enter the
object names to select
box and click
Check Names
to confirm (Example of user login name,
MySelf
).
NOTE:
•
Do not use
Everyone
as the user login name.
Содержание DocuPrint M105 ab
Страница 9: ...8...
Страница 13: ...Using This Guide 12 Using This Guide This section includes Organization on page 13 Conventions on page 14...
Страница 39: ...Specifications 38...
Страница 55: ...Basic Operation 54...
Страница 67: ...Printer Management Software 66...
Страница 180: ...179 Scanning See also Express Scan Manager on page 64...
Страница 207: ...Scanning 206 After you configured settings go to Sending the Scanned File to the Network on page 207...
Страница 277: ...Faxing DocuPrint M105 f Only 276...
Страница 323: ...Using the Operator Panel Menus and Keypad 322...
Страница 331: ...Troubleshooting 330...
Страница 381: ...Troubleshooting 380...
Страница 385: ...Maintenance 384 5 Close the document cover...
Страница 390: ...389 Maintenance 6 Place the toner cartridge slowly on the sheets of paper spread in step 3...
Страница 411: ...Contacting Fuji Xerox 410...


