


3.3 Configuring Scan Settings
167
Scanning With
Mailbox
3
Procedure
1
Load the document to be scanned.
“2.2 Loading Documents” (P. 147) for details on loading documents.
2
Display the Basic Scanning screen.
3
Select the mailbox for saving the scanned data.
“3.1 How to Scan” (P. 154) for details on selecting the mailbox.
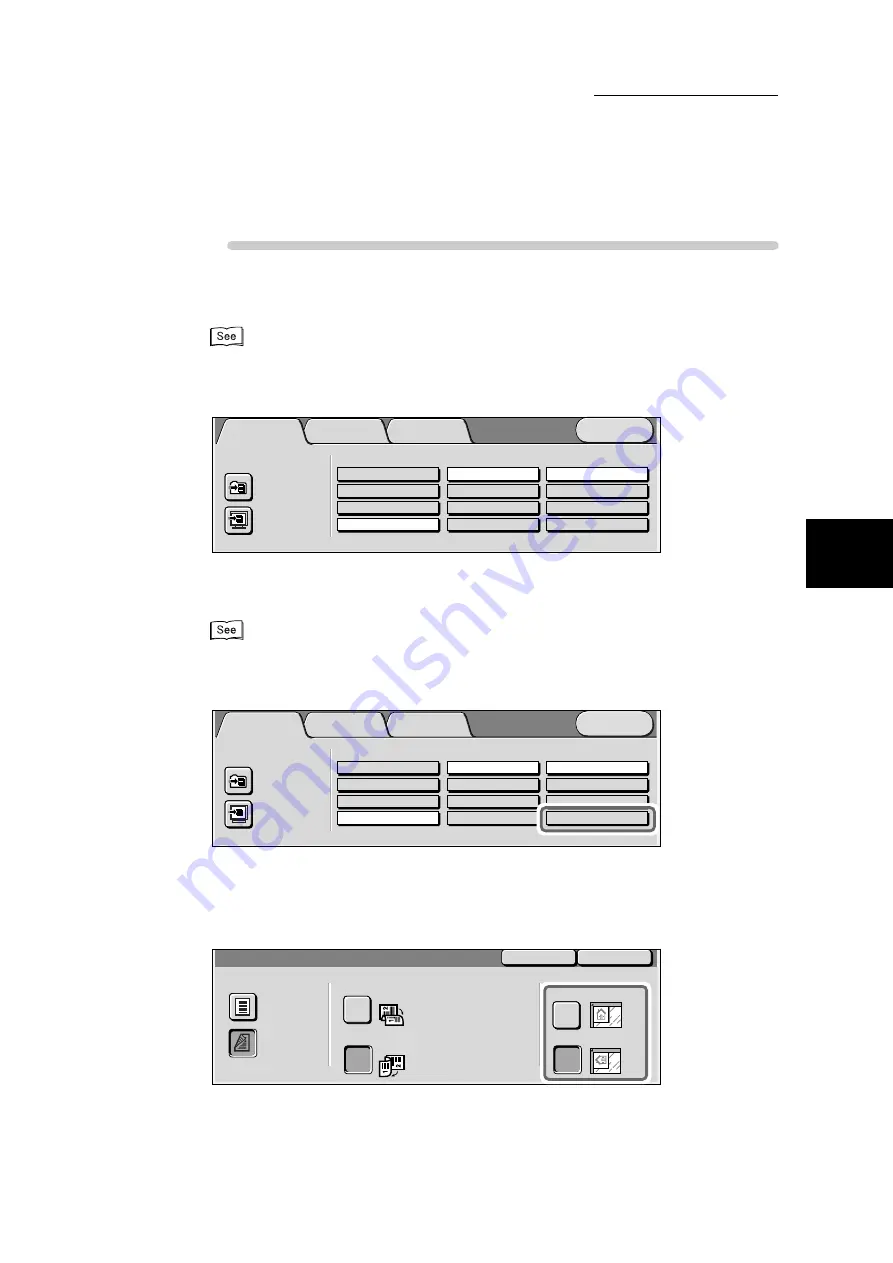
4
Select
More…
from 2 Sided Originals on the Basic Scanning screen.
The 2 Sided Originals screen is displayed.
5
Based on the orientation of the document loaded, select either Head to
Top or Head to Left from Original Orientation.
Scan Options
Basic Scanning
Image Quality/
File Format
Menu
Mailbox...
Job Template...
Scan to:
Output Color
Auto
200dpi
300dpi
400dpi
600dpi
Grayscale
Black
Full Color
1 Sided
2 Sided (H to H)
2 Sided (H to T)
More...
Scan Resolution
2 Sided Originals
Scan Options
Basic Scanning
Image Quality/
File Format
Menu
Mailbox...
Job Template...
Scan to:
Output Color
Auto
200dpi
300dpi
400dpi
600dpi
Grayscale
Black
Full Color
1 Sided
2 Sided (H to H)
2 Sided (H to T)
More...
Scan Resolution
2 Sided Originals
1 Sided
2 Sided
Originals
Head to Head
Head to Toe
Original Orientation
Head to Top
Head to Left
2 Sided Originals
Save
Cancel
Содержание DocumentCentre C240 Series
Страница 16: ...Part 1 Printer ...
Страница 116: ...4 10 File Upload Printing 103 4 Special Printing 5 Click Start to start printing ...
Страница 127: ...Part 2 Scanner ...
Страница 238: ...Part 3 Appendix ...


