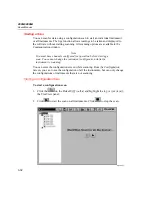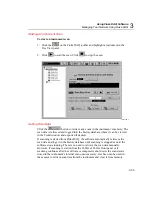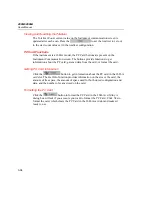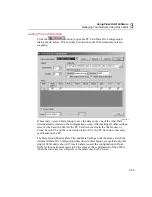
background image


Using Fluke DAQ Software


Managing Your Network Using Fluke DAQ


3


3-23 

Note 

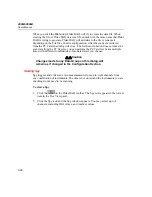
For the NetDAQ 2640A and 2645A, the totalizer debounce check box 

is set on the Instrument Configuration dialog. Totalizer start count 

and direction are not available on the NetDAQ. 

Inserting and Configuring a Channel 

After selecting a module, you need to add channels to the module.  

To insert and configure a Channel 

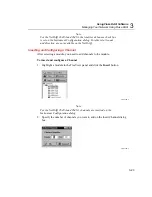
1.


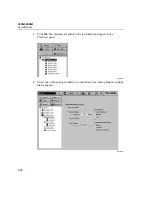
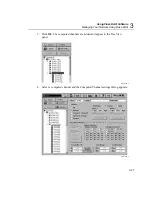
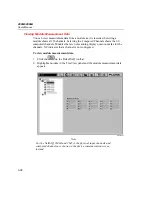
Highlight a module in the TreeView panel and click the 

Insert 

button. 


alg112s.bmp 


Note 

For the NetDAQ 2640A and 2645A, channels are inserted on the 

Instrument Configuration dialog. 

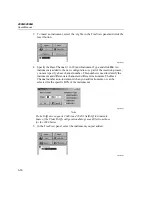
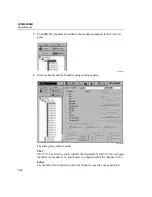
2.


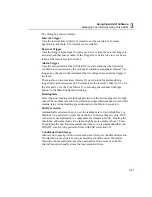
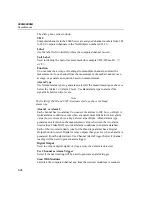
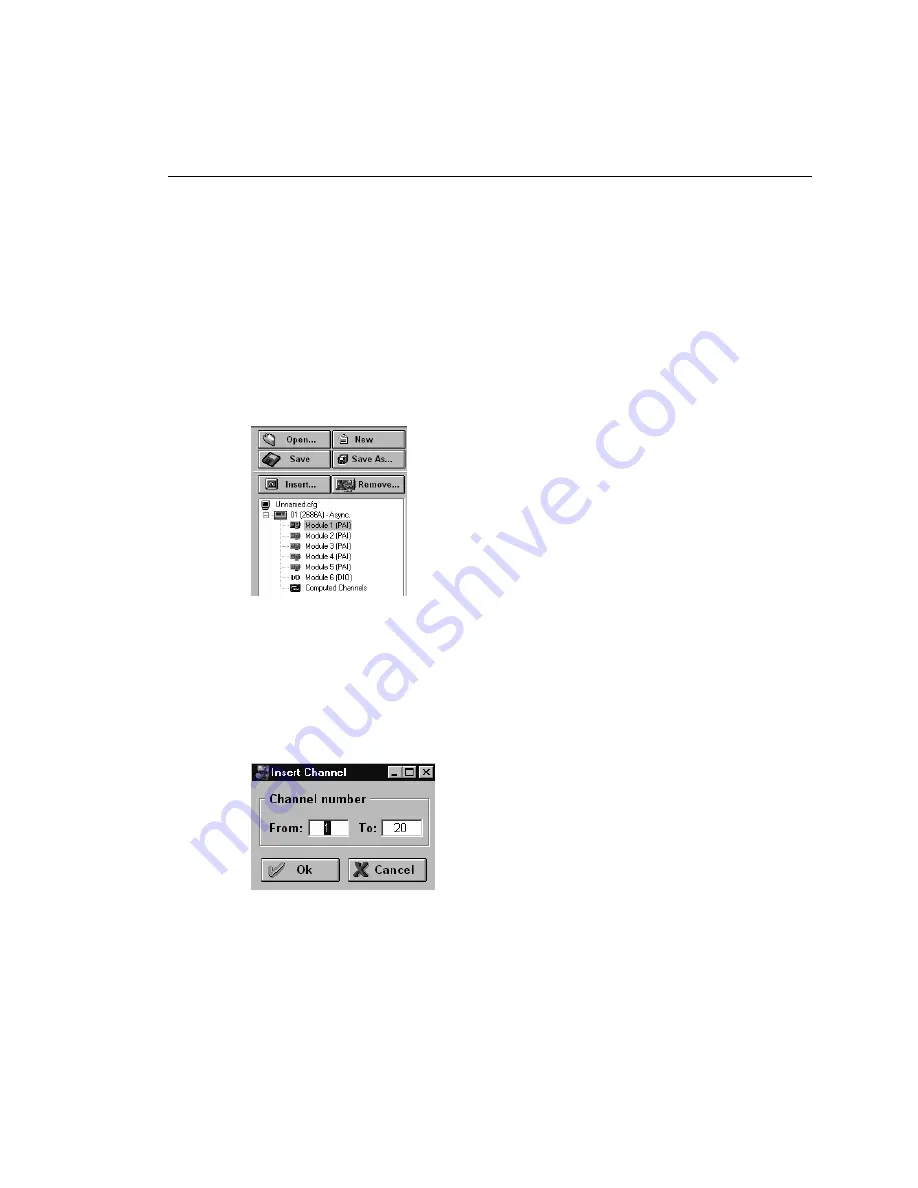
Specify the number of channels you want to add on the Insert Channel dialog 

box. 


alg113s.bmp 

Содержание 2680A

Страница 1: ... 2680A 2686A Data Acquisition System Data Logging System Users Manual June 2002 Rev 1 4 04 2002 2004 Fluke Corporation All rights reserved All product names are trademarks of their respective companies ...

Страница 2: ...e warranty period To obtain warranty service contact your nearest Fluke authorized service center to obtain return authorization information then send the product to that service center with a description of the difficulty postage and insurance prepaid FOB Destination Fluke assumes no risk for damage in transit Following warranty repair the product will be returned to Buyer transportation prepaid ...

Страница 3: ...ed including interference that may cause undesired operation There is no guarantee that interference will not occur in a particular installation If this equipment does cause interference to radio or television reception which can be determined by turning the equipment off and on the user is encouraged to try to correct the interference by one of more of the following measures Reorient the receivin...

Страница 4: ...s are measurements on household appliances portable tools and similar equipment XWWARNING statements identify conditions or practices that could result in personal injury or loss of life XWCAUTION statements identify conditions or practices that could result in damage to equipment SYMBOLS MARKED ON EQUIPMENT X WARNING Risk of electric shock J Ground earth terminal Protective ground earth terminal ...

Страница 5: ...e enclosure must be grounded through the grounding conductor of the power cord or if operated on battery with the power cord unplugged through the rear panel ground binding post USE THE PROPER POWER CORD Use only the power cord and connector appropriate for the voltage and plug configuration in your country Use only a power cord that is in good condition Refer power cord and connector changes to q...

Страница 6: ...impaired If the device appears damaged or operates abnormally protection may be impaired Do not attempt to operate the device under these conditions Refer all question of proper device operation to qualified service personnel Do not attempt to service unless you are a Fluke qualified repair technician To avoid personal injury or death remove the AC power cord and all analog and digital connector m...

Страница 7: ...82 2 EN55022 1 EN55011 class A EN610000 4 2 3 4 6 8 EN61326 Safety EN61010 1 CAT II CSA C22 2 No 1010 1 Operating Temperature Range 20 o C to 60 o C 4 o F to 140 o F Storage Temperature Range 40 o C to 70 o C 40 o F to 158 o F Relative Humidity 90 maximum for 10 o C to 28 o C 14 o F to 82 o F 75 maximum for 28 o C to 35 o C 82 o F to 95 o F 50 maximum for 35 o C to 60 o C 95 o F to 140 o F 3 MΩ ra...

Страница 8: ......

Страница 9: ...rigger 1 9 External Trigger 1 9 Alarms 1 9 Channel Monitoring 1 10 Alarm Trigger 1 10 Channel Numbering 1 10 Computed Channels 1 11 Mx B Scaling 1 11 Analog Channels 1 11 Digital I O Module Option 1 12 Digital I O 1 12 Relay Output 1 12 Totalizer 1 12 User Interface 1 13 Operating a 2680 Series Data Acquisition System 1 14 Isolated Networks 1 14 General Networks 1 14 Ethernet Port 1 14 Group Opera...

Страница 10: ...O Connector Module 2 15 Digital I O 2 16 Totalizer 2 16 Totalizer Enable 2 17 Relays 2 17 Controls and Indicators 2 17 Front Panel Controls 2 17 Front Panel Indicators 2 19 Rear Panel Controls 2 22 Rear Panel Indicators 2 23 Front Panel Operating Procedures 2 24 Power On Options 2 24 Displaying a Monitor Channel 2 25 Displaying the Digital I O Status 2 27 Displaying Relay Status 2 28 Displaying th...

Страница 11: ...Understanding the Workspace Area 3 8 Configuration Dialogs 3 9 Main Configuration Dialog 3 9 Instrument Configuration Dialog 3 9 Module Configuration Dialog 3 10 Analog Channel Configuration Dialog 3 10 DIO Configuration Dialog 3 10 Computed Channel Configuration Dialog 3 10 Communication Dialogs 3 11 Main Communication Dialog 3 11 Instrument Communication and Status Dialog 3 11 Module Communicati...

Страница 12: ...47 Real time Data File Creation 3 53 Main Window Advanced Settings 3 55 Using Fluke DAQ System Security Features 3 56 Configuring Web and Alarm Mail Settings 3 58 4 Maintenance 4 1 Introduction 4 3 Self Test Diagnostics and Error Codes 4 3 Cleaning 4 6 AC Fuse Replacement 4 7 DC Fuse Replacement 4 9 Performance Test 4 9 Configuring the Performance Test Setup 4 9 Initializing the Performance Test S...

Страница 13: ...Relay Fuse Test 4 30 Totalizer Tests 4 31 RS 232 Totalizer Count Test 4 31 RS 232 Totalizer Count and Enable Test 4 31 RS 232 Totalizer Count and Direction Test 4 32 RS 232 Totalizer Count and Debounce Test 4 32 Fluke DAQ Totalizer Count Test 4 33 Fluke DAQ Totalizer Count and Enable Test 4 33 Fluke DAQ Totalizer Count and Direction Test 4 34 Fluke DAQ Totalizer Count and Debounce Test 4 34 Calibr...

Страница 14: ...2680A 2686A Users Manual vi ...

Страница 15: ... to General 2 37 2 12 Reviewing and Setting the General Network Socket Port 2 40 2 13 Reviewing and Setting the General Network IP Address 2 41 2 14 Reviewing and Setting the Subnet Mask and Default Gateway 2 43 2 15 Viewing the Instrument Ethernet Address 2 44 2 16 Identifying Network Problems 2 58 2 17 Ethernet Indicators 2 61 3 2 Configuration Control States 3 29 3 3 File Renaming Example 3 51 ...

Страница 16: ...y Specifications A 17 A 22 FAI Module DC Voltage General Specifications A 18 A 23 FAI Module DC Voltage Resolution and Repeatability Specifications A 19 A 24 FAI Module DC Voltage Accuracy Specifications A 19 A 25 FAI Module AC Voltage General Specifications A 20 A 26 FAI Module AC Voltage Range and Resolution Specifications A 20 A 27 FAI Module AC Voltage Accuracy Specifications A 21 A 28 FAI Mod...

Страница 17: ...Monitor Channel 2 26 2 12 Examples During Monitor 2 26 2 13 Examples for Digital I O Relay and Totalizer Status 2 29 2 13 Reviewing and Setting the Base Channel Number 2 32 2 14 Examples for Reviewing and Setting the BCN 2 32 2 14 Reviewing and Setting the Line Frequency 2 34 2 15 Examples for Reviewing and Setting the Line Frequency 2 34 2 15 Reviewing and Setting the Isolated Network Type to Iso...

Страница 18: ...4 4 4 Wire Connections to the Universal Input Module Resistor 4 25 4 5 4 Wire Connections to the Universal Input Module 5700A 4 26 A 1 2680 Series Chassis A 30 C 1 Comparison of Common Waveforms C 3 D 1 385 RTD D 2 D 2 375 RTD D 3 D 3 391 RTD D 4 D 4 392 RTD D 6 G 1 10 100BaseT Ethernet Cables G 2 ...

Страница 19: ...1 9 Channel Monitoring 1 10 Alarm Trigger 1 10 Channel Numbering 1 10 Computed Channels 1 11 Mx B Scaling 1 11 Analog Channels 1 11 Digital I O Module Option 1 12 Digital I O 1 12 Relay Output 1 12 Totalizer 1 12 User Interface 1 13 Operating a 2680 Series Data Acquisition System 1 14 Isolated Networks 1 14 General Networks 1 14 Ethernet Port 1 14 Group Operations 1 15 Scanning and Logging 1 15 RS...

Страница 20: ...2680A 2686A Users Manual 1 2 ...

Страница 21: ...uted channel calculations The system scans 20 to 120 analog channels and calculates the values for up to 60 computed channels Interval timers alarm conditions and or an external signal input can trigger scans The Fluke DAQ software configures and controls up to 99 2680 Series instruments via an Ethernet connection The software provides the means to view scan data and log it into files In addition ...

Страница 22: ...86A Users Manual 1 4 REVIEW LAST MAX MIN REM AUTO SCAN MON SET Mx B FUNC ALARM C F RO mV AC DC x1Mk Hz LIMIT HI LO OFF CAL PRN EXT CH TR 1 2 F 2680 SERIES DAQ SYSTEM alg46f eps Figure 1 1 2680A 2686A Instrument ...

Страница 23: ...T Mx B FUNC ALARM C F RO mV AC DC x1Mk Hz LIMIT HI LO OFF CAL PRN EXT CH TR 1 2 F Primary Secondary and Annunciator Displays Indicators and annunciators for operating mode configuration display and data measurements PC Card Slot Only available on the 2686A Status Indicator LED Eject Button Function Keys User keys for configuring operating parameters such as Base Channel Number and front panel disp...

Страница 24: ...nnel being monitored is 11208 This number consists of the instrument Base Channel Number 11 Module Number 2 and the selected channel 08 14 721 Reading Indicates the reading of the channel being monitored has a value of 14 721 m Annunciator Indicates the multiplier for the reading is 001 milli The other multipliers are k kilo 1000 and M mega 1 000 000 V DC Volts DC Annunciator Indicates that the nu...

Страница 25: ...channel is in alarm Trigger Out output is logic low for nominal 125 ms start of any scan Trigger In input logic low triggers scanning DC PWR dc volts input input is 9 to 45 V dc to power the instrument AC Power Connector Connects to any line source of 100 to 240 V ac 50 60 Hz Ground Terminal Connect to earth ground when using DC power Power Switch Supplies power to the instrument ac or dc operatio...

Страница 26: ...l 5 0 V dc when there is no trigger output PC Card ATA Interface 2686A Only A PC ATA card interface provided in each 2686A system It can be used to store data when there is no network connection The data produced is DOS compatible When scanned data is first recorded on the card a copy of the configuration of the instrument is also recorded As a result you can stop scanning remove the card read res...

Страница 27: ...s using Interval 2 Interval 2 is in seconds with a minimum of 0 000 continuous scanning and a maximum of 86400 000 one scan every 24 hours The time resolution is to the millisecond for example 12 345 seconds When scanning starts if the External Trigger is logic low scanning begins at the Interval 2 rate If the External Trigger is logic high no scans are triggered until the trigger line is set to l...

Страница 28: ...6400 000 one scan every 24 hours The time resolution is to the millisecond for example 12 345 seconds The instrument performs background monitoring of channels designated as alarm triggers to check for alarm conditions using Interval 3 You can combine Alarm Trigger with External Trigger and Interval Trigger For example set the Interval Trigger for 60 seconds Interval 1 and the Alarm Trigger for 10...

Страница 29: ...ng of 100 1 15 50 165 A common use of Mx B scaling is to scale a sensor or transducer to provide for display and recording in engineering units The Mx B annunciator lights when a monitored channel has scaling applied Analog Channels The analog channel measurement connections are made via the Universal Input Modules External signal conditioning for the analog inputs is not necessary for most common...

Страница 30: ...0 1111 is represented by decimal 15 The instrument can display the Digital I O status in binary format at the front panel with updates each second Relay Output There are also 8 relays capable of switching up to 1 A or 250 V rms Fluke DAQ software records the relay status as bits 24 31 of the DIO value The selay status can also be displayed on the instrument front panel Totalizer The Digital I O mo...

Страница 31: ...can initialize the totalizer count by cycling power to the instrument or using Fluke DAQ software K2A K2B K1A K1B DIO 0 7 0 7 8 15 16 19 DIO 8 15 DIO 16 19 K5A K5B K4A K4B K3A K3B K8A Kn A RELAY DIAGRAM K8B B K7A K7B K6A K6B RELAYS DIGITAL I O 4V 30V MAX en alg57f eps Figure 1 5 DIO Connector Module User Interface Fluke DAQ is the operating software for the 2680 Series instruments It lets you conf...

Страница 32: ...me Isolated Networks An isolated network consists of only 2680 Series instruments and host computer The advantages include simplified setup faster network operation and freedom from general network problems Data throughput specifications are guaranteed only for isolated networks When you set Fluke DAQ software for an isolated network it automatically handles instrument IP addressing You must confi...

Страница 33: ...nstruments and logs the data into a history database and optionally into a csv file Each scan record consists of a timestamp values from all configured and recording analog channels and computed channels and the alarm states plus the Digital I O line status and the count of the totalizer if the Digital I O Relay module is in the instrument A number of factors can affect the actual scan rate in the...

Страница 34: ...system throughput because of its 4 ms overhead DIO data is provided with each module scan Consequently having five modules scanning at the same speed will incur an additional 20 ms delay if a DIO is active Writing to the PC card is more time consuming than writing to internal memory This is partly because the 2686A instrument uses a DOS compatible file storage system that requires additional overh...

Страница 35: ...annels from one module plus up to 60 computed channels At the fastest measurement rates 6 FAI modules could fill up the internal memory in about 150 seconds Once the internal memory is full data will be lost RS 232 Interface The instruments include an RS 232 port for calibration servicing and factory procedures the RS 232 port is not used for instrument control or scan data collection See Calibrat...

Страница 36: ...80A 180 Extra Input Module for analog input procedures 2680A 800 16 MB Memory Card 2680A 801 128 MB Memory Card 2680A 802 256 MB Memory Card 2680A 805 512 MB Memory Card 2680A 810 1 GB Memory Card 2680A BLANK Blank Module 2680A APSW Fluke DAQ Software Included with the purchase of each chassis 2680A DEVSW Fluke Development Software 2680A DLL Fluke DLL Library routines for the development of custom...

Страница 37: ... Alarm 2 10 External Trigger Wiring for a Group 2 10 Universal Input Module Analog Connections 2620A 180 2 12 Shielded Wiring 2 15 Crosstalk Considerations 2 15 Digital I O Connector Module 2 15 Digital I O 2 16 Totalizer 2 16 Totalizer Enable 2 17 Relays 2 17 Controls and Indicators 2 17 Front Panel Controls 2 17 Front Panel Indicators 2 19 Rear Panel Controls 2 22 Rear Panel Indicators 2 23 Fron...

Страница 38: ... Instrument Ethernet Address 2 44 Reviewing and Setting PC Card Options 2 46 Host Computer and Network Preparation 2 47 Installing Host Computer Ethernet Adapter 2 47 Instrument and Host Computer Interconnection 2 49 Host Computer Instrument Direct Connection 2 49 Interconnection Using 10 100BaseT Twisted Pair Ethernet Wiring 2 50 Set Up Windows Networking 2 52 Setting Host Computer Networking Par...

Страница 39: ...ies instruments This section of the manual describes all the connections controls and indicators on the instrument Host Computer Ethernet Adapter Installation Installing an Ethernet adapter such as the 3COM Fast Etherlink 10 100 BaseTx interface card if your host computer does not already have one Instrument and Host Computer Interconnection Connecting the host computer s and instruments Host Comp...

Страница 40: ...FLUKE CORPORATION MADE IN USA www fluke com PATENTS PENDING NO INTERNAL USER SERVICEABLE PARTS REFER SERVICE TO QUALIFIED SERVICE PERSONNEL 2680A 2686A XMT RCV ETHERNET NOT FOR CONNECTION TO PUBLIC TELEPHONE SYSTEM LNK RS 232 SERIAL PORT WARNING TO AVOID ELECTRIC SHOCK GROUNDING CONNECTOR IN POWER CORD MUST BE CONNECTED 8 7 6 5 4 3 2 9 42VDC 1 SIGNAL GND TRIGGER IN SIGNAL GND TRIGGER OUT SIGNAL GN...

Страница 41: ...ber 1777577 includes hardware and instructions for mounting the instrument Connecting to a Power Source and Grounding You can connect the instrument to an ac power source between 100 240 V ac 50 60 Hz to a dc power source between 9 and 45 V dc or to both Fluke guarantees equipment specifications only for 50 Hz and 60 Hz mains operation and dc operation Refer to Figure 2 2 and the descriptions belo...

Страница 42: ... 240V 47Hz 63Hz 100VA MAX MAIN SUPPLY NO INTERNAL USER SERVICEABLE PARTS REFER SERVICE TO QUALIFIED SERVICE PERSONNEL WARNING TO AVOID ELECTRIC SHOCK GROUNDING CONNECTOR IN POWER CORD MUST BE CONNECTED FUSE T 1 2A 250V SB 1 2 3 4 5 6 alg52f eps Figure 2 2 Connecting the Instrument to a Power Source XWWarning To avoid shock hazard when powering the instrument with ac power connect the power cord to...

Страница 43: ...o protect the dc input from over current This fuse is located inside the 2680 Series chassis on the main controller board The fuse should only be replaced by a Fluke qualified technician with all power disconnected from the instrument Grounding and Common Mode Voltage Connect the instrument chassis to a good earth ground Figure 2 2 to prevent a common mode voltage from raising the chassis to a hig...

Страница 44: ...he wire clamp screw for the associated terminal 3 Feed the wire into the gap between the connector body and the wire clamp 4 Tighten the wire clamp do not over tighten and crush the wire 5 Repeat steps 2 through 4 for each wire 6 Insert the connector in the rear panel Trigger Input Trigger Input uses terminals Trigger In and GND A contact closure or a TTL low signal input between Trigger In and GN...

Страница 45: ... their Trigger Input connection and to interface with external equipment You can enable or disable the Trigger Output using Fluke DAQ software The trigger output default is OFF See Table A 4 in Appendix A for complete specifications The Trigger Out signal can be used to synchronize a number of instruments in a master slave like setup However the maximum rate that a chassis can respond to a trigger...

Страница 46: ...Group External Trigger Wiring for a group instrument refers to the triggering configuration in which you connect the Trigger Out line on the master instrument to the Trigger In line on each other instrument in the group and provide a common connection to the GND line for each instrument This configuration provides improved synchronization of the group of instruments when the scanning intervals are...

Страница 47: ... SERVICEABLE PARTS REFER SERVICE TO QUALIFIED SERVICE PERSONNEL WARNING TO AVOID ELECTRIC SHOCK GROUNDING CONNECTOR IN POWER CORD MUST BE CONNECTED 100V 240V 47Hz 63Hz 100VA MAX MAIN SUPPLY NO INTERNAL USER SERVICEABLE PARTS REFER SERVICE TO QUALIFIED SERVICE PERSONNEL WARNING TO AVOID ELECTRIC SHOCK GROUNDING CONNECTOR IN POWER CORD MUST BE CONNECTED Master Instrument Other Grouped Instrument Oth...

Страница 48: ...ion must be suitable for single fault conditions 1 Remove the module from the rear panel by pressing the release tab on the side of the module and pulling the module free of the connector 2 Loosen the two large screws on top and open the module 3 Connect the wires to H high positive and L low negative for each channel 4 Thread these wires through the strain relief pins and out the back of the modu...

Страница 49: ... L H L H L H L H L H L H L H L L H L H H L H L H L H L H L H L H L H L H L H L H L H L H L H L H L H L H L H L H L H L H L H L H L H L H L H L H L STRAIN RELIEF 1 11 2 12 3 13 4 14 5 15 6 16 7 17 8 18 9 19 10 20 alg58f eps Figure 2 5 Universal Input Module Connections ...

Страница 50: ...shown here 12 11 13 14 15 16 17 18 19 20 2 1 3 4 5 6 7 8 9 10 SOURCE 4 WIRE SENSE 4 WIRE H L H L H L H L H L H L H L H L H L H L H L H L H L H L H L H L H L H L H L H L 4 WIRE 4T CONNECTION Use H and L Terminals for two channels on rear panel input module Connections for Channel 8 are shown here with Channel 18 providing the additional two connections For each 4 wire connection one Sense Channel 1...

Страница 51: ... Sensitive Channels Avoid connecting inputs with ac voltage signals adjacent to four terminal input channels High Impedance Inputs Avoid high source impedances on sensitive channels or minimize the capacitance of the sensitive channel to earth chassis ground for high impedance inputs Precision Resistance Measurements Avoid connecting any ac voltage inputs when making precision high resistance meas...

Страница 52: ...puts See Table A 37 in Appendix A for complete specifications Totalizer The totalizer uses terminals Σ and GND The totalizer counts contact closures or voltage transitions with a maximum count of 4 294 967 295 See Table A 38 in Appendix A for complete specifications The internal numeric representation of the totalizer is a 32 bit unsigned integer for a maximum count of 4 294 967 295 However for co...

Страница 53: ...Pole Single Throw DPST relays that can be used to provide added isolated IO connections or switch low power See Table A 39 in Appendix A for complete specifications Controls and Indicators The front panel provides a display and a set of control keys the rear panel provides the power switch and Ethernet status indicators See Figures 1 2 through 1 4 for an overall view of front and rear panels and F...

Страница 54: ...ss COMM again during configuration operations the operation cancels The COMM parameters are as follows Base Channel Number 01 to 99 Line Frequency 50 or 60 Hz Ethernet Address Read Only RS 232 Baud Rate Network Isolated Network General Network Socket Port Internet Protocol IP Address Default Gateway Subnet Mask Default Gateway Address E G Display digital I O status relay status and totalizer count...

Страница 55: ...er remote control this button returns control to the front panel The J button can only switch the instrument out of Remote when there has been no communication from the computer for more than 30 seconds The REM annunciator is dim when that occurs J I Make configuration selection or terminate parameter entry K H Displays ON OFF menu used to enable disable scanning Front Panel Indicators The front p...

Страница 56: ...the Alarm Triggering interval is in use due to a trigger alarm going off All other alarm conditions show the annunciator dim It is flashing if monitoring a channel that is in alarm C Displays when you monitor a channel for which the measurement function is in degrees Celsius F Displays when you monitor a channel for which the measurement function is in degrees Fahrenheit R0 Not Used m Displays whe...

Страница 57: ...surement function is in Ohms Hz Displays when you monitor a channel for which the measurement function is in Hertz LIMIT Not used HI Not used OFF Not used PRN Not Used CH Displays when the channel number is in the secondary display 1 Not used 2 Not used LO Not used CAL Displays when the instrument has corrupted calibration constants EXT Displays when the External Trigger is enabled while scanning ...

Страница 58: ... ac and dc power inputs XMT LINK RS 232 SERIAL PORT RCV CAUTION FOR FIRE PROTECTION REPLACE ONLY WITH A 250V FUSE OF INDICATED RATING STANDBY CHASSIS GROUND 10 100 BASE T ETHERNET NOT FOR CONNECTION TO PUBLIC TELEPHONE SYSTEM FUSE T 1 2A 250V SB Power Switch Applies AC and or DC power to the instrument alg55f eps Figure 2 10 Rear Panel Controls ...

Страница 59: ...ady off means there is no network activity Link Remains on when the instrument connects to a hub or host computer If off check the hub connection Red LED indicates a 10BaseT connection Green LED indicates a 100BaseT connection XMT LINK RS 232 SERIAL PORT RCV CAUTION FOR FIRE PROTECTION REPLACE ONLY WITH A 250V FUSE OF INDICATED RATING STANDBY CHASSIS GROUND 10 100 BASE T ETHERNET NOT FOR CONNECTIO...

Страница 60: ... last scan If configurations are different one or more error messages will be generated This feature helps identify faulty modules or modules that may have been accidentally removed from the system If the configurations do not match the stored configuration may be reset to the current configuration from the front panel Resetting the stored configuration will eliminate the unwanted error messages T...

Страница 61: ...s a series of dashes which lasts for approximately one second The measurement then appears in the primary display the secondary display shows the Global Channel Number The MON monitor annunciator is on when monitoring Monitor Reading Updates The instrument updates monitor readings once per second Table 2 4 Displaying a Monitor Channel L Press the MON Monitor key to monitor a channel You can use Mo...

Страница 62: ...ale Overload V AC reading is greater than the selected range GCN 45107 Monitor display for 234 96 F Thermocouple GCN 05112 otc displays for open thermocouple Monitor display for 23 884 FUNC Computed Channel GCN 05902 Monitor display for analog channel 18 with Mx B scaling GCN 08118 Figure 2 12 Examples During Monitor ...

Страница 63: ...trument is scanning or not scanning C B Press the up down arrow keys to select DIO display if necessary D E Press the left right arrow keys to display the desired DIO line DIO19 to DIO0 Hyphens divide the display for example 1111 0000 0000 0000 0000 G Press the DIO key again to exit Fluke DAQ Software can also display the Digital I O status Input example Toggling DIO7 between open circuit and grou...

Страница 64: ... output Display is in the form nnnn nnnn with five characters in view at a time Table 2 6 Displaying Relay Status G Press the DIO Digital I O key to view the Relay status C B Press the up down arrow keys to select Relay D E Press the left right arrow keys to display the desired Relay line Rly8 to Rly1 Hyphens divide the display for example 1111 0000 G Press the DIO key again to exit ...

Страница 65: ... Digital I O status display for DIO line 16 for example 1111 0000 0000 0000 0000 Relay status display for Relay 1 for example 1111 0000 Totalizer status display for the high digits for example 4294967295 Totalizer status display for the low digits for example 4294967295 Figure 2 13 Examples for Digital I O Relay and Totalizer Status ...

Страница 66: ... 4 294 967 295 Totalizer Status Display The instrument displays the totalizer status in two five digit segments high HI and low LO Using the maximum count of 4 294 967 295 as an example the HI five digit segment would display 42949 and the LO five digit segment 67295 Table 2 7 Displaying Totalizer Status G Press the DIO Digital I O key to view the totalizer status You can view the totalizer status...

Страница 67: ...W annunciator displays when reviewing the BCN the SET annunciator displays when setting the BCN Table 2 8 Reviewing and Setting the Base Channel Number F Press the COMM key to review the Base Channel Number BCN or press and hold the COMM key for 3 seconds to set the BCN C B Press the up down arrow keys until bASE Base Channel Number appears in the primary display COMM appears in the secondary disp...

Страница 68: ... Communications display for setting the BCN SET Base Channel Number display for setting the BCN 10s digits for example 45 REVIEW Base Channel Number display for reviewing the BCN number for example 45 CH Front Panel display for a instrument with BCN 45 Figure 2 14 Examples for Reviewing and Setting the BCN ...

Страница 69: ...nd Setting the Line Frequency F Press the COMM key to review the Line Frequency setting or press and hold the COMM key for 3 seconds to set the Line Frequency C B Press the up down arrow keys until LinE Line Frequency appears in the primary display COMM appears in the secondary display I Press the ENTER key LinE appears in the secondary display and the current LinE frequency setting is in the prim...

Страница 70: ...isplay for setting the line frequency SET Hz Line frequency display for setting the line frequency to 60 Hz SET Hz Line frequency display for setting the line frequency to 50 Hz REVIEW Hz Line frequency display for reviewing the line frequency 60 Hz Figure 2 15 Examples for Reviewing and Setting the Line Frequency ...

Страница 71: ...eration and set the instruments network type to isolated you do not need to know or set IP addresses for your instruments Table 2 10 Reviewing and Setting the Network Type F Press the COMM key to review the network type or press and hold the COMM key for 3 seconds to set the network type C B Press the up down arrow keys until nEt Network appears in the primary display COMM appears in the secondary...

Страница 72: ...nications display for setting the network type SET Network display for setting the network type to isolated SET Network display for setting the network type to general REVIEW Network display for reviewing the network type isolated network Figure 2 16 Examples for Reviewing and Setting the Network Type ...

Страница 73: ...et the network type C B Press the up down arrow keys until nEt Network appears in the primary display COMM appears in the secondary display I Press the ENTER key nEt appears in the secondary display and ISo isolated network or gEn general network is in the primary display C B To set the network type to general press the up down arrow keys to select gEn current setting appears bright I Press the EN...

Страница 74: ...lay for setting the network type SET Network display for setting the network type to general SET Socket Port display for setting the first digit for the example 04369 SET Socket Port display for setting the second digit for the example 04369 Figure 2 17 Examples for Reviewing and Setting General Network Parameters ...

Страница 75: ...setting an IP 1 digit for example 129 196 152 101 SET IP address display for setting an IP 1 digit for example 129 196 152 101 SET IP address display for setting an IP 2 digit for example 129 196 152 101 SET IP address display for setting an IP 3 digit for example 129 196 152 101 Figure 2 17 Examples for Reviewing and Setting General Network Parameters cont ...

Страница 76: ... up down arrow keys until nEt Network appears in the primary display COMM appears in the secondary display I Press the ENTER key nEt appears in the secondary display and ISo isolated network or gEn general network is in the primary display C B To set the network type press the up down arrow keys to select gEn I Press the ENTER key Pressing any other function key will cancel set operations This dis...

Страница 77: ...dary display I Press the ENTER key nEt appears in the secondary display and ISo isolated network or gEn general network is in the primary display C B To set the network type press the up down arrow keys to select gEn I Press the ENTER key Pressing any other key will cancel set operations This displays the current Socket Port I Press the ENTER key This displays the first digit of the 12 digit Inter...

Страница 78: ...tor If you do not require a gateway turn the default gateway feature OFF Subnet Mask The subnet mask is a 32 bit binary number expressed as four 3 digit segments like an IP address The subnet mask when masked with the instrument IP address determines what the network number is For example if the IP address is 129 196 180 93 and the subnet mask is 255 255 255 0 the network number is 129 196 180 0 T...

Страница 79: ...ts Sub0 Sub1 Sub2 Sub3 D E Press the left right arrow keys to select the desired number in each segment The selected digit is highlighted and the segment for example Sub 0 appears in the secondary display C B Press the up down arrow keys to select the desired number 0 to 9 for the positioned subnet mask digit In this manner select all 12 subnet mask digits I Press the ENTER key to make the selecti...

Страница 80: ...net addresses are always unique they are never altered reused or duplicated Ethernet Address Display The Ethernet address display consists of six 2 digit segments Eadr 0 to Eadr 5 In the example above Eadr0 00 Eadr1 80 Eadr2 40 Eadr3 12 Eadr4 34 Eadr5 56 Table 2 15 Viewing the Instrument Ethernet Address F Press the COMM key to open the communications display because this is a review process only ...

Страница 81: ...splay for viewing byte 0 for example 00 80 40 12 34 56 REVIEW Ethernet address display for viewing byte 2 for example 00 80 40 12 34 56 REVIEW Ethernet address display for viewing byte 4 for the example 00 80 40 12 34 56 REVIEW Ethernet address display for viewing byte 5 for example 00 80 40 12 34 56 Figure 2 18 Examples for Viewing the Ethernet Address ...

Страница 82: ...used space remaining on a card Init Reformats a PC card and deletes files Erase Deletes either the data or the separate configuration file on the PC card Store Stores the configuration to a channel level from the 2686A to the PC card Load Loads a previously stored configuration from the card to the 2686A Note When a PC card is used for data collection you should erase stored data before using the ...

Страница 83: ...reparation This section contains information for preparing your host computer and setting up network communication as summarized in Figure 2 19 Installing Host Computer Ethernet Adapter Skip this section if you have an Ethernet adapter installed on your computer Since the installation procedures for Ethernet adapters change frequently and without notice you must follow the instructions supplied wi...

Страница 84: ...thernet Adapter 3 Set up Windows 4 Install Fluke DAQ Software Ethernet Card OR Windows 2000 or higher Fluke DAQ for Windows 2 Interconnect Host Computers and Instruments Instrument PC Card alg02f eps Figure 2 19 Preparing for Network Operation ...

Страница 85: ...ct Connection You can connect a single instrument directly to a host computer using 10 100BaseT cable but you must use a special cable that has its transmit and receive lines crossed The crossed lines allow each end to transmit to the receive terminal at the other end For more information see Ethernet Cabling in Appendix G RJ 45 10 100BaseT Outlets Typical RJ 45 Interface Typical Patch Cord Unshie...

Страница 86: ...21 Take care that you use twisted pair wires designed for 10 100BaseT network use phone cables will not work Refer interconnection issues to your network administrator For more information see Network Considerations in Appendix H Direct connection between a single host computer and a single instrument with 10 100BaseT is possible but you must use a special cable that has its transmit and receive l...

Страница 87: ... Instrument 3 Instrument 4 The typical general network configuration uses 10 100BaseT Twisted Pair Ethernet for interconnection shown 10 100BaseT Twisted Pair Ethernet Hub Not Supplied Connect to RJ 45 10 100BaseT Port Twisted Pair Patch Cord Typical RJ 45 Interface Typical Patch Cord alg03f eps Figure 2 21 Interconnection Using 10 100BaseT Twisted Pair Wiring ...

Страница 88: ... the adapter The operating system may have already detected the Ethernet adapter and added it If not follow the adapter manufacturer s installation instructions or use Add Remove Hardware in the Windows 2000 or XP Control Panel For Windows NT follow the steps below 1 Open the Windows NT Control Panel Network utility via Start Settings or My Computer 2 Select Adapter tab then click Add 3 Choose the...

Страница 89: ...ready operating on the network skip this section Complete the following procedure to set the networking parameters on Windows 2000 The procedure is similar on Windows XP and NT 1 Open the Control Panel Network and Dial up Connections utility via Start Settings or My Computer 2 Highlight the Local Area Connection for the network adapter used for connecting to the Isolated Network and then click Fil...

Страница 90: ... Fluke DAQ software configuring and verifying communications with the instrument Refer to Chapter 3 for detailed instructions for configuring and communicating with instruments using Fluke DAQ software This procedure assumes that you have performed the following relevant steps described earlier in this chapter Setting line frequency and network parameters on the instrument if the defaults are not ...

Страница 91: ...w alg102s bmp The dialog box entries include Configuration file Click the button to load an existing configuration file Network Type Isolated if the PC is connected directly to the 2680 Series instrument or General if the instrument is part of a network Port Number 4369 is the default port number Enable Data Simulation If selected data is simulated and the software does not actually control the in...

Страница 92: ...reeView panel and click the Insert button alg103s bmp 4 Specify the Base Channel 1 to 99 and Instrument Type and click OK A instrument is attached to the new configuration As part of the insertion process you can specify a base channel number This number is used to identify the instrument and differentiate channels in different instruments The Base Channel number auto increments when you add instr...

Страница 93: ...ss on the Instrument Settings dialog if using General Network Type IP Address is disabled if Isolated network is used Other fields are optional You may need to contact your Internet support staff to determine the IP Address alg106s bmp The dialog box entries include IP Address Enter the IP Address of the instrument you are adding General network only ...

Страница 94: ...General network installation and what version of Windows you are using 2 Check that Ethernet adapter drivers are installed correctly 3 Verify that the TCP IP stack is installed correctly 4 Verify that the IP address and subnet mask are correct in the Windows network settings 5 Verify that there is only one copy of Winsock dll on the PC Table 2 16 Identifying Network Problems Symptom Error Reason P...

Страница 95: ...Network mode User error or software set up 2680 Series is being used by another computer on network Socket port wrong in Fluke DAQ General IP address in Fluke DAQ in use by another instrument PC network adapter set to same IP address as the instrument 2680 Series hardware set up Socket port set wrong on instrument if NET set to GEN Instrument network interface needs COMM rESEt Connection is down I...

Страница 96: ...fault gateway or dgate set wrong on the instrument Network fault duplicate IP address bad ARP etc Miscellaneous Software set to wrong network type Isolated vs General Instrument set to wrong network type Isolated vs General Another network adapter has IP address in same subnet Interrupt problem Adapter IRQ set wrong or IRQ conflict Software interrupt conflict Loss of scan data when using multiple ...

Страница 97: ...ormal indication blinks when the instrument is transmitting data on the network RCV red Receive Normal indication blinks when there is any network activity Steady off means there is no network activity LINK red green Link Remains on when the instrument connects to a hub or host computer If off check the hub connection Red for 10BaseT Green for 100BaseT ...

Страница 98: ...2680A 2686A Users Manual 2 62 ...

Страница 99: ...iguration Dialog 3 10 Communication Dialogs 3 11 Main Communication Dialog 3 11 Instrument Communication and Status Dialog 3 11 Module Communication Dialog 3 11 Digital I O Points Dialog 3 11 Computed Channels Dialog 3 11 Communications Icons 3 12 Security Dialogs 3 12 Trend Dialog 3 13 Alarm Dialog 3 13 Mail and Web Settings Dialogs 3 13 Managing Your Network Using Fluke DAQ 3 14 Inserting and Co...

Страница 100: ...5 Starting Spy 3 36 Viewing Module Measurement Data 3 38 Using the Digital I O Points Communication Dialog 3 39 Using Trend to View Collected Data 3 40 Changing the Trend Chart Display 3 43 Viewing Alarms 3 44 Configuring Data Files 3 46 Selecting a Master for a Data Group 3 47 Advanced Data File Configuration 3 47 Real time Data File Creation 3 53 Main Window Advanced Settings 3 55 Using Fluke DA...

Страница 101: ...load upload configuration to the instruments Send commands to and take readings from analog modules and the optional DIO module Monitor the instruments on line values and alarms Plot trend charts and a complete historical capability to retrieve historical trends alarms and export data files in csv format Record and store scanned data on a PC Card PCMCIA ATA format in the 2686A XWCaution Removing a...

Страница 102: ...cut on the your desktop when the installation is complete Double click the shortcut to start Fluke DAQ Note You may need to reboot your computer after you install the Fluke DAQ software The following directories and files are installed on your PC alg100s bmp The Fluke DAQ subdirectories contain the following information Alarm Collected alarm data and format information Config Miscellaneous files u...

Страница 103: ...guration files Data Scan data files Understanding the User Interface Fluke DAQ software has a standardized and easy to use interface This section explains the components of the interface Fluke DAQ Main Window The Fluke DAQ main window contains a workspace area toolbar and other controls to add instruments and configure your network alg102s bmp ...

Страница 104: ...curity System Configuration button The system security configuration feature allows the administrator to add and remove Fluke DAQ users allow users to configure instruments and to change user passwords Only the administrator Root user can use the security system configuration function Configuration button Used to configure networks instruments modules and channels Communication button Used to acce...

Страница 105: ...an use the Alarm View dialog to view On Line and History alarms The Alarm status icon can also assume two states in the TreeView panel When an alarm is activated the Alarm icon flashes The icon stops flashing after you give an Ack command Last Alarm or All Alarms in the Alarms dialog Web and Alarm Mail Settings button Used to enter Fluke DAQ web configuration information and to configure Fluke DAQ...

Страница 106: ...existing configuration file Insert and Remove instruments modules and channels Navigate through the configuration setup dialogs Open an existing configuration file Create a new configuration file Specify configuration file name and path Remove a Treeview item Configuration item file name Root Node PAI Module Channels Insert a Treeview item 2680 Series Instrument Save a configuration file FAI Modul...

Страница 107: ... from a Configuration dialog to a Communication dialog the instrument that was previously selected in the dialog is still selected For example if instrument 01 is selected in the Configuration dialog and you move to a Communication dialog the instrument will only be highlighted if it was selected the last time you were in the Communication dialog Dialog selections are remembered and are independen...

Страница 108: ...d alarm information for individual channels You can also select multiple channels on a module and set them all at once DIO Configuration Dialog Use the DIO Configuration dialog to enter totalizer configuration information To set relays and I O pins see the DIO Communication dialog described later in this Chapter Computed Channel Configuration Dialog 2680 Series instruments can have up to 60 comput...

Страница 109: ...us and reset instrument errors Start Stop scan on the instrument and all the modules Get scan data from the scan queue memory View and reset the totalizer Upload scan data from the PC Card format the PC Card and remove scan data from the PC Card 2686A only Module Communication Dialog You can use the Module Communication dialog to View the current channel values View the alarm conditions Digital I ...

Страница 110: ...le is being scanned and a channel is in alarm condition Computed Channel Status Icon Blue channel icon indicates channels are not being scanned Green channel icon indicates channels are being scanned Red channel icon indicates channel in an alarm condition I O Module 6 Black digital I O icon indicates all the channels are turned off Green digital I O icon indicates a channel is turned on by a exte...

Страница 111: ... When an alarm occurs the color of the instrument Icon in the communication window changes red As long as the alarm exists the Icon remains red In the Alarm window a red line of information shows the active status of the alarm The Alarm button on the toolbar begins flashing when an alarm occurs and continues to flash until all alarms are acknowledged Mail and Web Settings Dialogs You can use the W...

Страница 112: ... Fluke DAQ to Insert and configure instruments modules channels and computed channels Start a scan View scan data View alarms Inserting and Configuring an Instrument To insert and configure a instrument 1 Double click the icon on your desktop to start Fluke DAQ 2 Specify basic settings in the Fluke DAQ Application dialog alg102s bmp ...

Страница 113: ... the History database so all acquired data is saved even is no csv file is configured See Data File Configuration later in this chapter for more information Advanced Settings Use this button to configure the following Advanced settings Autodisable Scan Causes scanning to stop if the scan queue memory in the instrument fills up and there have been no communication from the computer for more than 30...

Страница 114: ...must specify a base channel number This number is used to identify the instrument and differentiate channels in different instruments The Base Channel number auto increments when you add instruments or can be selected for the specific BCN of the instruments alg104s bmp Note Fluke DAQ also supports 2640A and 2645A NetDAQ instruments Some of the Fluke DAQ configuration dialogs may differ from those ...

Страница 115: ...neral Network Verify Button Click the Verify button to ping the instrument and verify that the IP Address is correct The instrument and your PC must both be connected to the network for this to work Configuration transfer You can transfer configuration information from the PC to the instrument from the instrument to the PC or to and from a PC Card and the PC or the instrument PC Card operations ar...

Страница 116: ...instruments Scan Overflow You can choose to overwrite old data or stop receiving data when the buffer is full Log to PC Card 2686A only Never Ignore the PC card Always Always write to the PC card default setting This selection is useful for stand alone applications or when you want data backup Note When the card is full the 2686A stops saving data to the PC card Scanning will continue and data wil...

Страница 117: ... want to insert in the Module dialog box alg108s bmp The dialog box entries include Module Number You can add up to 6 modules to the 2680 Series instruments A Digital I O can only be inserted in Module Slot 6 and you can have only one DIO per instrument Module Type Valid module types are Analog PAI Analog FAI or Digital DIO Note The NetDAQ 2640A and 2645A do not use the Insert Module function sinc...

Страница 118: ...rs Manual 3 20 3 Click Ok The modules are added to the instrument and appear in the TreeView panel alg109s bmp 4 Select one of the analog modules you inserted and the Analog Module settings dialog appears alg110s bmp ...

Страница 119: ...e PAI Interval 3 is set using the Advanced Settings button on the Main Configuration dialog Reading Rate Select the slow reading rate for high precision or the fast reading rate for high speed The medium rate allows resolution and speed between the slow and fast reading rates Actual reading speed depends on the function you select Drift Correction Automatically selected when you set the reading ra...

Страница 120: ...tion dialog appears instead of the Module settings dialog alg111s bmp The dialog box entries include Start Count Used to specify a start count Debounce Select debounce to ignore signals with a period less than 2 ms 500 Hz otherwise signals up to 5 kHz can be counted Direction If you entered a start count the start count is reloaded when the totalizer reaches the terminal count The totalizer can co...

Страница 121: ...available on the NetDAQ Inserting and Configuring a Channel After selecting a module you need to add channels to the module To insert and configure a Channel 1 Highlight a module in the TreeView panel and click the Insert button alg112s bmp Note For the NetDAQ 2640A and 2645A channels are inserted on the Instrument Configuration dialog 2 Specify the number of channels you want to add on the Insert...

Страница 122: ...ct a channel and the Module settings dialog appears alg115s bmp The dialog box entries include CH XX YYY The first two digits identify the chassis BCN 01 99 The next digit identifies the module 1 6 and the last two digits identify the channel 1 20 Label Use the label field to identify where the channel is used in your application ...

Страница 123: ... A Band alarm type generates an alarm when the measurement value is between the two alarm limit values Fluke DAQ records all alarm conditions in an alarm database Each of the two Alarm limits one for the Band type alarm has a Digital Output button to select Digital or relay outputs that go active when an alarm is generated from the alarm limit Use Channel Alarm Trigger Select if channel reading wi...

Страница 124: ...ous power Channel 1 x Channel 2 For a computed channel to execute it must be associated with the scanning of a module You must choose at least one module in the Scan with Module area for this association The default is module 1 To configure a computed channel 1 Highlight the Computed Channels icon in the TreeView panel and click the Insert button alg116s bmp 2 Specify the number of the channels yo...

Страница 125: ...re Managing Your Network Using Fluke DAQ 3 3 27 3 Click Ok The computed channels are added and appear in the TreeView panel alg118s bmp 4 Select a computed channel and the Computed Channel settings dialog appears alg119s bmp ...

Страница 126: ...nd 2645A instruments do not have the Band alarm type Alarm 1 or Alarm 2 Each channel has two alarms You can set the alarms to Off Low or High A Normal alarm condition occurs when a measurement falls below a low alarm value Low or rises above a high alarm value High A Band alarm type generates an alarm when the measurement value is between the two alarm limit values Fluke DAQ records all alarm cond...

Страница 127: ... example Mx B scaling of 100x 50 applied to a measured value of 1 15 would result in a reading of 100 1 15 50 165 Input or Scaled Range You can enter the Input and Scaled range and press the Calculate M and B from Ranges button to have Fluke DAQ calculate the M and B values Configuring Multiple Channels You can change or set configurations using multiple selections in the TreeView window The scree...

Страница 128: ...xxx Alarm on off Boolean value of 1 or 0 Cxxx Any channel measurement C9xx Computed channel TS Time since last measurement milliseconds TOT Totalizer Operators unary unary abs exp int ln log and sqr Operators Values in integer floating point or scientific notation for example 1 2 345 6 7890E 03 Each computed channel can have an expression of up to 250 characters but the total maximum number of cha...

Страница 129: ...d and will provide the correct result C101 some other measurement to force the time calculation C901 TOT C902 TS 1000 C902 TOT Note You need one physical channel configured in the module that you re scanning for this to work even though you re not using the channel in the expression Computed channels and the time value are initialized to zero at the beginning of scanning Physical channels that hav...

Страница 130: ...ration before starting a scan You cannot change the instrument configuration while the instrument is scanning You can enter the configuration screen while scanning From the Configuration Screen you can to see the configuration of all the instruments but can only change the configurations of instruments that are not scanning Starting a Configuration Scan To start a configuration scan 1 Click the on...

Страница 131: ...ase where it can be viewed in the Trend window and exported if desired If scanning is started from Fluke DAQ the software automatically retrieves the scan data and logs it in the history database until scanning is stopped or until the software stops running There is no need to retrieve the scan data manually However if scanning is started from the 2680A or 2686A front panel or if scanning continue...

Страница 132: ...ormation about the PC card get scan data from the card or format the card Getting PC Card Information Click the button to get information about the PC card in the 2686A card slot The Get Info function provides information on the size or the card the amount of free space the amount of space used for both stored configuration and data and the number of scans stored on the card Formatting the PC Card...

Страница 133: ... making all other settings select From Card in 2686A if the PC Card is in the slot in the 2686A unit or From Card in PC and the correct drive letter if it is in a PC Card slot or memory card reader on the PC The Data Group Master Data File and Data Settings work the same as with the Advanced Data File Configuration described in this chapter except that only this single 2686A unit is shown If Inser...

Страница 134: ...can perform the PC Card Get Scans multiple times with different combinations of module data if you choose XWCaution Changes made to any Data Group on this dialog will remain as if changed in the Configuration Section Starting Spy Spy triggers and collects its own measurements from up to eight channels from any combination of instruments The data is not stored and the instruments you are checking d...

Страница 135: ...Using Fluke DAQ Software Managing Your Network Using Fluke DAQ 3 3 37 alg123s bmp 3 Click to start Spy Click to stop Spy ...

Страница 136: ...nnels Modules that are not scanning display question marks for the channels NC indicates that a channel is not configured To view module measurement data 1 Click the on the Fluke DAQ toolbar 2 Highlight a module in the TreeView panel and the module measurement data appears alg124s bmp Note For the NetDAQ 2640A and 2645A the physical input channels and computed channels are shown on the device comm...

Страница 137: ...Bits or relays you set display a green dot Bits or relays set by an alarm have a red dot A bit set by an external signal has a blue dot There is no way to set a relay externally When a relay is set it has closed contacts When a bit is set it has a logic low signal also called active low To view digital I O points dialog 1 Click the on the Fluke DAQ toolbar 2 Highlight an I O module in the TreeView...

Страница 138: ...chart If a particular channel is not active question marks are displayed A moveable horizontal cursor is used to find the time a signal reached a certain amplitude Use the CTRL ALT Print Screen the key combination to copy a bit map of the chart and paste it to a word processing document If an instrument is stopped the data for all channels in that instrument that are also shown in the Trend window...

Страница 139: ...red pen symbol and the current value for each trend on the right side of the chart Each channel set up to display on the Trend chart has the following properties Instrument is the BCN of the instrument for the channel Module selects the module number or the computed channels Channel is actual channel to display for the trend line Label is the description for the channel Units is the measurement un...

Страница 140: ...ata Group Master Data File and Data Settings work the same as the with the Advanced Data File Configuration described later in this chapter When you click the Ok button Fluke DAQ will try to create the data file When creating the file if Fluke DAQ detects a file on disk with the same name that Fluke DAQ is trying to generate Fluke DAQ will add data to the file or rename it depending on the File Si...

Страница 141: ... Display To change the Trend chart display The Trend Setting dialog appears when you double click on the chart screen Use the Trend Settings dialog to change the location of the upper and lower boundary points and the scaling seen on the chart for each of the plot pens you are using alg128s bmp ...

Страница 142: ...owledge the alarm the alarm line changes to blue When you acknowledge an alarm it turns green All alarm conditions are recorded in the Alarm History dialog If an alarm appears in red in the Alarm History dialog it will not be duplicated If an alarm is active it must be acknowledged before it will be displayed again When a channel has two alarms only one alarm can be active at a time If one alarm b...

Страница 143: ...l When you choose the History option you can view alarms over a period of time Each time an alarm changes state the new color is added to the history screen You can view alarms that have occurred over a period of time or for a specific instruments modules or channels alg130 bmp The dialog box entries for History include Type Specify On Line or History alarm view Period of Viewing Specify the year ...

Страница 144: ... selected master is a 2680 Series instrument you need to define the master module as well Enable real time data file creation Check this option to create an Excel compatible csv data file when you start scanning the master instrument If this option is not selected no csv data file will be created Remember that Fluke DAQ stores the scan data in a history database for any instrument enabled in the s...

Страница 145: ...the Master except that the data from the Master will be in the first columns of the csv file When actual scan intervals differ between sources the scan data is handled as follows If an instrument or module scans slower than the Master that slower source s data is repeated in the csv file until a new scan is received from the slower source If an instrument or module scans faster than the Master onl...

Страница 146: ...button on the Data File Configuration dialog and the Advanced Data File Configuration dialog appears alg141s bmp The dialog box entries include Data Group Name Name of the current active group This box can be used to show any group names used with the configuration by selecting the down arrow ...

Страница 147: ...l increase until a unique number is found Copy From Specifies if the group will be created using the default values None or the values from another group any other text selected in the Combo Box OK Inserts the new group Cancel Closes the window without inserting a new configuration Note Fluke DAQ displays an error message if the you enter the name of an existing group or a blank name Rename Click ...

Страница 148: ...om other modules is aligned to the master Master Module When the selected master is a 2680 Series instrument you need to define the master module as well Data File Specify the name of the data file that will be generated The default value for this field will be C Program Files Fluke DAQ 2 2 Data Group Name csv File Size Control The File Size Control provides a way to limit the size of the csv data...

Страница 149: ...nth DD Day format to the file name Attach time to file name Attach the time of the file roll over in _HHMMSS HH Hour MM Minute SS Second format to the file name If another file with the same rename name exists or if no Attach option selected a _Number is attached to the file The value for Number is incremented up to form a file name that does not exist After renaming the file Fluke DAQ creates a n...

Страница 150: ...oth hours and minutes can exceed the 23 and 59 limits respectively For example you can configure 40 hours and 70 minutes File Size Size 50 MB This parameter represents the file size If the file size is exceeded Fluke DAQ generates a new file Number of Lines Amount 65000 lines A new file will be created every time that the number of lines scans additional lines in the file being stored exceeds the ...

Страница 151: ...roup is generating a file with the same name or if there are conflicts between the data files they have one or more of the same instrument modules selected in common the following error message appears alg146s eps Data Groups that conflict will not be started but the other groups will be created and the scan will start normally If Fluke DAQ detects a file on the disk with the same name that Fluke ...

Страница 152: ...Fluke DAQ verifies the criteria specified in the File Size Control and renames the file if necessary If the master is scanning faster than the other modules data will be repeated for the slower modules Computed Channels are saved using the master values if a Computed Channel is not configured to scan with the master the value with the closest Time Stamp between all modules is stored The same rule ...

Страница 153: ...g Fluke DAQ dialog alg151 bmp The Advanced Settings include Autodisable Scan Selecting Autodisable Scan causes scanning to stop if the scan queue memory in the instrument fills up and there has been no communication from the computer for more than 30 seconds The default is not selected which means scanning will not stop automatically Do not ask to start slaves Selecting Do not ask to start slaves ...

Страница 154: ...l 3 to a maximum of 1000 seconds and a minimum interval of 0 050 seconds for the FAI 2645 The default FAI 2645 Interval 3 value is 0 100 seconds Using Fluke DAQ System Security Features You can use the system security features to protect instrument configuration information The system security feature allows the administrator to add and remove Fluke DAQ users allow other users to configure instrum...

Страница 155: ...ents the user from changing configuration settings Remove User Click to remove the user selected in the User Name list When the dialog asking if you are sure you want to remove the user appears click Yes to remove the user Change Password Click to change the password for the user selected in the User Name list When the dialog box appears enter the new password then reenter it confirm the new passw...

Страница 156: ...es from your 2680 Series or NetDAQ instrument will be sent Use the Alarm Mail Settings portion of the dialog to configure Fluke DAQ to automatically send e mail messages reporting alarm conditions using the Simple Mail Transfer Protocol SMTP Note To use the e mail and web features your PC must be connected to a network supporting the Transmission Control Protocol Internet Protocol TCP IP To enter ...

Страница 157: ...hen the Fluke DAQ software is started Start FlukeDAQ Web Server Use this button to start the Web Server manually Update Web Pages Use this button to update the FlukeDAQ web pages when the Data Server address or URL has changed When the Web Settings are configured and the Web Server is running two Web pages are available to view current scan data from the instruments These Web pages are named fluke...

Страница 158: ...ame User name for authentication Password The password for the user name Messages Subject Subject shown in the e mail message To Type the names of the people to whom you want to send the message CC Type the names of the people to whom you want to send a copy of the message BCC Type the names of people who should receive the message while their names are hidden from other recipients of the message ...

Страница 159: ...ke DAQ Trigger Input Test 4 15 Trigger Output Tests 4 15 RS 232 Trigger Output Test 4 15 Fluke DAQ Trigger Output Test 4 16 Volts DC Accuracy Test PAI Module 4 16 Volts DC Accuracy Test FAI Module 4 17 Volts AC Accuracy Test 4 18 Frequency Accuracy Test 4 19 Analog Channel Integrity Test 4 20 Open Thermocouple Response Test 4 20 2 Wire Resistance Accuracy Test PAI Optional 4 21 2 Wire Resistance A...

Страница 160: ...d Enable Test 4 31 RS 232 Totalizer Count and Direction Test 4 32 RS 232 Totalizer Count and Debounce Test 4 32 Fluke DAQ Totalizer Count Test 4 33 Fluke DAQ Totalizer Count and Enable Test 4 33 Fluke DAQ Totalizer Count and Direction Test 4 34 Fluke DAQ Totalizer Count and Debounce Test 4 34 Calibration 4 35 Variations in the Display 4 35 Service 4 36 Replacement Parts 4 36 ...

Страница 161: ...using the original container if available and mail it to the nearest Fluke Service Center Include a description of the problem Fluke assumes no responsibility for damage in transit During power up the current module configuration is evaluated against the stored module configuration used for the last scan If configurations are different one or more error messages will be generated This feature help...

Страница 162: ...de Description 0 No self test errors 1 Boot block ROM checksum failed 2 Bad outguard main image in ROM 3 Configuration data file corrupt 4 Display test failure 5 Display not responding 6 Module 1 calibration constants corrupt 7 Module 1 calibration procedures incomplete 8 Module 1 A D failure 9 Module 1 zero offset measurements unreasonable 10 Module 1 reference balance measurements unreasonable 1...

Страница 163: ...led 31 Module 3 open thermocouple detection failed 32 Module 4 calibration constants corrupt 33 Module 4 calibration procedures incomplete 34 Module 4 A D failure 35 Module 4 zero offset measurement unreasonable 36 Module 4 reference balance measurements unreasonable 37 Module 4 overload detection failed 38 Module 4 open thermocouple detection failed 39 Module 5 calibration constants corrupt 40 Mo...

Страница 164: ... expected in slot 2 300 PAI expected in slot 3 301 FAI expected in slot 3 400 PAI expected in slot 4 401 FAI expected in slot 4 500 PAI expected in slot 5 501 FAI expected in slot 5 600 PAI expected in slot 6 601 FAI expected in slot 6 602 DIO expected in slot 6 Cleaning XWWarning Keep the instrument dry to avoid electrical shock to personnel or damage to the instrument To prevent damage never app...

Страница 165: ...oid electrical shock do not operate the instrument without the cover properly installed 1 Disconnect all rear panel cables to the instrument power Universal Input modules and I O connectors 2 Locate the fuse holder at the back of the chassis near the power input connector and twist out the fuse 3 Insert the new fuse into the holder You must use a 1 2 ampere 250 V time delay line replacement fuse 4...

Страница 166: ...SE OF INDICATED RATING STANDBY CHASSIS GROUND 10 100 BASE T ETHERNET NOT FOR CONNECTION TO PUBLIC TELEPHONE SYSTEM SERIAL NUMBER 2680A 2686A 100V 240V 47Hz 63Hz 100VA MAX MAIN SUPPLY NO INTERNAL USER SERVICEABLE PARTS REFER SERVICE TO QUALIFIED SERVICE PERSONNEL WARNING TO AVOID ELECTRIC SHOCK GROUNDING CONNECTOR IN POWER CORD MUST BE CONNECTED FUSE T 1 2A 250V SB 1 2 3 4 5 6 alg66f eps Figure 4 1...

Страница 167: ... measurements listed in the following steps assume the instrument is being tested after a one hour warm up in an environment with an ambient temperature of 18 to 28 C and a relative humidity of less than 70 Some of the digital tests can be run either through the RS 232 port or by using Fluke DAQ software With most procedures you can use either method to verify functionality For the RS 232 tests yo...

Страница 168: ... Model Multifunction DC Voltage Fluke 5700A Calibrator Range 90 mV to 300 V dc Accuracy 0 002 AC Voltage Frequency Voltage Accuracy 1 kHz 29 mV to 300 V 0 05 100 kHz 15 mV to 300 V 0 5 Frequency 10 kHz 1 V rms 0 01 Ohms Ohms Accuracy 190Ω 0 005 1 9 kΩ 0 005 19 kΩ 0 005 190 kΩ 0 005 1 9 MΩ 0 005 Digital Multimeter General Purpose Measurement Fluke 77 Signal Generator Sine wave 0 5 to 1 V rms 10 Hz ...

Страница 169: ...ully the correct host computer Ethernet port is activated the host computer configuration is accurately reflected and other background operations are completed This procedure clears the instrument of any existing BCN Line Frequency and Network settings 1 Apply Instrument Power with Configuration Reset Hold down the COMM key on the instrument front panel and apply power to the instrument After the ...

Страница 170: ...sert a Channel 01 and set the channel to 90 mV dc 8 Verify Communications With the Communications Configuration dialog box still open select the 2680 Series on the TreeView list and click the Verify button The message Connection Successful is returned for successful communications between the 2680 Series and host computer If you receive an error message refer to Error Codes in Appendix I Click OK ...

Страница 171: ...ommands through the RS 232 port For the RS 232 tests you will also need to use a program such as HyperTerminal to perform the test HyperTerminal is provided as a standard accessory on Windows systems The Accuracy Performance Tests include the following Master Alarm Output Test Trigger Input Test Trigger Output Test Volts DC Accuracy Test Volts AC Accuracy Test Frequency Accuracy Test Analog Channe...

Страница 172: ...put should be less than 1 V Fluke DAQ Master Alarm Output Test 1 Connect Test Leads to ALARM TRIGGER I O Connector Remove the 8 position ALARM TRIGGER I O connector from the instrument rear panel Connect a test lead to each line Master Alarm Trigger Output Trigger Input plus a test lead to the GND line 2 Measure Line Using a digital multimeter measure the output of the Master Alarm test lead refer...

Страница 173: ...for V dc In Fluke DAQ verify channel 1 is configured for V dc 3 V range 3 Start Instrument Scanning Click the Start arrow in the Communication dialog to start instrument scanning although no measurement scanning takes place because the external Trigger Input is not set 4 Set Trigger Input While monitoring the Module Communication dialog connect the Trigger Input test lead to the GND test lead The ...

Страница 174: ...ation dialog to start instrument scanning 7 Open Spy Open the Spy window under the Configuration dialog 8 Verify Trigger Out Pulse Check that the Trigger Out pulse is 125 µs and is repeated every second 9 Stop Scanning Click the Stop Instrument button on the Button Bar to stop instrument scanning Volts DC Accuracy Test PAI Module For these tests you must move between the Fluke DAQ Configuration di...

Страница 175: ...mV 300 mV 0 300056 V 0 299944 V 3 V Short Circuit Zero 0 00015 V 0 00015 V 3 V 3 V 2 99946 V 3 00054 V 3 V 3 V 3 00054 V 2 99946 V 30 V Short Circuit Zero 0 0017 V 0 0017 V 30 V 30 V 29 9944 V 30 0056 V 30 V 30 V 30 0056 V 29 9944 V 300 V Short Circuit Zero 0 017 V 0 017 V 300 V 300 V 299 944 V 300 056 V 300 V 300 V 300 056 V 299 944 V Volts DC Accuracy Test FAI Module The following procedure test...

Страница 176: ...mV 300 mV 0 30009 V 0 29991 V 3 V Short Circuit Zero 0 0004 V 0 0004 V 3 V 3 V 2 9992 V 3 0008 V 3 V 3 V 3 0008 V 2 9992 V 30 V Short Circuit Zero 0 005 V 0 005 V 30 V 30 V 29 991 V 30 009 V 30 V 30 V 30 009 V 29 991 V 50 V Short Circuit Zero 0 04 V 0 04 V 50 V 50 V 49 95 V 50 05 V 50 V 50 V 50 05 V 49 95 V Volts AC Accuracy Test The following procedure tests the accuracy of the volts ac function ...

Страница 177: ...V Frequency Accuracy Test The following procedure tests the accuracy of the frequency function for the PAI and FAI modules Measurement accuracy applies to all channels not just the channel used for the test 1 Configure Channel 1 for Frequency Using the Fluke DAQ software configure channel 1 for frequency There is no range selection for frequency as all frequency measurements use auto ranging 2 Ope...

Страница 178: ...eads and very low resistance for shorted leads less than 10 Ω for the PAI or less than 1 kΩ for the FAI 5 Repeat Test for each Channel Repeat steps 2 to 4 for each channel 3 4 5 and so forth to channel 20 Open Thermocouple Response Test This test checks the Open Thermocouple response 1 Connect an 820 Ohm Test Resistor Remove the Universal Input module from the instrument and connect an 820 Ω resis...

Страница 179: ... Decade Resistance Source Tables are provided for both connections 2 Configure Channel 1 for Ohms In Fluke DAQ configure channel 1 for Ohms 2W 300 range 3 Open Spy Open the Spy window under the Configuration dialog 4 Verify Accuracy Configure the Decade Resistance Source for the output values below and verify the Spy window measurement is between the minimum and maximum values Change the channel 1...

Страница 180: ...ng 2 terminals Measurement accuracy applies to all channels not just the channel used for the test The 4 wire resistance accuracy test is more rigorous and you may wish to skip this step and continue to 4 Wire Resistance Accuracy Test described later in this Chapter 1 Connect the Resistance Source to Channel 1 Remove the Universal Input module from the instrument and connect a cable from the Decad...

Страница 181: ...ire resistance present in your setup to the resistance values given in this table Resistance Range 5700A Minimum Reading Maximum Reading 30 kΩ Short Circuit Zero 700 Ω 1 kΩ 30 kΩ 19 kΩ 19 686 kΩ 20 014 kΩ 300 kΩ 190 kΩ 189 60 kΩ 192 10 kΩ 3 MΩ 1 9 MΩ 1 8740 MΩ 1 9277 MΩ The resistance accuracy in this table makes allowance for up to 0 1 Ω of lead wire resistance You must add any additional lead wi...

Страница 182: ...annels 1 and 11 Remove the Universal Input module from the instrument and connect a cable from the Decade Resistance Source to the Universal Input module terminals for channel 1 Sense and channel 11 Source as shown in Figure 4 4 Reinstall the Universal Input module You may also use the 5700A resistance calibration output instead of the Decade Resistance Source Tables are provided for both connecti...

Страница 183: ...3 4 5 6 7 8 9 10 SOURCE 4 WIRE SENSE 4 WIRE H L H L H L H L H L H L H L H L H L H L H L H L H L H L H L H L H L H L H L H L 4 Wire 4W Connection 5700A Decade Resistance Box or DIN IEC75 RTD Input Module alg69f eps Figure 4 4 4 Wire Connections to the Universal Input Module Resistor ...

Страница 184: ...H L H L H L H L H L H L H L H L H L H L H L H L H L H L H L H L INPUT MODULE HI HI LO LO HI SENSE V AUX CURRENT GUARD GROUND WIDEBAND 5700A NC NC OUTPUT V A Ω Ω H L H L 5700A UUT Sense Sense Source Source EX GRD OFF 2 WIRE COMP OFF EX SNS ON alg70f eps Figure 4 5 4 Wire Connections to the Universal Input Module 5700A ...

Страница 185: ...61 Ω 290 139 Ω 3 kΩ Short Circuit Zero 0 Ω 0 5 Ω 3 kΩ 2 9 kΩ 2 89849 kΩ 2 90137 kΩ 30 kΩ 29 kΩ 28 9834 kΩ 29 0166 kΩ 300 kΩ 290 kΩ 289 621 kΩ 290 379 kΩ 3 MΩ 2 9 MΩ 2 89146 MΩ 2 90854 MΩ The resistance accuracy in this table makes allowance for up to 0 01 decade resistance tolerance Resistance Range 5700A Minimum Reading Maximum Reading 300 Ω Short Circuit Zero 0 Ω 0 030 Ω 300 Ω 190 Ω 189 912 Ω 19...

Страница 186: ...ions 2 Configure Channel 1 for Resistance In Fluke DAQ configure channel 1 for Ohms 4W 300 range 3 Open Spy Open the Spy window under the Configuration dialog 4 Verify Accuracy Configure the Decade Resistance Source for the output values below and verify the Spy window measurement is between the minimum and maximum values Change the channel 1 range as required see Step 2 Resistance Range Decade Re...

Страница 187: ...mmand Set the mask to 1048575 Use the command DIO for input The value can range from 1 to 1048575 2 20 1 1 Set Signal Lines High Set all of the signal lines high using the DIO 1048575 1048575 command 2 Verify Signal Verify that all of the signal lines are equal to or greater than 3 5 V dc 3 Set Signal Line Low Set all of the signal lines low using the DIO 1048575 0 command 4 Verify Signal Verify t...

Страница 188: ...ponds Verify that the correct lines are active DIO Relay Fuse Tests RS 232 DIO Relay Fuse Test Use the RS 232 command RELAY mask value command to verify operation of the relays The mask should always be set to 255 The value can be set from 1 to 255 depending on the bit to be set For example to set the relay pair K1A K1B send RELAY 1 0 To clear the relay pair send RELAY 1 1 To set relay pair K8A K8...

Страница 189: ...og In the DIO Configuration dialog Set the start count in the DIO Configuration dialog to 0 deselect debounce if selected and select direction as up Click the Communication icon and select the DIO from the TreeView Deselect the DIO channel 0 if selected to enable the totalizer RS 232 Totalizer Count Test 1 Initialize Totalizer to Count Up Initialize the totalizer to count up with the command TOTCF...

Страница 190: ...t DIO 0 to 0 to enable the totalizer 4 Reconnect Signal Generator Reconnect the signal generator 5 Verify Totalizer Count Verify that the totalizer counts from 0 to 4 294 967 295 and then down 6 Disconnect Signal Generator Disconnect the signal generator RS 232 Totalizer Count and Debounce Test 1 Initialize Totalizer to 0 Initialize the totalizer to 0 with the TOTINIT command 2 Set Totalizer to Up...

Страница 191: ...rator Set the signal generator to 10 Hz and 1 V pp and connect to the totalizer input 6 Verify Totalizer Count Verify that the totalizer count increases by about 10 counts per second in a positive direction 7 Stop Spy Stop the Spy 8 Disconnect Signal Generator Disconnect the signal generator Fluke DAQ Totalizer Count and Enable Test 1 Select DIO Click on the Communication icon and select the DIO f...

Страница 192: ...decreases by about 10 counts per second 6 Stop Spy Stop the Spy 7 Disconnect Signal Generator Disconnect the signal generator Fluke DAQ Totalizer Count and Debounce Test 1 Configure DIO In the Configuration dialog select the DIO from TreeView In the DIO Configuration dialog set the start count to 0 select debounce on and select direction as up 2 Start Spy Go to the Spy and start the Spy with the p...

Страница 193: ...epends on the accuracy specification you wish to maintain The instrument should also be calibrated if it fails the performance test or has undergone repair Variations in the Display Under normal operation the display presents various combinations of brightly and dimly lit annunciators and digits However you may encounter other random irregularities across different areas of the display under the f...

Страница 194: ...36 FLUKE 1 800 363 5853 Europe 31 402 675 200 Japan 81 3 3434 0181 Singapore 65 738 5655 Anywhere in the world 1 425 446 5500 Or visit Fluke s Web site at http www fluke com Replacement Parts Replacement parts are listed below To order replacement parts in the USA call 1 800 526 4731 To order parts from outside the USA contact the nearest Fluke Service Center Other device models options and access...

Страница 195: ...tions A 1 B Noise Shielding and Crosstalk Considerations B 1 C True RMS Measurements C 1 D RTD Linearization D 1 E Computed Channel Equations E 1 F Data File Format F 1 G Ethernet Cabling G 1 H Network Considerations H 1 I Error Codes I 1 ...

Страница 196: ......

Страница 197: ...recision Analog Input PAI module The third section contains specifications that apply only to the Fast Analog Input FAI module The last section contains information only for the Digital I O Relay and the Totalizer DIO module 2680A 2686A Combined Specifications The following specifications apply to both the 2680A and 2686A instruments The topics include General Specifications PAI FAI Environmental ...

Страница 198: ... Kg 1 8 lb 2680A PAI 1 2 Kg 2 7 lb 2680A DIO 0 8 Kg 1 8 lb Power 100 240 V ac no switching required 50 to 60 Hz 100 VA maximum or optional 9 V dc to 45 V dc 35 W maximum EMC EN50082 2 EN55022 1 EN55011 class A EN610000 4 2 3 4 6 8 EN61326 Safety EN61010 1 CAT II DIO is rated CAT I CSA C22 2 No 1010 1 Serial Interface Connector 9 pin male DB9 Signals Tx Rx DTR RTS GND Modem Control full duplex Baud...

Страница 199: ... full humidity ratings with 2 hour warm up Altitude Operating 2 000 m 6 562 ft maximum Non operating 12 200 m 40 000 ft maximum Warm up Time 1 hour to rated specifications or 15 minutes if relative humidity non condensing is 50 or less Real Time Clock and Calendar The next table provides a summary of the battery powered real time clock and calendar Table A 2 2680A 2686A Real Time Clock and Calenda...

Страница 200: ...ed Minimum Pulse Width 5 µs Maximum Frequency Nominal 400 Hz Repeatability 3 ms Trigger Out Specifications The next table provides a summary of the Trigger Out specifications The Trigger Out output is located on the rear panel connector terminals Trigger Out and Signal GND Table A 4 Trigger Out Specification Specification Characteristic TTL Logical Zero Trigger Out Set 0 8 V maximum for an Iout of...

Страница 201: ...a 10 100BaseT interface or through an RS 232 port The 10 100BaseT provides the primary communication interface The RS 232 is used for calibration and limited debug capability 2686A PC Card Storage The 2686A supports a non volatile PC Card PCMCIA ATA type card memory module option This table provides a list of active channels and the number of scans to memory card capacity Table A 6 2686A Active Ch...

Страница 202: ...Ω imbalance Medium and Fast Rates Channel to Channel Cross talk 120 dB minimum Slow Rate e g 30 V dc on channel 1 may cause a 30 µV error on channel 2 100 dB minimum Medium and Fast Rates e g 1V dc on channel 1 may cause a 10 µV error on channel 2 Temperature Coefficient For input Add 1 10th the 90 day specification per C above 28 C or below 18 C For floor error V Add 1 20th the 90 day specificati...

Страница 203: ...t V 18 C to 28 C 10 C to 60 C Range 90 Day 1 Year 1 Year Slow Fast Slow Fast Slow Fast 90 mV 01 7 µV 01 17 µV 013 8 µV 013 18 µV 042 18 2 µV 042 44 2 µV 300 mV 01 15 µV 01 30 µV 013 17 µV 013 35 µV 042 39 µV 042 78 µV 750 mV 01 40 µV 01 70 µV 013 50 µV 013 80 µV 042 104 µV 042 182 µV 3 V 01 0 1 mV 01 0 2 mV 013 0 15 mV 013 0 2 mV 042 0 26 mV 042 0 52 mV 30 V 01 1 5 mV 02 3 mV 013 1 7 mV 026 3 5 mV...

Страница 204: ...rminal on channels 2 through 10 and 12 through 20 to earth 300 V ac rms from any terminal on channels 1 and 11 to any other terminal 150 V ac rms from any terminal on channels 2 through 10 and 12 through 20 to any other input terminal Maximum Volt Hertz Product 2x10⁶ Volt Hertz product on any range normal mode input 1x10⁶ Volt Hertz product on any range common mode input Temperature Coefficient Li...

Страница 205: ...Range and Resolution Specifications Range Resolution Minimum Input for Slow Fast Rate Accuracy Full Scale 30 000 3 000 300 mV 10 µV 100 µV 20 mV 3 V 100 µV 1 mV 200 mV 30 V 1 mV 10 mV 2 V 150 300 V 10 mV 100 mV 20 V Note 300 V range applies to channels 1 and 11 only ...

Страница 206: ...mV 1 2 5 mV 10 kHz to 20 kHz 0 4 2 5 mV 1 5 mV 0 5 2 5 mV 1 2 5 mV 20 kHz to 50 kHz 1 3 mV 1 5 6 mV 1 5 3 mV 2 6 mV 50 kHz to 100 kHz 2 5 mV 3 10 mV 3 5 mV 4 10 mV 30 V 20 to 50 Hz 3 25 mV 6 50 mV 3 5 25 mV 7 50 mV 50 to 150 Hz 0 4 25 mV 1 50 mV 0 5 25 mV 1 2 40 mV 150 Hz to 10 kHz 0 3 25 mV 1 50 mV 0 5 25 mV 1 2 40 mV 10 kHz to 20 kHz 0 4 25 mV 1 50 mV 0 5 25 mV 1 2 40 mV 20 kHz to 50 kHz 1 30 mV...

Страница 207: ...e Coefficient Add 1 10th the 90 day specification per C above 28 C or below 18 C Accuracy at 20 C Multiply the 10 C to 60 C accuracy specification by 2 After 1 hour warm up For accuracy between 10 C and 20 C interpolate linearly Table A 14 PAI Module 4 Wire Resistance Range and Resolution Specifications Resolution Current Full Scale Maximum Voltage Range Slow Fast Applied Voltage Applied by Instru...

Страница 208: ...the absorption of humidity under extreme conditions If the instrument is operated normally within its specified temperature humidity range the 3 MΩ range meets its accuracy specifications However if the instrument is soaked at 50 C 90 relative humidity the 3 MΩ range may require 1 hour of dry out time at 25 C 40 relative humidity for each hour of soak time in order to achieve its specified accurac...

Страница 209: ...and 20 C interpolate linearly Table A 17 PAI Module 4 Wire RTD Specifications Accuracy 3σ Temperature Resolution 90 Day 18 C to 28 C 1 Year 18 C to 28 C 1 Year 10 C to 60 C Slow Fast Slow Fast Slow Slow Fast 200 C 0 003 C 0 007 C 0 06 C 0 16 C 0 09 C 0 33 C 0 63 C 0 C 0 003 C 0 007 C 0 09 C 0 20 C 0 13 C 0 53 C 0 86 C 100 C 0 003 C 0 007 C 0 10 C 0 23 C 0 16 C 0 63 C 0 97 C 300 C 0 003 C 0 007 C 0...

Страница 210: ...nal into the input after each measurement A thermocouple resistance greater than 1k to 10k is detected as an open input Temperature Coefficient To calculate Thermocouple accuracy for temperatures between 28 C and 60 C or 10 C and 18 C use a linear interpolation between the two applicable points For example if the applicable specification at 28 C is 0 6 and the specification at 60v C is 1 1 then th...

Страница 211: ...0 K 100 to 25 04 0 55 0 60 0 90 0 70 1 00 25 to 120 03 0 40 0 50 0 80 0 60 0 90 120 to 800 03 0 50 0 65 0 90 1 00 1 20 800 to 1372 03 0 70 1 00 1 30 1 60 1 90 L 100 to 100 04 0 90 1 00 2 00 1 30 2 00 100 to 800 04 0 50 0 90 1 40 1 20 1 70 800 to 900 03 0 50 0 70 1 10 1 30 1 50 N 100 to 25 05 0 65 0 75 1 20 0 80 1 30 25 to 120 05 0 55 0 60 1 00 0 70 1 10 120 to 1000 04 0 45 0 60 0 90 1 00 1 20 1000...

Страница 212: ...16 05 1 60 2 10 3 20 3 40 4 60 T 100 to 0 04 0 60 0 65 1 00 0 70 1 10 0 to 150 03 0 40 0 50 0 80 0 60 0 90 150 to 400 02 0 30 0 40 0 60 0 60 0 80 U 100 to 0 04 1 50 1 50 2 60 1 60 3 00 0 to 600 04 0 60 0 80 1 60 1 10 1 90 Thermistor Accuracy C 90 Day 1 Year Temp C Range Slow Slow 40 to 150 100 to 100 mΩ 0 3 0 4 18 to 23 C Steinhart Hart Equation 1 T o Kelvin A B ln Ω C ln Ω 3 Default constants are...

Страница 213: ... 0 05 1 Hz 0 05 10 Hz 90 kHz to 900 kHz 10 Hz 100 Hz 0 05 10 Hz 0 05 100 Hz 1 MHz 100 Hz 1 kHz 0 05 100 Hz 0 05 1 kHz Table A 21 PAI Module Frequency Sensitivity Specifications Frequency Measurement Sensitivity Sinewave Frequency Range Minimum Signal Maximum Signal 15 Hz to 70 kHz 100 mV ac rms V 150 300 V rms 1 and Vx Hz 2x10⁶ 70 kHz to 100 kHz 100 mV ac rms 20 V ac rms 100 kHz to 200 kHz 150 mV ...

Страница 214: ...60 Hz 0 1 1 kΩ imbalance Slow Rate 80 dB minimum at dc 60 dB at 50 Hz 60 Hz 0 1 1 kΩ imbalance Medium and Fast Rates Channel to Channel Crosstalk 120 dB minimum Slow Rate e g 30 V dc on channel 1 may cause a 30 µV error on channel 2 80 dB minimum Medium and Fast Rates e g 1 V dc on channel 1 may cause a 10 µV error on channel 2 Temperature Coefficient For input Add 1 10th the 90 day specification ...

Страница 215: ...e Accuracy Specifications Accuracy 3σ input V 18 C to 28 C 10 C to 60 C Range 90 Day 1 Year 1 Year Slow Fast Slow Fast Slow Fast 90 mV 01 20 µV 01 50 µV 013 23 µV 013 50 µV 042 52 µV 042 130 µV 300 mV 01 40 µV 01 90 µV 013 49 µV 013 93 µV 042 104 µV 042 234 µV 3 V 01 3 mV 01 6 mV 013 38 mV 013 64 mV 042 78 mV 042 1 56 mV 30 V 01 4 mV 02 8 mV 013 4 9 mV 026 9 5 mV 042 10 6 mV 084 20 3 mV 50 V 01 30...

Страница 216: ...put terminal Maximum Volt Hertz Product 2x10⁶ Volt Hertz product on any range normal mode input 1x10⁶ Volt Hertz product on any range common mode input Temperature Coefficient Linear interpolation between 2 applicable points for temperatures between 28 C and 60 C or 10 C and 18 C e g if the applicable specification at 28 C is 2 and the specification at 60 C is 3 then the specification at 40 C is 3...

Страница 217: ... Hz 3 2 5 mV 6 5 mV 3 5 2 5 mV 7 5 mV 50 to 150 Hz 0 4 2 5 mV 0 8 5 mV 0 5 2 5 mV 1 5 mV 150 Hz to 10 kHz 0 3 2 5 mV 0 6 5 mV 0 4 2 5 mV 1 5 mV 10 kHz to 20 kHz 0 4 2 5 mV 0 8 5 mV 0 5 2 5 mV 1 5 mV 20 kHz to 50 kHz 1 3 mV 1 5 6 mV 1 5 3 mV 2 6 mV 50 kHz to 100 kHz 2 5 mV 3 10 mV 3 5 mV 4 10 mV 30 V 20 to 50 Hz 3 25 mV 6 50 mV 3 5 25 mV 7 50 mV 50 to 150 Hz 0 4 25 mV 0 8 50 mV 1 2 25 mV 1 3 40 mV ...

Страница 218: ...oefficient Add 1 10th the 90 day specification per C above 28 C or below 18 C Accuracy at 20 C Multiply the 10 C to 60 C accuracy specification by 2 After 1 hour warm up For accuracy between 10 C and 20 C interpolate linearly Table A 29 FAI Module 4 Wire Resistance Range and Resolution Specifications Resolution Current Full Scale Maximum Voltage Range Slow Fast Applied Voltage Applied by Instrumen...

Страница 219: ...re gradient nominal 1 ºC Only 30 k 300 k and 3 M ranges are available in 2 wire resistance on the FAI Module FAI Module 4 Wire RTD per ITS 1990 Measurement Specifications The next tables provide FAI Module specifications for the 4 wire Resistance Temperature Detector RTD measurement function The 4 wire measurements use 2 input channels a decade apart e g channels 4 and 14 There is no 2 wire RTD ca...

Страница 220: ... function per ITS 1990 Table A 33 FAI Module Thermocouple General Specifications Specification Characteristic Input Impedance 100 MΩ minimum in parallel with 300 pF Open Thermocouple Detect Operates by injecting a small ac signal into the input after each measurement A thermocouple resistance greater than 1 kΩ to 10 kΩ is detected as an open input Temperature Coefficient To calculate Thermocouple ...

Страница 221: ... 00 1 50 K 100 to 25 4 1 00 1 10 2 00 1 20 2 10 25 to 120 3 0 80 0 90 1 70 1 00 1 80 120 to 1000 3 0 90 1 10 1 80 1 50 2 20 1000 to 1372 3 1 20 1 50 2 30 2 00 2 90 L 100 to 100 4 1 20 1 30 2 90 1 60 3 10 100 to 800 4 0 90 1 00 2 10 1 20 2 30 800 to 900 3 0 70 0 80 1 30 1 00 1 50 N 100 to 25 5 1 40 1 50 2 80 1 50 2 90 25 to 120 5 1 10 1 30 2 30 1 30 2 40 120 to 1000 4 1 00 1 10 2 00 1 20 2 10 1000 ...

Страница 222: ... 5 2 00 2 50 4 50 3 20 5 30 1800 to 2316 5 3 10 3 80 6 80 5 10 8 10 T 100 to 0 4 1 10 1 20 2 20 1 30 2 30 0 to 150 3 0 90 1 00 1 70 1 00 1 80 150 to 400 2 0 70 0 80 1 40 0 80 1 50 U 100 to 0 4 2 00 2 10 4 30 2 20 4 60 0 to 600 4 1 30 1 40 2 50 1 60 2 60 Thermistor Accuracy C 90 Day 1 Year Temp C Range Slow Slow 40 to 150 100 to 100 mΩ 0 4 0 51 18 to 23 C Steinhart Hart Equation 1 T o Kelvin A B ln...

Страница 223: ... Hz 1 Hz 0 05 0 1 Hz 0 05 1 Hz 9 kHz to 90 kHz 1 Hz 10 Hz 0 05 1 Hz 0 05 10 Hz 90 kHz to 900 kHz 10 Hz 100 Hz 0 05 10 Hz 0 05 100 Hz 1 MHz 100 Hz 1 kHz 0 05 100 Hz 0 05 1 kHz Table A 36 FAI Module Frequency Sensitivity Specifications Frequency Range Minimum Signal Maximum Signal 15 Hz to 70 kHz 100 mV ac rms 30 V ac rms 70 kHz to 100 kHz 100 mV ac rms 20 V ac rms 100 kHz to 200 kHz 150 mV ac rms 1...

Страница 224: ...for the 10 Digital I O lines 0 to 19 Digital I O is located on the Output Module Digital connector terminals 0 to 19 and GND Table A 37 DIGITAL I O Specification Specification Characteristic Maximum Input Voltage 30 V Minimum Input Voltage 4 V Isolation None dc coupled Threshold 1 4 V Hysteresis 500 mV Output Voltage TTL Logical Zero 0 8 V maximum for an Iout of 1 0 mA 1 LSTTL load Output Voltage ...

Страница 225: ... Threshold 1 4 V Hysteresis 500 mV Input Debouncing None or 1 75 ms selectable Maximum Transition Rate 5 kHz Debounce disabled 500 Hz Debounce enabled Maximum Count for Totalizer 4 294 967 295 Digital Relay Specifications The next table provides a summary of the relay specifications for the 8 relay contact pairs on the output card Relay contacts are located on the Output Module connector two pairs...

Страница 226: ...Daughter Card Opto isolators M o t h e r b o a r d C o n t r o l l e r A D 2 TCP IP Network Display Keypad A C and Battery Supply Circuits Line Voltage or Battery Voltage Controller RAM FLASH Real Time clock ATA Card Ethernet RS232 RS232 cal test A D 3 A D 4 A D 5 DIO or A D 6 External Trig out External Trig in Filter and A D circuits Microprocessor PCMCIA Type II Memory Slot alg50f eps Figure A 1...

Страница 227: ...a r d C o n t r o l l e r A D 1 Tcp IP Network Display Keypad RS232 cal test A D 2 A D 3 A D 4 A D 5 External Trig in Isolated Power Power Daughter Card Opto isolators A C and Battery Supply Circuits Controller RAM FLASH Real Time clock Ethernet RS232 ATA Card PCMCIA Type II Memory Slot Line Voltage or Battery Voltage Removable Connector Card alg51f eps Figure A 1 2680 Series Chassis cont ...

Страница 228: ...2680A 2686A Users Manual A 32 ...

Страница 229: ...a sharp cutoff above the highest frequency of interest ahead of every input that is to be digitized and you must sample at a frequency at least two times that of the transition band of the filter The 2680 Series instruments do not have an anti aliasing filter built in They are not suitable for digitizing dynamic signals unless you put a suitable anti aliasing filter in series with each input Note ...

Страница 230: ... Slow which allows the instrument to filter out the noise 5 Ensure that the chassis of the instrument is connected to earth ground This is desirable for reasons of safety as well as noise Crosstalk Considerations The accuracy of low voltage measurements e g thermocouples low voltage ac measurements and resistance measurements above 3 kΩ can be greatly affected by undesired pickup from ac voltage s...

Страница 231: ...cations V ac Frequency Volts DC Resistance Temperature 100 Ohm RTD Temperature Thermocouple 100 Hz 80 dB 2 V if R 3k 04 V 1 V 100 Hz 100 dB 1 V if R 3k 02 V 003 V 500 Hz 100 dB 1 V if R 3k 02 V 03 V 1 kHz 50 dB 1 V if R 3k 02 V 3 V 2 kHz 60 dB 05 V if R 3k 02 V 1 V 5 kHz 66 dB 1 V if R 3k 02 V 1 V 10 kHz 80 dB 01 V 02 V 1 V 20 kHz 50 dB 02 V 05 V 1 V 50 kHz 40 dB 05 V 1 V 5 V 100 kHz 40 dB 1 V 2 V...

Страница 232: ... Not recomm 01 V 2 05 V 2 20 kHz 05 mV V 2 01 V 2 Not recomm 01 V 2 Not recomm 50 kHz 1 mV V 2 01 V 2 Not recomm 01 V 2 Not recomm 100 kHz 1 mV V 2 01 V 2 Not recomm 01 V 2 Not recomm 500 kHz 1 mV V 2 1 V 2 Not recomm 01 V 2 Not recomm For frequencies below 5 kHz the 2680 Series is roughly 10 times more susceptible to crosstalk at frequencies that are exact multiples of 300 Hz than it is at the fr...

Страница 233: ... Effects of Internal Noise in AC Measurements With the input shorted and the instrument set for ac volts V ac measurement internal amplifier noise causes a typical display reading of approximately 0 50 mV ac Since the instrument is a true rms responding measurement instrument this noise contributes minimally to the readings at the specified floor of each range When the rms value of the two signals...

Страница 234: ...t devices display the correct rms reading of 1 0000 V ac the dc component equals 0 However consider the 2 V peak to peak square wave Both types of measurement correctly display the dc component 0 V but the 2680 Series instrument also correctly measures the ac component 1 0000V The average responding device measures 1 11 V which amounts to an 11 error Average responding measurement instruments have...

Страница 235: ...1 1 414 2 000 0 779 0 771 1 414 2 000 2 000 1 414 2 000 1 000 1 414 1 111 0 785 1 000 0 707 3 464 2 000 1 732 4 442 K 0 962 2K 1 000 PK PK PK PK PK PK PK PK PK PK 2 0 PK RECTIFIED SINE FULL WAVE RECTIFIED SINE HALF WAVE 0 PK 0 PK SQUARE PK PK 0 PK RECTIFIED SQUARE RECTANGULAR PULSE 0 PK X Y D X Y K D D2 TRIANGLE SAWTOOTH 0 PK ac dc 2 2 RMS CAL IS THE DISPLAYED VALUE FOR AVERAGE RESPONDING INSTRUME...

Страница 236: ...2680A 2686A Users Manual C 4 ...

Страница 237: ...endar Van Dusen equation for a 385 RTD R0 may be specified using the Fluke DAQ software but α δ and β are fixed These fixed coefficients are the modified DIN 43760 coefficients that conform to ITS90 α 0 00385055 δ 1 49978574 β 0 10863383 The accuracy specifications of Fixed 385 measurements with a 385 RTD that matches the above coefficients are shown in Table A 15 for a PAI module and Table A 32 f...

Страница 238: ...ficients that conform to ITS90 δ 1 49978574 β 0 10863383 Figure D 1 shows the accuracy envelope for a 385 RTD that has δ and β that match the above coefficients Because of the error introduced by the linearization at low temperatures it is recommended that use of the Custom 385 RTD type be limited to temperatures between 100 and 600 C FAI PAI 100 0 100 200 300 400 500 600 Temperature Degrees C 1 5...

Страница 239: ...approximation and the difference in δ it is recommended that the use of the 375 RTD be limited to temperatures between 100 C and 300 C Figure D 3 shows the accuracy envelope for a 391 RTD and Figure D 4 shows the accuracy envelope for a 392 RTD Due to errors introduced by the approximation and the difference in δ it is recommended that the use of the 391 RTD and 392 RTD be limited to temperatures ...

Страница 240: ...0 0 100 200 300 400 500 600 Temperature Degrees C Accuracy Envelope Custom RTD 391 Probe 1 Year Slow 18 28 Degrees C Alpha 0 00391071 Delta 1 49576611 Beta 0 10822857 1 5 1 0 0 5 0 0 0 5 1 0 Error Degrees C 1 5 alg63f eps Figure D 3 391 RTD ...

Страница 241: ...I 100 0 100 200 300 400 500 600 Temperature Degrees C Accuracy Envelope Custom RTD 392 Probe 1 Year Slow 18 28 Degrees C Alpha 0 0039261 Delta 1 49512239 Beta 0 10188228 1 5 0 5 0 0 0 5 1 0 Error Degrees C 1 5 1 0 alg64f eps Figure D 4 392 RTD ...

Страница 242: ...2680A 2686A Users Manual D 6 ...

Страница 243: ...n The instrument traps math errors such as divide by zero and log 0 and returns a non numeric result which the Fluke DAQ reports as OL If a the value of a reference channel is non numeric indicating an open thermocouple or overload the value 1 0E 9 will be returned for the computed channel Computed channel equations must observe the following syntax White space is allowed but not required between ...

Страница 244: ...channel alarm status constant function equation TOT TS channel C digit digit digit alarm status A digit digit digit constant mantissa exponent mantissa digit digit digit digit digit digit exponent E digit digit function function name equation function name ABS EXP INT LN LOG SQR TOT TS Note The NetDAQ 2640A and 2645A use one or two digit channel numbers For example the syntax is C digit digit NetD...

Страница 245: ... or after scanning has stopped with the Export function or with the PC Card Get Scans function on the 2686A File Format The comma separated ASCII file format is as follows EOL means end of line a CR LF sequence File name string EOL Date and time file was created EOL File Comment 70 character string EOL Number of Columns including timestamp EOL Channel Number strings comma separated GCN strings DOL...

Страница 246: ...record consists of the scan time tag and a comma separated list of channel readings including the DIO word totalizer alarm1 and alarm2 The time tag format is in Excel Lotus Serial Number Date format which is the number since midnight January 1 1900 For example 37890 12345679 indicates September 26 2003 04 29 94 2 57 46 667 AM Strings in the data file are quoted to allow direct importation into Mic...

Страница 247: ...le has straight through by pin to pin connections see Figure G 1 Direct connection cables are used to make a direct connection between an instrument and a host computer A direct connection cable has the receive RX and transmit TX signal lines crossed These cables are also known as crossover or cross wired cables This allows the RX line input to become a TX output and vice versa see Figure G 1 This...

Страница 248: ...acle Function Pin Key Pin TX 1 1 TXD 2 2 RX 3 3 RXD 8 Pin RJ 45 Pinout Connections Reversed TX RX Receptacle Function Pin Key Pin TX 1 1 TXD 2 2 RX 3 3 4 4 5 5 RXD 6 6 7 7 8 8 4 4 5 5 6 6 7 7 8 8 1 8 1 8 Key Receptacle alg72f eps Figure G 1 10 100BaseT Ethernet Cables ...

Страница 249: ...west possible cost using off the shelf commercial networking products Read Network Primer later in this Chapter for more information on these standards 2680 Series and Your Network Administrator If you plan to communicate between your host PC and the 2680 Series instruments on a network that is totally isolated from any other network communication devices you can install the network and set up the...

Страница 250: ...came more popular users placed pressure on vendors to establish standards to allow interoperation of various types of computers operating system software and interface hardware One of these standardization efforts was started by the DARPA agency of the U S Defense department Another was headed up by the DEC and Xerox companies This effort resulted in the Ethernet wiring and low level protocol sche...

Страница 251: ...o may allow other types of cable connections such as 10Base2 and 10Base5 fat coax This is done to allow a hub to communicate with other network hosts such as other hubs routers and bridges A hub is sometimes referred to as a network switch If you want to use 10 100BaseT wiring without a hub to connect one 2680 Series instrument and one PC you must use a special 10 100BaseT cable This is necessary ...

Страница 252: ... and instruments must be carefully selected in this case See IP Addresses and Segmented Networks for more information on IP address assignment When a Bridge Router or Gateway is used in a network containing 2680 Series instruments and hosts be sure to reboot the host PC whenever an instrument is moved from one section of the net to another This is required to allow the network hardware devices to ...

Страница 253: ...es have a structure that can be used by Network Management to facilitate breaking the network into segments subnets that make better use of the available data communication capacity bandwidth Use of IP addressing and the network segmentation scheme is described in IP Addresses and Segmented Networks in this appendix The relationship between a host s Ethernet address and its IP address is establish...

Страница 254: ...e assigned to hosts 127 0 0 0 128 0 0 0 191 255 0 0 192 0 0 0 223 255 255 0 w 224 through 255 with x y and z equal to any value Most IP subnets have Class B or C Net IDs because there are quite a few of these available You may be able to get a Class A Net ID but there are so few of these available only 126 world wide that they are rarely issued and most are already assigned Most companies get one ...

Страница 255: ...twork contains a Router you must use the same Net ID used by the 2680 Series instruments for example 198 178 246 z If you do this you should set z to a number that does not interfere with the instruments Because the BCN can range from 1 99 you should set z of the IP address of your PC in the range 101 254 The Subnet Mask assigned to the PC should be 255 255 255 0 If your network contains more than...

Страница 256: ...th an Ethernet adapter by the manufacturer but often adapters must be added after purchase Installation of an Ethernet adapter is quite simple Windows NT and later versions of Windows can install commonly used adapters without using the adapter s installation software During the installation of an internal interface board on an ISA bus computer you may need to make several detailed configuration d...

Страница 257: ...king driver is controlled by the Network applet in the Control Panel With other networking software the setup information for NDIS drivers is contained in a file called protocol ini that must be in the same directory from which the driver is loaded This file contains sections describing the driver characteristics and the protocols that may be operating over the driver For example a driver characte...

Страница 258: ...rol Protocol Internet Protocol TCP IP has evolved as a networking protocol that supports communication among diverse computers and devices at U C Berkeley there once was a TCP IP connected Coke machine The TCP IP protocol can be used to communicate between programs running on many different computer systems running under many different operating systems and even running on several different physic...

Страница 259: ...t hosts on different network segments the packet is forwarded to the default gateway for delivery The default gateway has knowledge of the network IDs of the other network segments so it forwards the packet to other gateways on the network until the packet is delivered to the gateway attached to the destination segment with the matching network ID This process is generally referred to as routing t...

Страница 260: ...y physical network that is capable of carrying or tunneling TCP IP packets and can gate to an Ethernet 2680 Series devices use fixed IP addresses They support user entry of the subnet mask and the default gateway On networks that contain routers and gateways and support the Proxy ARP protocol or have static routing tables you don t have to use these parameters In the Proxy ARP protocol the routing...

Страница 261: ... If your network contains routers bridges gateways or other devices that divide the network into subnets and you intend to have the PC on a different subnet from the 2680 Series instrument s you need to make sure that the instruments can route IP packets This is especially true on Novell networks where the network may contain devices that can route only IPX packets The PC software uses the Address...

Страница 262: ...er section Check that the soft interrupt specified for use by the network interface driver is the same as specified for use by the protocol software Make sure that this interrupt is not being used by another software package i e another hardware driver 2 Network software loads and binds properly but Fluke DAQ cannot communicate with the instrument Use the communication configuration dialog and the...

Страница 263: ...rruptions In this case consider moving the instrument to an isolated network or a different subnet 4 Fluke DAQ can not keep up with the scan rate selected in the instruments This is indicated by the count of the number of scans in the instrument increasing continually to the maximum count during a data acquisition run Once the maximum count is reached scan data may be lost Move your instrument to ...

Страница 264: ...ay adapter driver and support packages If your network software doesn t load or operate properly try selecting the standard display driver in Windows Setup under the control panel If the problems go away contact your display adapter vendor for the latest version of their display adapter driver and associated support software If using the latest version doesn t fix the problems you may have to use ...

Страница 265: ... Command cannot be executed while scanning is enabled 5 Command cannot be executed while scanning is disabled 6 Command cannot be executed because no channels are configured 7 Command cannot be executed because the specified channel is not configured 8 No input module in the specified slot 9 Non volative storage is corrupted 10 No spy measurements are available 11 Enable scanning time is 24 hours ...

Страница 266: ...2 Can t get more than 5000 scans at a time from the PC card 1001 Error opening network configuration file 1002 Configuration file has different fields 1003 No BCN number defined 1004 Calling an incorrect version of communication layer 1005 WINSOCK DLL has already unloaded 1006 Cannot open socket 1007 Null pointer to data to be sent 1008 Stream buffer full 1009 The command sent cannot be verified 1...

Страница 267: ...aximum number of configurations 2010 BCN not registered in the CCF 2011 Out of memory error returned from Toolbox 2012 CCF doesn t exits or cannot be read 2013 Cannot create or write the CCF 2014 BCN cannot be found in the CCF 2015 Illegal TCP IP port number 2016 Invalid model number 2017 Invalid path provided for loading CCF file 2018 CCF file damaged or corrupted 2019 Attempted to set an invalid...

Страница 268: ...ne is using the instrument or the wrong TCP port number is being used in General Network mode 2029 Toolbox function is being called while another Toolbox function is processing 2030 Bad baud rate given when enabling Pass Thru mode on the secondary interface port 2031 Buffer size exceeds the maximum buffer limit 2032 Bad parameter value sent to flxConfixSet or Get 2033 Bad model for this function 2...

Страница 269: ...egrity test 4 20 Asynchronous device operations 1 14 B Base channel number reviewing and setting 2 31 Basic network packet and frame contents H 4 Block Diagrams A 30 C Calibration 4 35 Capabilities device 1 5 Channel computed 1 11 monitoring 1 10 monitoring analog 1 11 numbering 1 10 Channel analog 1 11 Cleaning 4 6 Common mode voltage 2 7 Communications RS 232 1 17 Computed channel 1 11 Computed ...

Страница 270: ...on 1 14 External trigger 1 9 External trigger wiring group device 2 10 F Features device 1 5 File format F 1 Fixed 385 RTD D 1 Fluke DAQ Alarm dialog 3 12 checking operational status 3 8 Communication dialogs 3 11 Configuration dialogs 3 9 configuring a computed channel 3 24 inserting a device 3 13 inserting and configuring a channel 3 22 inserting and configuring a module 3 18 installing 3 3 Mail...

Страница 271: ...2 42 IP address for host computer setting 2 53 IP addresses and segmented networks H 5 Isolated network operation 1 14 Isolated network type reviewing and setting 2 35 L Line frequency reviewing and setting 2 33 Linearization RTD D 1 M Mail and Web Settings dialogs 3 12 Maintenance 4 3 Master alarm 1 9 2 10 Master alarm output tests 4 14 Monitoring channel 1 11 2 25 digital I O status 2 27 totaliz...

Страница 272: ...eters 2 53 Shielded wiring 2 15 Shielding considerations B 1 Specifications 2680A 2686A general A 2 communication I O A 5 digital input output A 28 digital relay A 29 FAI A D 2 wire resistance measurement A 23 FAI A D 4 wire resistance measurement A 22 FAI A D 4 wire RTD measurement A 23 FAI A D AC voltage measurement A 20 FAI A D DC voltage measurement A 18 FAI A D frequency measurement A 27 FAI ...

Страница 273: ...tion 2 54 Token ring networks H 16 Totalizer 1 12 2 17 enable 2 17 Totalizer tests 4 31 Trend dialog 3 12 Trigger input 1 8 2 8 Trigger input tests 4 15 Trigger output 1 8 Trigger output tests 4 15 Trigger alarm 1 10 Trigger external 1 9 Trigger interval 1 9 Troubleshooting H 14 Troubleshooting network problems 2 58 Troubleshooting testing and 2 54 True RMS measurements C 1 U Universal input modul...

Страница 274: ...2680A 2686A Users Manual 6 ...

Отзывы: