19
7.REMOTE CONNECTIONS
7.1 MMA Welding
Using socket 36 (Fig. 1) the welding
current regualtor coin be used close to
the location where welding will take
place.
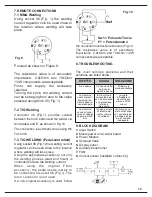
Proceed as shown in Figure 9.
The resistance value is of secondary
importance: 2.2kOhm anc 10kOhm
1/2W components are acceptable.
Fimer can supply the accessory
required.
Turning the knob, the welding current
can be set raging from zero to the value
selected using Knob 25 (Fig. 1).
7.2 TIG Welding
Connector 36 (Fig.1) provides contact
between the torch button and the welder via
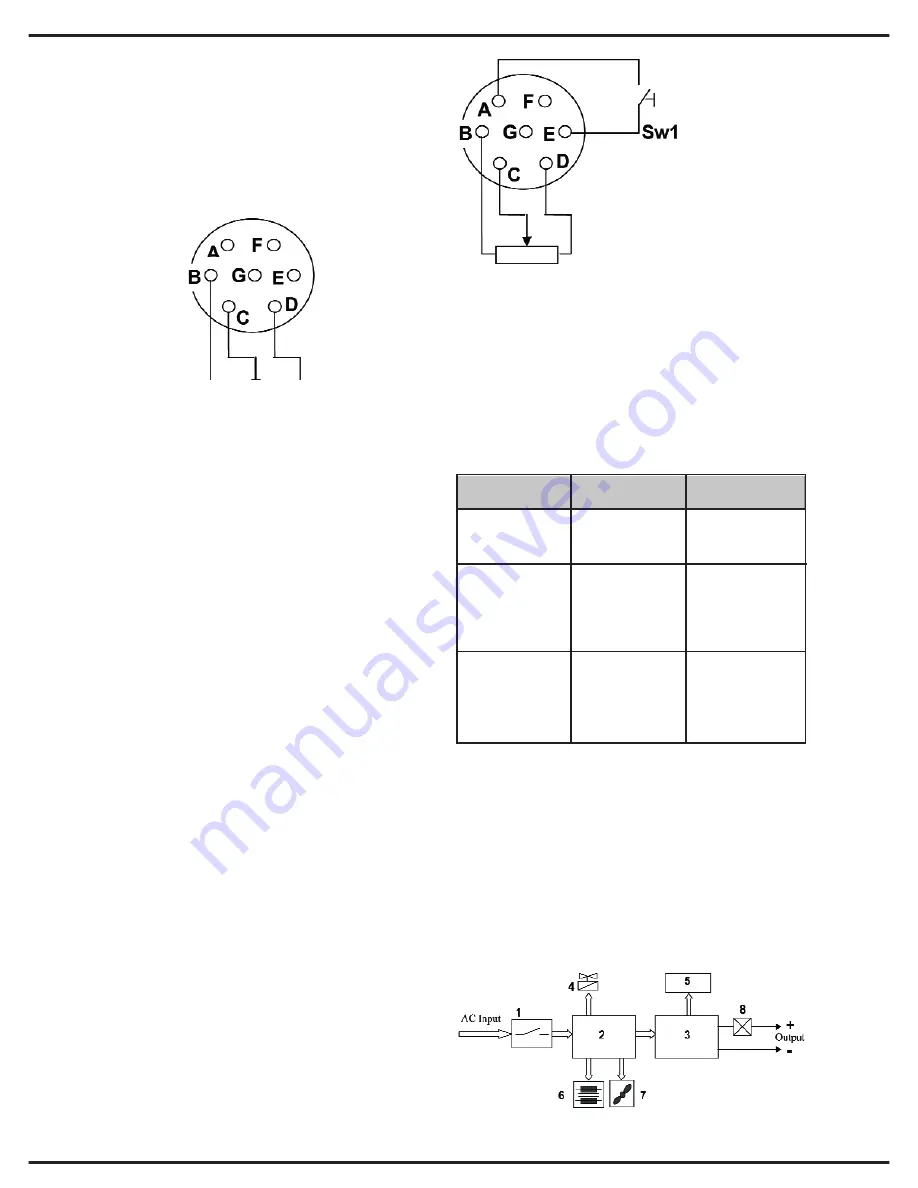
terminals A and E, as shown in Fig.10.
The connection is automatic when using the
TIG torch.
7.3 TIG WELDING (Pedal-controlled)
Using socket 36 (Fig.1) the welding current
regulator can be used close to the location
where welding will take place.
Using the appropriate accessory, not only
the welding process (start and finish) is
controlled but also the welding current.
When using the original Fimer
accessory, the pedal needs merely to
be connected to socket 36 (Fig.1). The
torch connector is not used.
If a non-original accessory is used, follow
the connection instructions shown in Fig.10.
The resistance value is of secondary
importance: 2.2kOhm and 10kOhm 1/2W
components are acceptable.
8. TROUBLESHOOTING
The most common problems and their
solutions are listed below:
9. BLOCK DIAGRAM
1.
Input Switch
2.
Mains power and control board
3.
Power Module
4.
Solenoid Valve
5.
Display panel
6.
Auxiliary transformer
7.
FAN
8.
Current sensor (installed on block 2)
Sw1 = Pulsante Torcia
P1 = Potenziometro
Fig. 9
Fig. 10
DIFETTO
CAUSA
SOLUZIONE
Arco spento
Cattivo contatto
tra pinza di
massa e pezzo
Stringere la
pinza e controllare
La macchina
cessa improvvi-
samente di fun-
zionare dopo un
uso prolungato.
la macchina è
surriscaldata per
un uso eccessivo
e la protezione
termica è
intervenuta.
Lasciare
raffreddare la
macchina per
almeno 20-30
minuti.
La macchina
cessa di funzio-
nare e sul display
appare la scritta
E.Ln
Tensione di rete
al di sotto del
valore minimo
accettabile.
Verificare se non
si sta utilizzando
un cavo di prolun-
ga troppo lungo
e/o di sezione
inadeguata.
Содержание TT165 AC/DC
Страница 1: ...InstructionManual TT165 AC DC TT205 AC DC TT165 AC DC TT205 AC DC ...
Страница 4: ......
Страница 5: ...TT165 AC DC TT205 AC DC ...
Страница 10: ...X ...
Страница 12: ......
Страница 30: ...20 NOTE ...
Страница 32: ...Cod 910 100 333GB REV00 ...

