37
CHAPTER 11
BRAKE PAD
REPLACEMENT
37
AH
AG
AL
AI
AM
AN
WORKSHOP MANUAL
TL 250
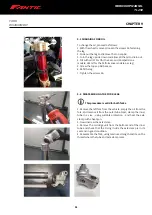
11.4 REAR OIL LEVEL
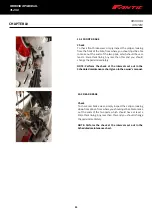
Check for oil through the oil reservoir AG. The oil level should
never be allowed to drop below the minimum level mark on the
reservoir AG. Top up oil as required through the filler cap AH.
If the brake lever feels spongy when pulled, the issue may
be an air bubble in the braking system. You need to contact
an authorized garage as soon as possible.
NOTE: For replacement intervals, refer to the Scheduled
maintenance chart and use recommended lubricants (see
owner's manual)
11.5 BLEEDING THE FRONT BRAKE
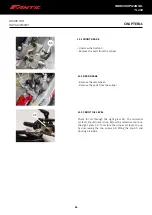
To bleed the front brake system, proceed as follows:
• Remove the rubber cap AI from the valve AL.
• Open the oil reservoir's cap.
• Insert one end of a hose in the valve AL,
and the other inside a container.
• Unscrew the valve AL (with the lever pulled) and pump the
brake lever until you get a steady stream of oil coming out
without any air bubbles: during this operation, it is important
you do not release the lever completely, and keep topping up
the brake pump reservoir to make up for the oil coming out.
• Tighten the valve back up and remove the hose.
• Refit the cap.
11.6
BLEEDING THE REAR BRAKE
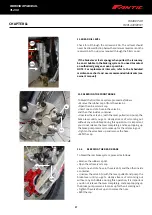
To bleed the rear brake system, proceed as follows:
• Remove the rubber cap AM.
• Open the oil reservoir's cap.
• Insert one end of a hose in the valve AN, and the other inside
a container.
• Unscrew the valve AN (with the lever pulled) and pump the
brake lever until you get a steady stream of oil coming out
without any air bubbles: during this operation, it is important
you do not release the lever completely, and keep topping up
the brake pump reservoir to make up for the oil coming out.
• Tighten the valve back up and remove the hose.
• Refit the cap.
Содержание TL 250
Страница 1: ...1 WORKSHOP MANUAL E N...
Страница 3: ...WORKSHOP MANUAL TL 250...
Страница 11: ...11 WORKSHOP MANUAL TL 250...
Страница 30: ...30 WORKSHOP MANUAL TL 250 CHAPTER 6 DASHBOARD 39 GENERAL CONTENT AND CONSULTATION ENGLISH...
Страница 49: ...49 49 WORKSHOP MANUAL TL 250...
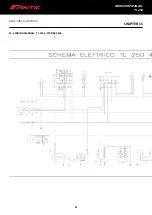
Страница 50: ...50 50 CHAPTER 15 ELECTRICAL DEVICES 15 3 WIRING DIAGRAM TL 250 4 STROKE 2016 WORKSHOP MANUAL TL 250...
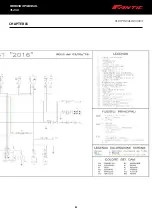
Страница 51: ...51 CHAPTER 15 ELECTRICAL DEVICES 51 WORKSHOP MANUAL TL 250...
Страница 136: ...136 136 WORKSHOP MANUAL TL 250...

