


Communication Settings
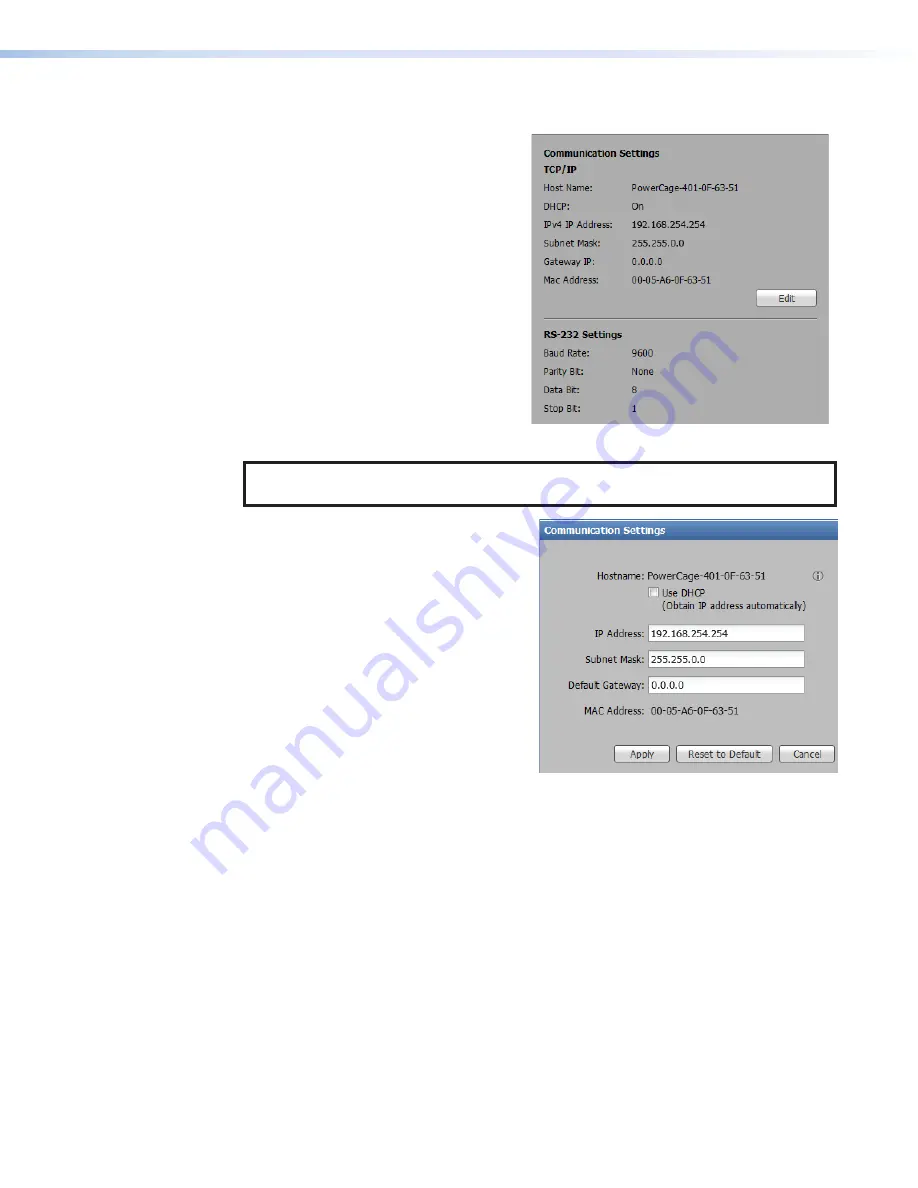
The Communication Settings panel (see
figure 28) configures TCP/IP settings and
displays RS-232 settings.
To configure the TCP/IP settings, click
the
Edit
button in the
Communication
Settings
panel.
The
Communication
Settings
dialog box
opens (see figure 29).
Figure 28.
Communication Setting Panel
NOTE:
The
Host
Name
is generated from the device name configured in
To obtain an IP address automatically:
1.
Select the
Use
DHCP
check box.
2.
Click the
Apply
button. The dialog box
closes.
To set a static IP address:
1.
Ensure the
Use
DHCP
check box is not
selected.
2.
In the
IP
Address
field, enter an IP
address.
3.
In the
Subnet
Mask
field, enter the
subnet mask if required.
4.
In the
Default
Gateway
field, enter the
default gateway if required.
Figure 29.
Communication Settings
Dialog Box
5.
Click the
Apply
button. The dialog box closes.
To reset all communication settings to the default values:
Click the
Reset
to
Default
button. The following settings are set:
•
DHCP is disabled.
•
The IP address is set to
192.168.254.254
.
•
The subnet mask is set to
255.255.0.0
.
•
The default gateway is set to
0.0.0.0
.
To cancel pending changes:
Click the
Cancel
button. The dialog box closes.
28
29
PowerCage 401 Enclosure • Internal Web Page
39
39
Содержание PowerCage 401
Страница 8: ...PowerCage 401 Enclosure Contents viii...


