Servicing Hardware
3.
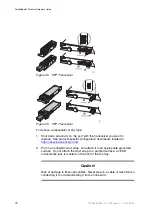
Label and disconnect any cables attached to the transceiver you want to
replace.
4.
Release the latching mechanism:
a
If the transceiver has a wire handle, unlatch it, and rotate it 90
to 180
.
b
If the transceiver has latching tabs, squeeze and hold the tabs.
5.
Withdraw the transceiver from its port and insert a dust cover over the
optical connectors.
To install a transceiver of any type:
1.
Put on an antistatic wrist strap, and attach it to an appropriate grounded
surface; an ESD convenience jack. Do not attach the wrist strap to a
painted surface.
2.
Ensure that the latching mechanism is closed.
3.
With the transceiver connectors aligned with the RX and TX labels on the
front panel of the line card slide the transceiver into the opening for the port
until the rear connector is seated and the locking mechanism snaps into
place. The labels for the TX and RX connectors vary by vendor. An arrow,
which can be incised on the case, usually indicates the traffic direction.
4.
Remove the dust cover if you are installing an optical transceiver.
4.4
Cleaning Optical Connectors
Clean fiber-optic components are a requirement for quality connections
between fiber-optic equipment. For more information, see
Inspection and
Cleaning Procedures for Fiber-Optic Connections
.
This document is located at
https://ebusiness.ericsson.net
97
27/153 30-CRA 119 1170/1 Uen A
|
2010-04-09
Содержание SmartEdge 600
Страница 1: ...SmartEdge 600 Router Hardware Guide Release 6 3 INSTALLATION 27 153 30 CRA 119 1170 1 Uen A ...
Страница 6: ...SmartEdge 600 Router Hardware Guide 27 153 30 CRA 119 1170 1 Uen A 2010 04 09 ...
Страница 26: ...SmartEdge 600 Router Hardware Guide 20 27 153 30 CRA 119 1170 1 Uen A 2010 04 09 ...
Страница 108: ...SmartEdge 600 Router Hardware Guide 102 27 153 30 CRA 119 1170 1 Uen A 2010 04 09 ...
Страница 112: ...SmartEdge 600 Router Hardware Guide 106 27 153 30 CRA 119 1170 1 Uen A 2010 04 09 ...

