-169
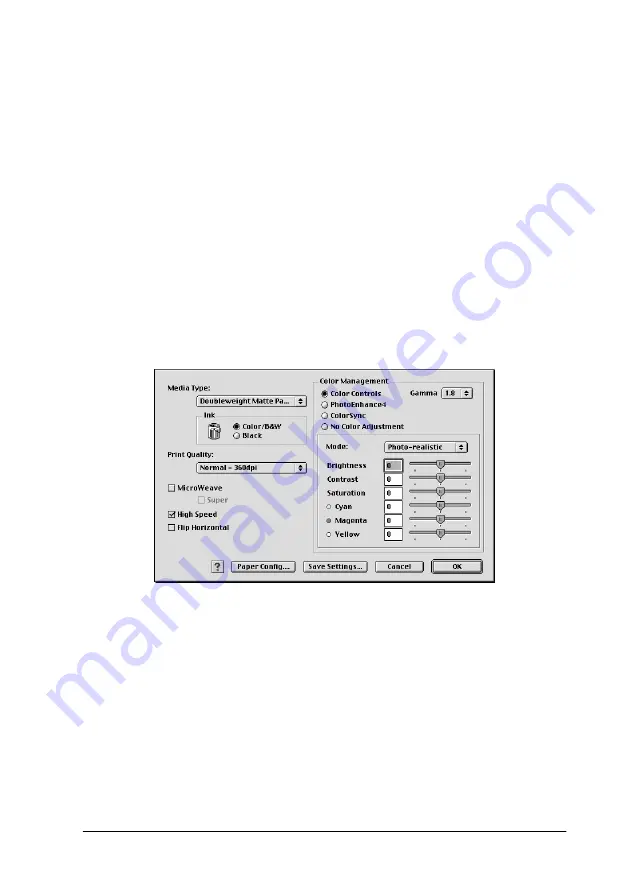
Advanced setting
The Advanced setting give you complete control over your
printing environment. Use these settings to experiment with new
printing ideas, or to fine-tune a range of print settings to meet
your individual needs. Once you are satisfied with your new
settings, you can give them a name and add them to the Custom
Settings list.
Follow the instructions below to make and save Advanced
settings.
1. Click the
Custom
button on the “Print dialog box” and then
click
Advanced
. The following dialog box appears:
Advanced dialog box
2. Select the Media Type loaded in the printer. For details, see
“Making the Media Type setting”.
3. If you use UltraChrome ink, choose
Color/B&W
to print color
or monotone photos, or
Black
to print a draft or black text
only. If you use ColorFast or dye ink, choose
Color
to print in
color, or
Black
to print in black and white.
4. Select a Print Quality setting.
Содержание Stylus Pro 10600 - UltraChrome Ink - Stylus Pro 10600 Print Engine
Страница 1: ...Reference Guide ...
Страница 46: ... 45 EPSON Enhanced Matte Poster Board 762mm 30 1016mm 40 S041599 ...
Страница 52: ... 51 EPSON Enhanced Adhesive Synthetic Paper 1118mm 44 30 5m 100 S041619 ...
Страница 60: ... 59 EPSON Poster Board Semigloss B2 S041273 EPSON Poster Board Semigloss B1 S041236 ...
Страница 109: ... 108 Plain Paper Enhanced Matte Poster Board EPSON Enhanced Matte Poster Board ...
Страница 141: ... 140 2 Right click your printer icon and select Properties 3 Click the Port tab then click the Configure Port button ...
Страница 164: ... 163 Plain Paper Enhanced Matte Poster Board EPSON Enhanced Matte Poster Board ...
Страница 239: ... 238 The roles of switches and meanings of the sensor light are as follows Auto Switch Manual Switch ...
Страница 312: ... 311 Speed Progress 126 Using 136 ...


