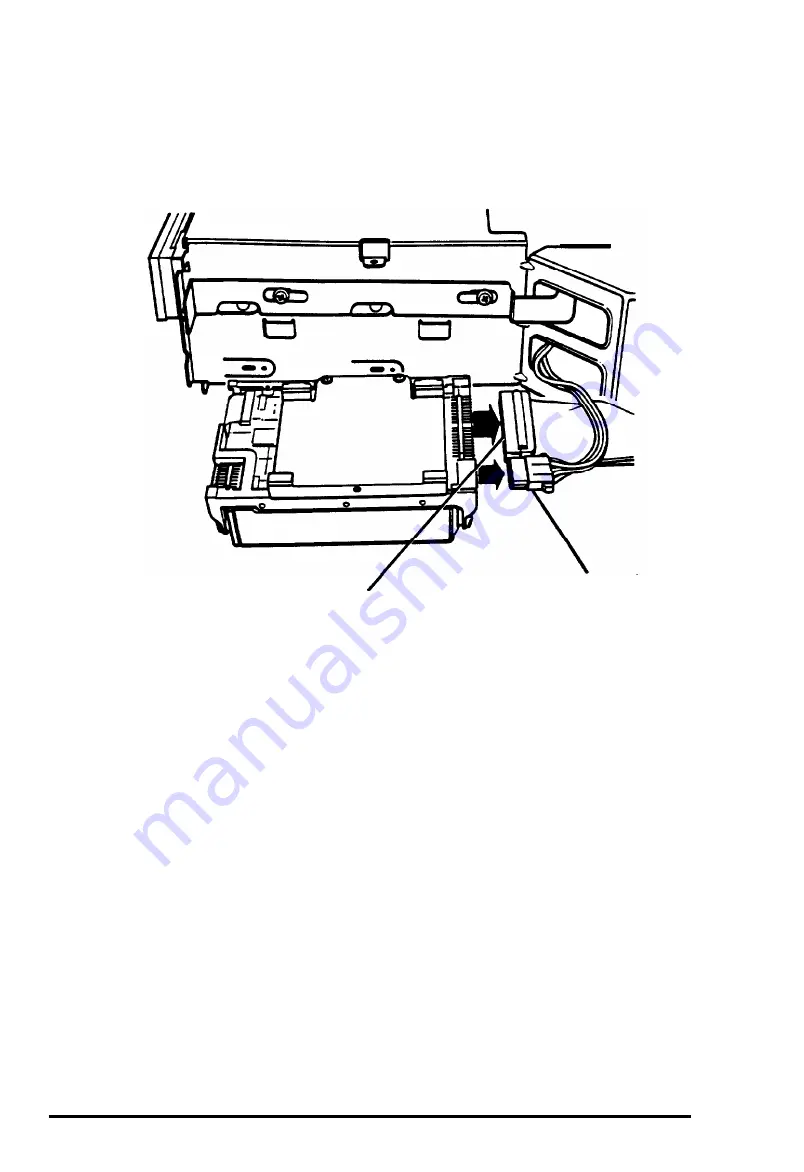
4.
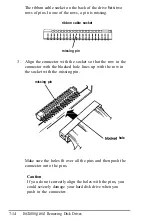
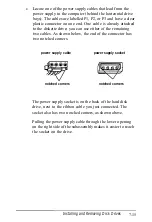
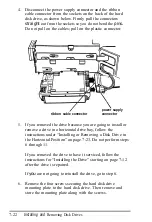
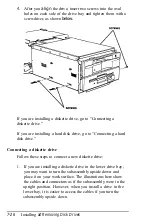
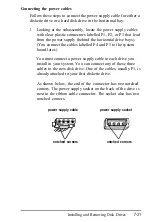
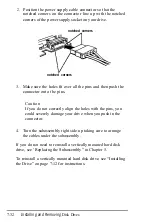
Disconnect the power supply connector and the ribbon
cable connector from the sockets on the back of the hard
disk drive, as shown below. Firmly pull the connectors
straight
out from the sockets so you do not bend the
pins.
Do not pull on the cables; pull on the plastic connector.
power supply
ribbon cable connector
connector
5.
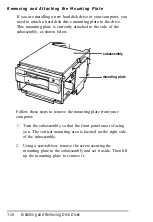
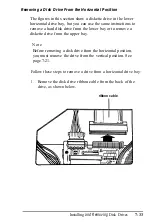
If you removed the drive because you are going to install or
remove a drive in a horizontal drive bay, follow the
instructions under “Installing or Removing a Disk Drive in
the Horizontal Position” on page 7-23. Do not perform steps
6 through 11.
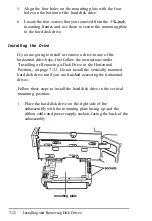
If you removed the drive to have it serviced, follow the
instructions for “Installing the Drive” starting on page 7-12
after the drive is repaired.
If
you
are not going to reinstall the drive, go to step 6.
6.
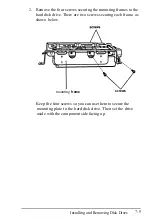
Remove the four screws securing the hard disk drive
mounting plate to the hard disk drive. Then remove and
store the mounting plate along with the screws.
7-22
Installing and
Removing Disk Drives
Содержание EQUITY 3865X/20 PLUS
Страница 1: ...EPSON E Q U I T Y 3 8 6 5 X 2 0 P L U S U s e r s G u i d e ...
Страница 2: ...EPSON E Q U I T Y 3 8 6 S X 2 0 P L U S USER S GUIDE X EQ386 20PLUS ...
Страница 136: ......
Страница 266: ...E Q U I T Y 3 8 6 S X 2 0 P L U S U s e r s G u i d e ...
Страница 269: ...Epson America Inc 20770 Madrona Avenue Torrance CA 90503 ...


