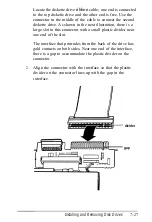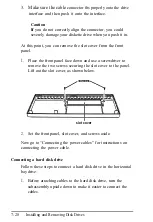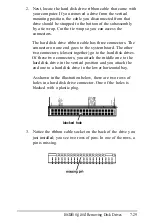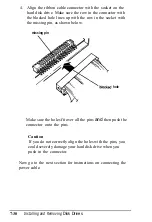
2.
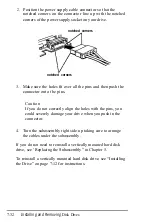
Position the power supply cable connector so that the
notched comers on the connector line up with the notched
corners of the power supply socket on your drive.
notched corners
notched corners
3.
Make sure the holes fit over all the pins and then push the
connector onto the pins.
Caution
If you do not correctly align the holes with the pins, you
could severely damage your drive when you push in the
connector.
4.
Turn the subassembly right side up taking care to arrange
the cables under the subassembly.
If you do not need to reinstall a vertically mounted hard disk
drive, see ‘Replacing the Subassembly” in Chapter 5.
To reinstall a vertically mounted hard disk drive, see “Installing
the Drive” on page 7-12 for instructions.
7-32
Installing and Removing
Disk Dives
Содержание EQUITY 3865X/20 PLUS
Страница 1: ...EPSON E Q U I T Y 3 8 6 5 X 2 0 P L U S U s e r s G u i d e ...
Страница 2: ...EPSON E Q U I T Y 3 8 6 S X 2 0 P L U S USER S GUIDE X EQ386 20PLUS ...
Страница 136: ......
Страница 266: ...E Q U I T Y 3 8 6 S X 2 0 P L U S U s e r s G u i d e ...
Страница 269: ...Epson America Inc 20770 Madrona Avenue Torrance CA 90503 ...

