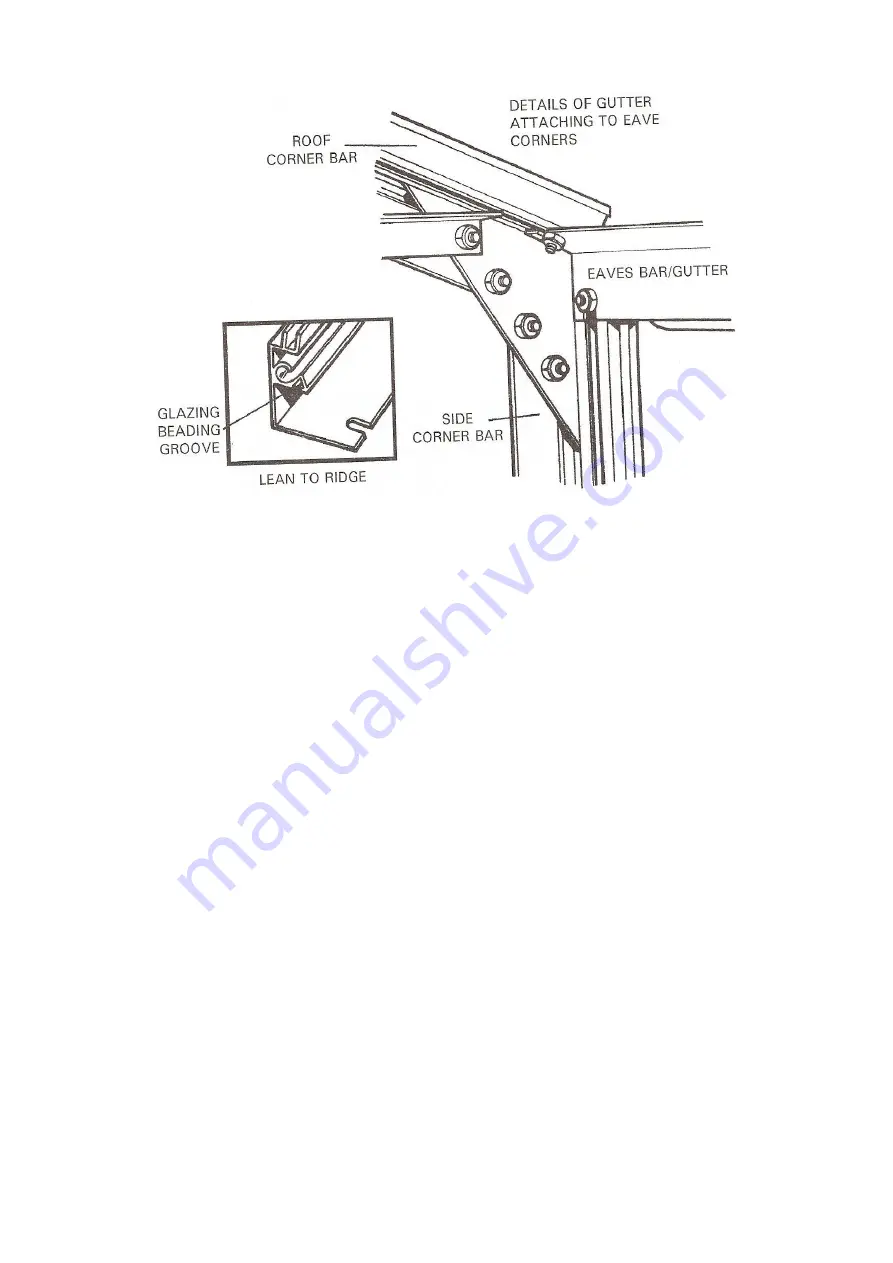
B The next step is to put the roof on and this is done in 3 stages
1 Attaching the ridge
Firstly insert the glazing beading into the vee groove, then in the same way the gutter slotted into
the corner bars so too does the ridge. Slot the ridge on to the corner bar, ensuring that the flat side
of the ridge is facing the wall. The bolts inserted in the roof corner bars at original frame assembly
can now be slid into the slots at the end of the ridge. (
Key point
)
2 Securing the roof bars
(The construction of this section is complicated. Please take extra care when reading the instruction
booklet).
Firstly thread the glazing bead into the grooves of each roof glazing bar, as previously described in
an earlier section.
The roof bars are secured by utilising the previously inserted bolts in the inner bolt slot of the roof
corner bars.
1. Attach a flat bar to the roof corner bar using the unoccupied bolt on the inner bolt slot. Add a nut
and finger tip tighten.
2. Slide one bolt along the bolt slot of a glazing bar which is to attach to the flange in the gutter as
seen in the diagram.
Before adding a nut to this bolt, add a strengthening bar with its mitred end to the ridge
(strengthening bars taped up with the roof bars) to the bolt with its flat side under the glazing bar.
Add the nut and finger tip tighten.
3. From the top of the glazing bar (and all other glazing bars when you arrive at this stage), slide
down the bolt slot, in the following order 1 – short bolt, 1 – long bolt, 2 – short bolts.
The bolts are to be roughly equal distances apart along the bar. The last of the short bolts is used to
attach the glazing bar and strengthening bar to the ridge.
Содержание KENSINGTON 10 x 6
Страница 1: ......
Страница 2: ......
Страница 3: ......
Страница 17: ...DOOR FRAME...
Страница 36: ...6 WIDE LT TOUGHENED GLASS PLAN Glass pane for standard door on gable end Louvre on rear end...
Страница 39: ...OPTIONAL EXTRAS RAIN WATER KIT FOR GUTTERING...
Страница 40: ...ELITE 1407...


