


Chapter 4 Web-Based Administration Tool
40
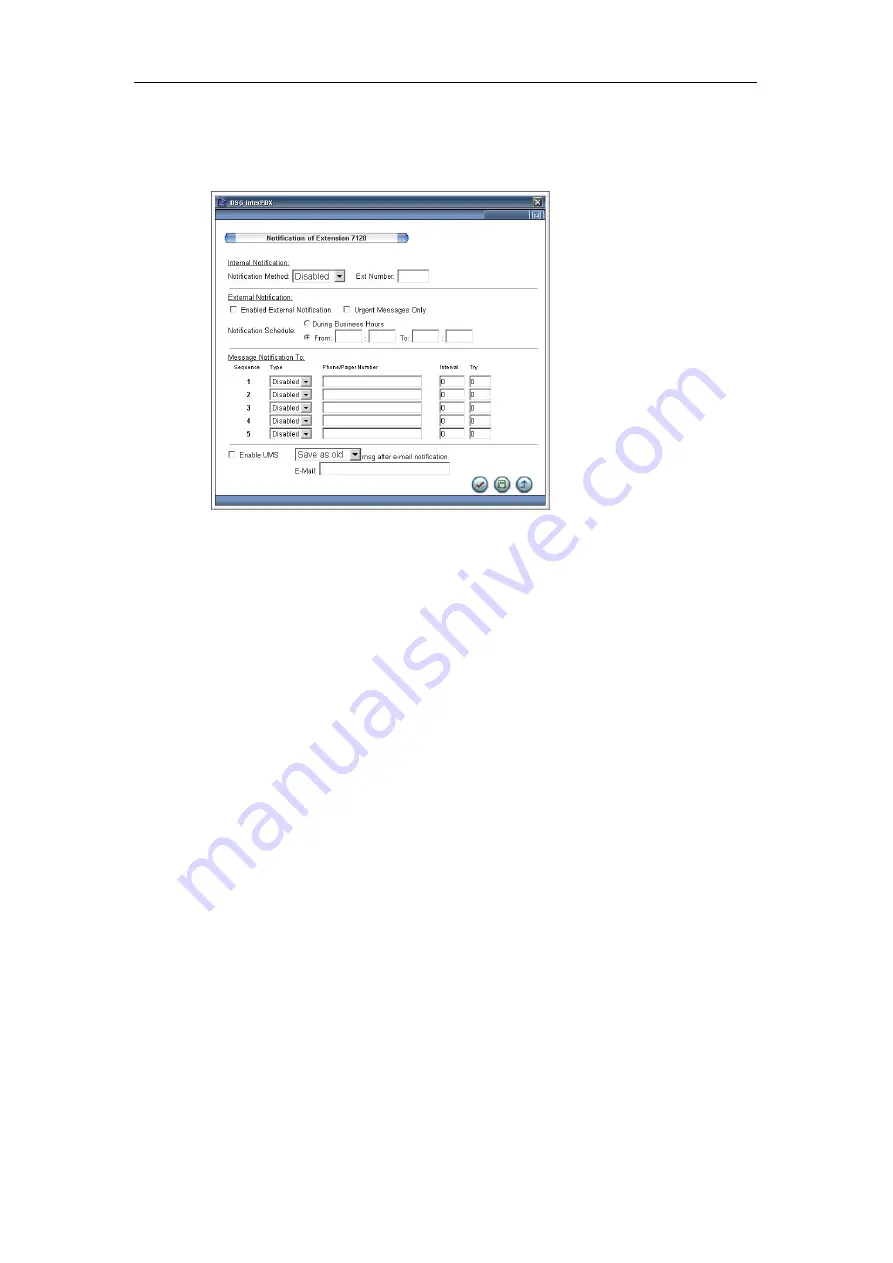
Notification
The Notification allows you to assign several methods to notify you when
receiving new voice messages.
Internal Notification
The Internal Notification is Ring Notification. When the extension receives new
messages, the system will notify the receiver by ringing the extension. This
function can be used on different kinds of extensions such as assistant extensions,
analog phones, and virtual extensions.
1.
Click the Notification item.
2.
Internal Notification Method: Select “Extension” from the drop-down menu
to enable the internal notification. You can also disable this function.
3.
Setting the Notification Target: If you enable the internal notification, input
the associated extension number. The system will ring the extension number
you assigned when receiving new messages. If you want to enable your
station’s notification function, please input your extension number or leave it
blank.
External Notification
1.
Click the “Enabled External Notification” check box to enable the External
Notification function, or click the “Urgent Messages Only” check box to notify
you only when receiving urgent messages. The notification of urgent
messages will be delivered even when you disable the external notification.
2.
Set the “Notification Schedule” according to your needs. The notifications will
be sent during the hours you set.
3.
Set the notification sequence starting from 1. Select Phone or Pager from the
Содержание IP590
Страница 1: ...InterPBX Communication System IP590 IP Phone User Guide 08IP59M e0 90d EN1...
Страница 18: ......
Страница 30: ......
Страница 43: ...Chapter 4 Web Based Administration Tool 43...
Страница 44: ......
Страница 48: ......
Страница 50: ......
Страница 56: ...Appendix C Navigating the LCD Display 56...


