Maintenance
8-6
Torque Adjust Procedure
•
Ensure that the adjusting nut is in a finger tight
position.
•
If the adjustment nut is tighter than finger tight,
loosen and complete previous step.
•
Match mark the adjusting nut with the hub. Using a
torque wrench tighten the adjusting nut to 90ft*lb.
•
After the break-away torque is set, bend the tabs of
the lock washer over the hex flats of the adjusting
nut.
Note: The torque limiter clutch nut requires a reasonable
amount of force to adjust. Use a torque wrench that provided
you with at least 18” of leverage.
Run in Procedure
•
If the torque limiter has been taken apart and reassembled or friction disks have been
change, it is recommended that the clutch be “run in” by “slipping” the center
member (sprocket).
•
Ensure that the adjusting nut is in a finger tight position.
•
Match mark the adjustment nut and hub. Advance the adjustment nut ¼ turn from
finger tight.
•
Slip the
torque limiter
sprocket for 8
minutes at full
RMP.
•
Refer to the
“Torque
adjust
procedure” for
final
readjustment.
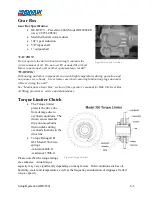
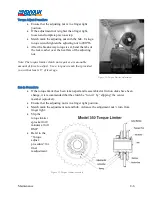
Figure 50-Torque Limiter Adjustment
Figure 51-Torque Limiter Assembly
Содержание 600 GTS Series
Страница 2: ......
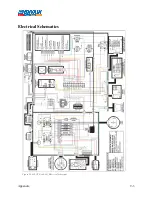
Страница 47: ...Appendix 9 3 Electrical Schematics Figure 56 600 GTS sub 40 Electrical Schematic...
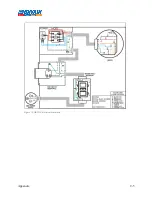
Страница 48: ...Appendix 9 4 Figure 57 600 GTS Electrical Schematic...
Страница 49: ...Appendix 9 5 Figure 58 HR2250 Electrical Schematic...
Страница 50: ...Appendix 9 6 Figure 59 Trailer Wiring Schematic...

