


HEC-P6XXX User’s Manual
Document #: 2016002.1.pdf
PAGE 8 of 60
Divelbiss Corporation • 9778 Mt. Gilead Road • Fredericktown, Ohio 43019 • 1-800-245-2327 • www.divelbiss.com
Getting Started
4. Click the (Compile) button
5. Click the (Monitor) button to change from the ‘Edit’ to ‘Monitor’ Mode.
6. Click the (Connect) button to connect to the target. A dialog will appear automatically when no kernel is
loaded. If this dialog does not appear, click
PROJECT
then
BOOTLOADER
.
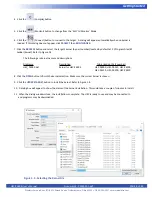
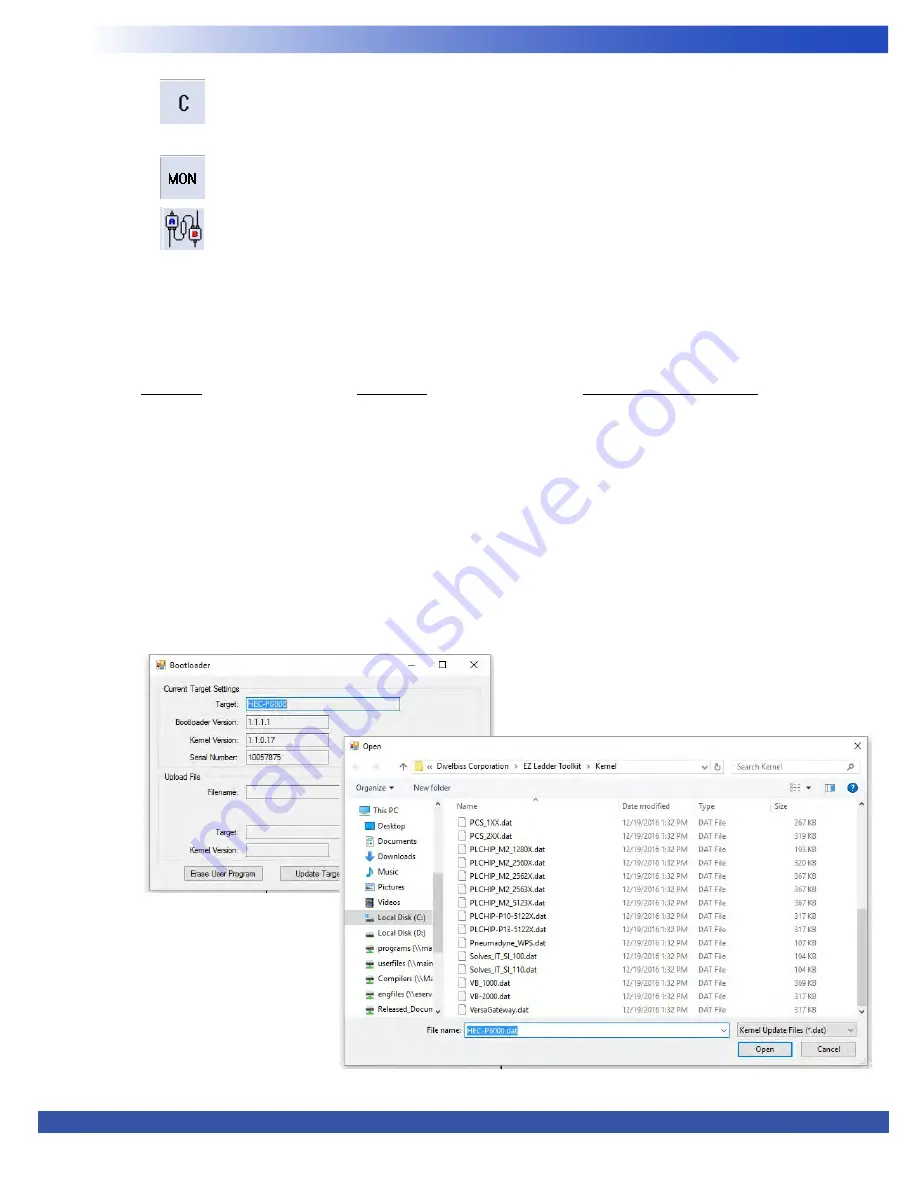
7. Click the
BROWSE
button and select the target’s kernel (by part number) located by default at C:\Program Files\EZ
Ladder\Kernel\. Refer to Figure 1.3.
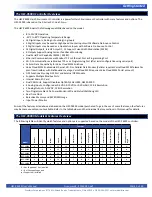
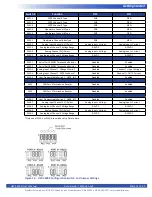
The following are kernel names and descriptions:
File Name
Description
To be Used on (Part number)
HEC_P6000.dat
Kernel for HEC-P6XXX
HEC-P6000, HEC-P6010, HEC-P6100,
HEC-P6110, HEC-P6200, HEC-P6210
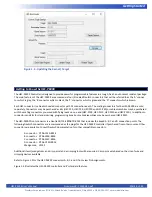
8. Click the
OPEN
button to finish the kernel selection. Make sure the correct kernel is chosen.
9. Click the
UPDATE TARGET
button to install the kernel. Refer to Figure 1.4.
10. A dialog box will appear to show the status of the kernel installation. This could take a couple of minutes to install.
11. When the dialog windows close, the installation is complete. The HEC is ready to use and may be connected to
and programs may be downloaded.
Figure 1.3 - Selecting the Kernel File


