


HEC-P6XXX User’s Manual
Document #: 2016002.1.pdf
PAGE 43 of 60
Divelbiss Corporation • 9778 Mt. Gilead Road • Fredericktown, Ohio 43019 • 1-800-245-2327 • www.divelbiss.com
HEC-P6XXX Features
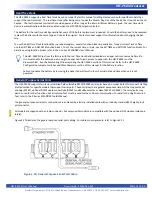
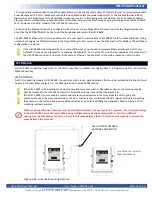
SD Card Memory
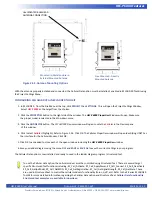
The HEC-P6XXX can accept a Micro SD Flash card. This card currently may be used to install / update the HEC-P6000’s kernel, com
-
piled ladder diagram or use the file system to read and write data (using structured text). Installation/update of Kernel and Ladder
Diagram project will only occur on power up of the HEC-P6XXX (when the SD Card is enabled and configured as such).
For SD Card updates to work, the SD card must have a directory named “update”. In this update directory, the kernel (.dat)
and the ladder diagram compiled programs (.hex) must be placed for the SD card to update the HEC-P6XXX.
The kernel and ladder diagrams are only updated after an SD card is inserted by cycling power. Updates are only performed
during the controller’s power up.
Refer to the P-Series EZ LADDER Toolkit for details using the SD Card to install or update kernels and ladder diagrams and
how to use the file system for read / write access to the SD Card.
The SD Card may be used for reading and writing data using the file system. This file system is accessed using structured text com
-
mands only. Refer to the EZ LADDER Toolkit manual for details on how to use the File system and structured text.
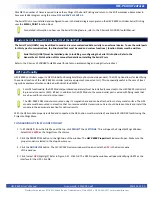
Before the SD Card may be used to install or update the kernel or EZ LADDER compiled project to the HEC-P6XXX, it must be config
-
ured to do so. This configuration must be done in the
Bootloader
screen. The Bootloader screen will only operate if EZ LADDER is
connected to an actual HEC-P6XXX controller.
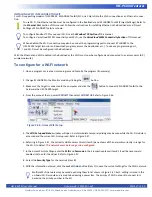
To Access the Bootloader:
1. Verify the target has been configured (see
Configuring the HEC-P6XXX Target in EZ LADDER Toolkit
).
2. Connect the Programming cable(s) from the computer to the HEC-P6XXX. See
Programming Port
in the
HEC-P6XXX Features
section.
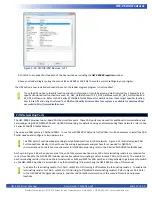
3. Create a small one-rung program with a normally open (direct contact) and an output tied together. You may also open a pre-
existing program for the HEC. EZ LADDER includes a sub-directory (...EZ LADDER\Kernel Install Start Programs\)which has starter
programs for each target to load the kernel. Choose
GetStarted_HEC-5xxx.dld
.
Special care must be taken when mapping and using the EEPROM on-board memory. Refer to the P-Series EZ LADDER
Toolkit manual (EEPROM MEMORY section) for details on using the function blocks and how the memory is mapped
including recommendations for controller where values are stored.
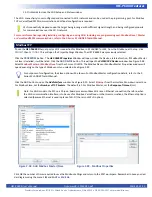
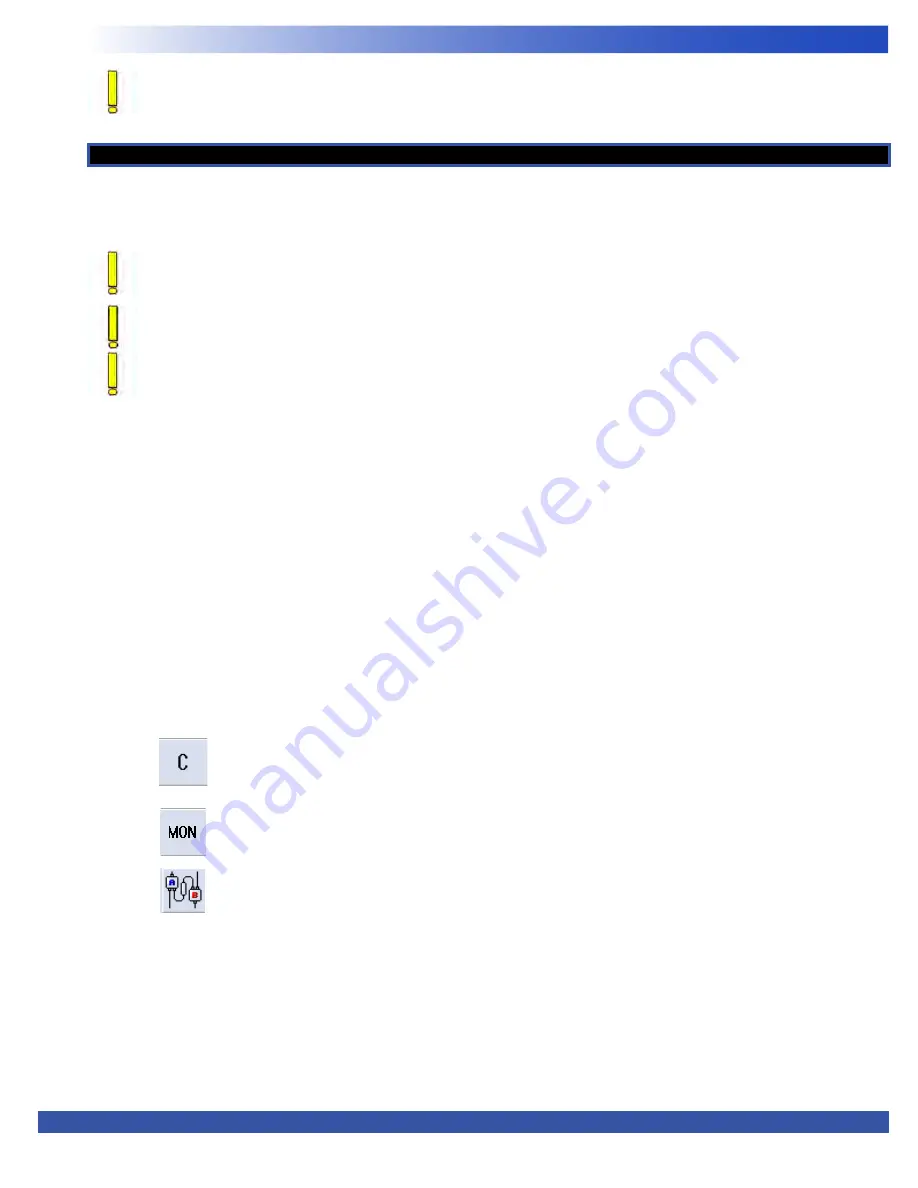
4. Click the (Compile) button.
5. Click the (Monitor) button to change from the ‘Edit’ to ‘Monitor’ Mode.
6. Click the (Connect) button to connect to the target.
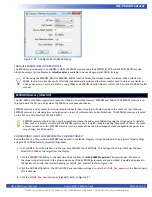
7. Using the menu, click
PROJECT
then
BOOTLOADER.
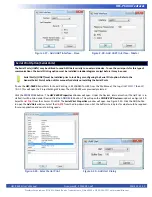
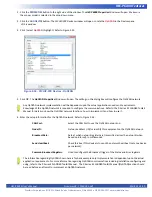
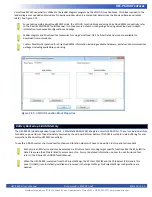
You may see a window momentarily while EZ LADDER connects to the HEC-
P6XXX’s bootloader. The Bootloader window will open. See Figure 2.39.
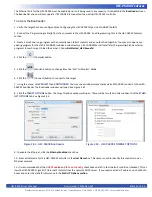
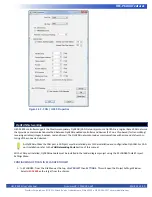
8. Click the
TARGET
OPTIONS
button. The Target Options window will open. There will be two tabs in this window. Click the
SD
CARD
OPTIONS
tab. See Figure 2.40.


