


HEC-P6XXX User’s Manual
Document #: 2016002.1.pdf
PAGE 35 of 60
Divelbiss Corporation • 9778 Mt. Gilead Road • Fredericktown, Ohio 43019 • 1-800-245-2327 • www.divelbiss.com
HEC-P6XXX Features
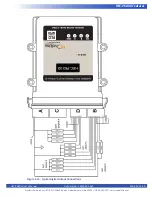
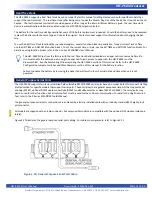
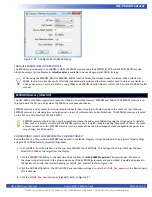
Figure 2-27 - Add UART Interface - Slave
Figure 2-28 - Add UART Interface - Master
Serial Print Option (Serial Ports)
The Serial Ports (UARTs) may be utilized to send ASCII data serially to an external device. To use the serial ports for this type of
communications, the Serial Printing option must be installed in ladder diagram project before it may be used.
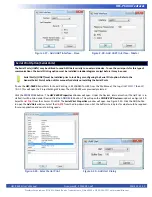
Serial Port(s) (UART) must be installed prior to installing or configuring the Serial Print option. Refer to the
General Serial Ports Section of this manual for details on installing the Serial Ports.
T
o use the
HEC-P6XXX
Serial Ports
for Serial Printing, in EZ LADDER Toolkit, from the File Menu at the top, click
PROJECT
then
SET
-
TINGS
. This will open the Project Settings Window. The HEC-P6XXX was previously selected.
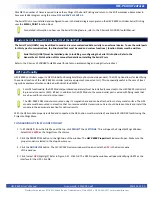
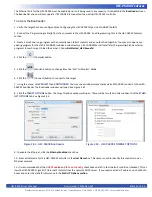
Click the
PROPERTIES
button. The
HEC-P6000 Properties
Window will open. Under the Devices,
Internal
section, if Serial Print is in
-
stalled, it will be listed under Device. Click the
ADD DEVICE
button. This will open the
PLCHIP-PXX Devices
window. See Figure 2-29.
Select
Serial Print
from the choices. Click
OK.
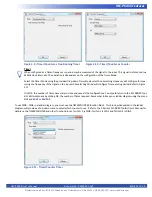
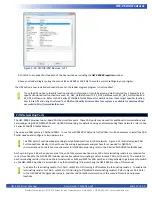
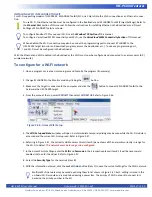
The
Serial Print Properties
window will open. See Figure 2-30. Click the
ADD
button
to open the
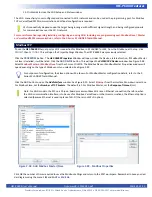
Add Uart
window. Select the
UART#
from the drop-down menu. Set the buffer size in bytes for what would be required
for your application and serial printing needs.
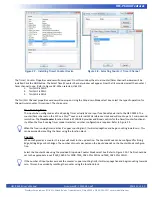
Figure 2-29 - Select Serial Print
Figure 2-30 - Add Uart Dialog


