Get
ting Star
ted
Connections
Set
tin
g
s
Pla
ybac
k
Remot
e Contr
ol
Multi-z
one
Inf
or
mation
Tr
oubleshooting
Specifications
Set
tin
g
s
GUI Menu Operation
1
Press
[SOURCE SELECT]
.
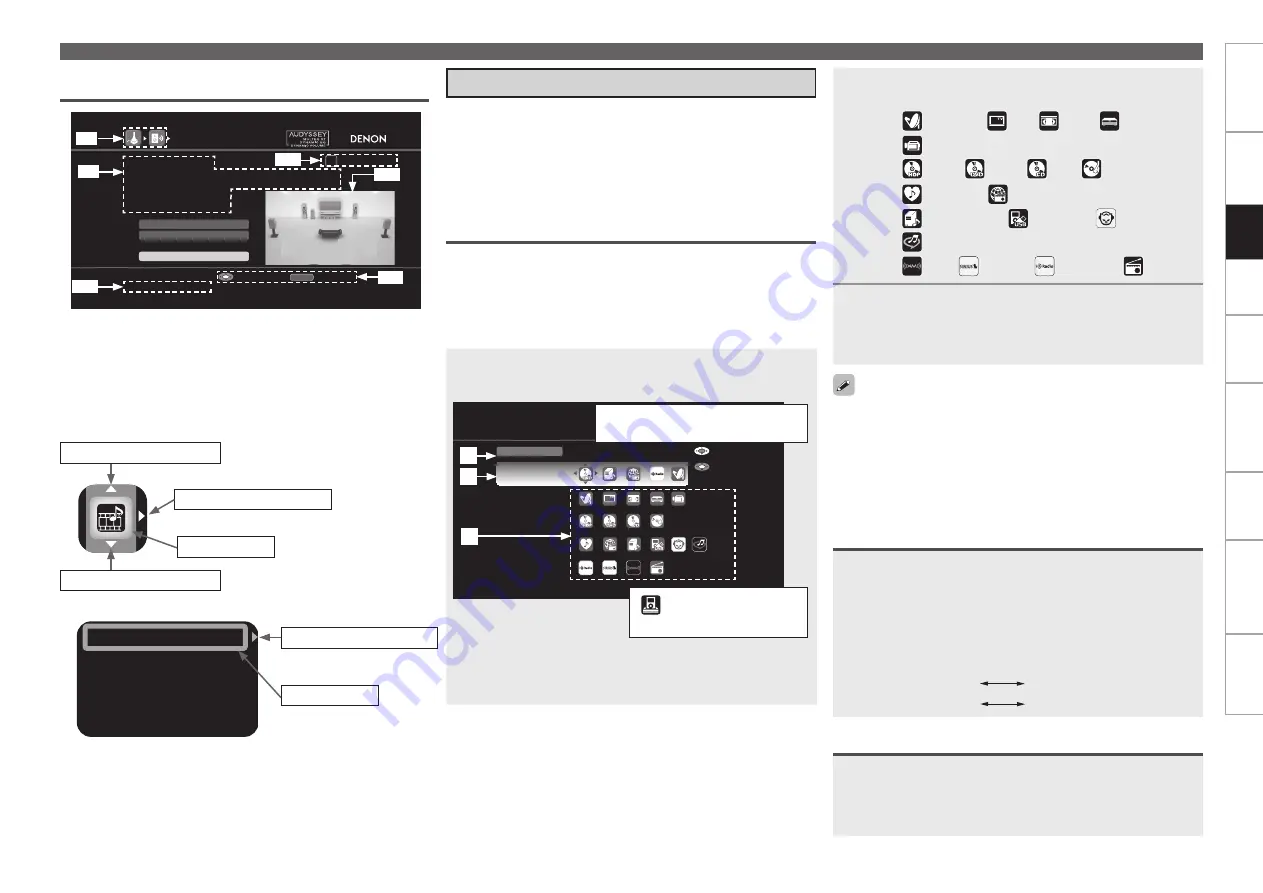
Display the “Source Select” menu.
SOURCE SELECT
Source
DVD
Recent
Video
Player
Network
Tuner
Enter
Move
q
Input Source
: The name of the highlighted input source is
displayed.
w
Recently used sources
: The recently used input sources (up to
5) are displayed.
The currently selected input source
is highlighted.
“
” is displayed when using
a Control dock for iPod.
Selecting the Input Source
There are three ways to select the input source, as described below.
q
Selecting the input source using the “Source Select” menu (GUI
menu)
w
Selecting the input source using the
[INPUT SOURCE SELECT]
(Main remote control unit)
e
Selecting the input source using the
<SOURCE SELECT>
(Main
unit)
q
Using the “Source Select” Menu
Switch the main remote control unit to the “MAIN” or “MACRO”
mode when performing this operation (
v
page 108 “Operating the
Main Remote Control Unit”).
If the main remote control unit is in “ZONE2”, “ZONE3” or “ZONE4”
mode, the “Source Select” menu will not be displayed when
[SOURCE
SELECT]
is pressed.
q
w
e
Input Assign
Input Mode
Video
Rename
Source Level
G
Example 2
H
Audyssey Auto Setup screen
(with illustration)
Switch to the next item
Selected item
Switch the selected item
Switch to the next item
Switch the selected
item using
ui
.
b
Icon
n
List
n
Selected item
(Use
p
or
ENTER
to switch.)
Switch the selected item
AUDYSSEY AUTO SETUP
1 2 3 4 5 6
Amp Assign
RETURN
Auto Setup Start
Channel Skip
STEP1 Preparation
Connect the speakers and place them according
to the recommendations in the manual.
Set the following items
if necessary.
Start Auto Setup
Enter
Cancel
z
9
z
12
z
13
z
11
z
8 : History icon
z
9 : Operation guidance text
z
10 : Operation step indicators
z
11 : Illustration
z
12 : Guide text for the currently selected
setup item
z
13 : Operation button guidance
(Use
i
to switch.)
(Use
p
or
ENTER
to switch.)
(Use
u
to switch.)
z
8
z
10
Use the device selection buttons on the main remote control unit to
set the device to be operated beforehand.
When using with an iPod connected directly to the AVR-4810CI’s
USB pot, select “USB/iPod” for the input source.
Input sources that are not going to be used can be set ahead of time.
Make this setting at “Source Delete” (
v
page 53).
To turn off the source selection menu without selecting an input
source, press
[SOURCE SELECT]
again.
•
•
•
•
w
Operating on the Main Remote Control Unit
Press
[INPUT SOURCE SELECT]
.
The desired input source can be selected directly.
b
To operate the AVR-4810CI using the main remote control unit,
set the remote control unit to the “MAIN” mode (
v
page 108
“Operating the Connected Devices by Remote Control Unit”).
b
Pressing the
VCR/DVR
button and the
CD/PHONO
button on the
main remote control unit will switch between the following.
VCR/DVR
:
VCR
DVR
CD/PHONO
:
CD
PHONO
Turn
<SOURCE SELECT>
.
b
If “ZONE2/3/4 Rec Select”, “Video Select” or “Tuning Preset”
mode is selected for the input source, press
<SOURCE>
before
turning the
<SOURCE SELECT>
.
e
Operating on the Main Unit
e
Icons for the input sources in the different categories are
displayed.
Video
:
Player :
Network :
Tuner
:
(SAT/CBL),
(TV),
(VCR),
(DVR),
(V.AUX)
(HDP),
(DVD),
(CD),
(PHONO)
(Favorites),
(Internet Radio),
(Media Server),
(USB/iPod),
(Napster),
(Rhapsody)
(XM),
(SIRIUS),
(HD Radio),
(TUNER)
2
Use
uio
p
to select the input source icon, then
press
ENTER
.
The input source is set and the source selection menu is turned
off.


