8.
Insert the card-edge connector firmly into the expansion-card connector until the card is fully seated.
9.
Close the expansion-card latches.
10. If applicable, connect any cables to the expansion card.
11. Install the expansion-card riser.
12. Close the system.
13. Reconnect the system to its electrical outlet and turn the system on, including any attached peripherals.
14. Install any device drivers required for the card as described in the documentation for the card.
Removing Expansion-Card Risers
CAUTION: Many repairs may only be done by a certified service technician. You should only perform
troubleshooting and simple repairs as authorized in your product documentation, or as directed by the online or
telephone service and support team. Damage due to servicing that is not authorized by Dell is not covered by your
warranty. Read and follow the safety instructions that came with the product.
NOTE: The expansion-card riser 1 can be used only when both the processors are installed.
1.
Turn off the system, including any attached peripherals, and disconnect the system from the electrical outlet and
peripherals.
2.
Open the system.
3.
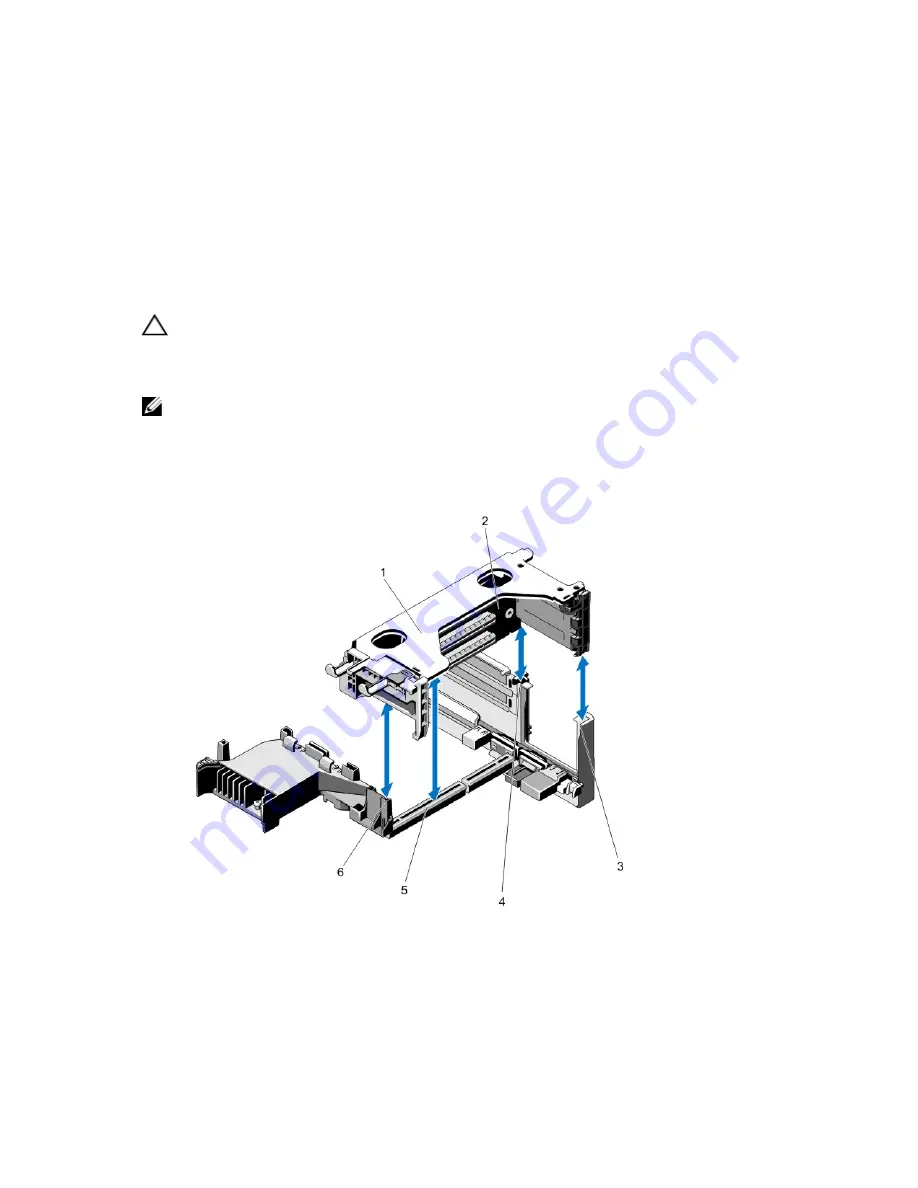
Holding the touch points, lift the expansion-card riser from the riser connector on the system board.
Figure 24. Removing and Installing the Expansion Card Riser 1
1. expansion-card riser 1 cage
2. expansion-card riser 1
3. riser guide-back (right)
4. riser guide-back (left)
5. expansion-card riser 1 connector
6. riser guide (front)
56
Содержание PowerVault DR4100
Страница 1: ...Dell DR4100 Systems Owner s Manual Regulatory Model E14S Series Regulatory Type E14S001 ...
Страница 28: ...28 ...
Страница 82: ...82 ...
Страница 92: ...92 ...
Страница 104: ...104 ...
Страница 120: ...120 ...


