background image

* In this resolution, the display is set to pan mode. To use 1280 x 1024 resolution, set the external monitor to 

Plug and Play Monitor

 as 

described in the following procedures. 


For Windows 95, perform the following steps:


1.

Click the 

Start

,button, point to 

Settings

, and then click 

Control Panel


2.

Double-click the 

Display

 icon.


3.

Click the 

Settings

 tab, click 

Advanced Properties

, and click the 

Monitor

 tab.


4.

Click 

Change...

, click 

Plug and Play Monitor

, and click 

OK

 twice.


5.

Set 

Display area

 to 

1280 x 1024

, and click 

OK

.


For Windows 98, perform the following steps:


1.

Click the 

Start

 button, point to 

Settings

, and then click 

Control Panel


2.

Double-click the 

Display

 icon.


3.

Click the 

Settings

 tab, click 

Advanced...

, and click the 

Monitor

 tab.


4.

Click 

Change...

, click 

Next

, and click 

Display a list of all the drivers

.


5.

Click 

Next

, and click 

Show all hardware

.


6.

Under 

Manufacturers

, click 

(Standard monitor types)

.


7.

Under 

Models

, click 

Plug & Play Monitor

; and click 

Next


8.

Click 

Next

 again, click 

Finish

, and click 

Close


9.

At the 

Display Properties

 screen, set 

Screen area

 to 

1280 x 1024

, and click 

Apply

.  


10.

Click 

OK

 , click 

Yes

, and click 

OK

.


To display more colors, select a lower resolution. If you select a resolution and color combination that the computer does not support, the computer 
automatically selects the next supported combination. 

Customizing Video Resolution 

1. Click the 

Start

 button, point to 

Settings

, and then click 

Control Panel

.  

 
The 

Control Panel

 window appears. 


2. Double-click the 

Display

 icon.  

 
The 

Display Properties

 window appears. 


3. Click the 

Settings

 tab, and then set the resolution by dragging the slider in the 

Desktop Area

 box. In the 

Color Palette

 box, choose the 

number of colors from the menu provided. For more information, see your operating system documentation.  
 
If you choose a resolution or color palette that is higher than is supported, the settings adjust automatically to the closest possible setting. 
 

4. To change the refresh rate, click the 

NeoMagic

 tab, and then follow the instructions on your display. 


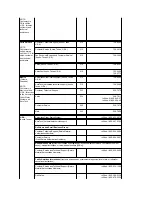
640 x 480

256 

8

60 Hz

60 Hz, 75 Hz, 85 Hz

65,536  
(64 K)

16 (High Color)

60 Hz

60 Hz, 75 Hz, 85 Hz

1677721  
(16 Million)

24 (True Color)

60 Hz

60 Hz, 75 Hz, 85 Hz

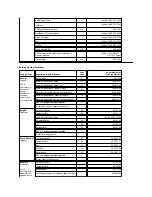
800 x 600

256 

60 Hz

60 Hz, 75 Hz, 85 Hz

65,536  
(64 K)

16 (High Color)

60 Hz

60 Hz, 75 Hz, 85 Hz

1677721  
(16 Million)

24 (True Color) 

60 Hz

60 Hz, 75 Hz, 85 Hz

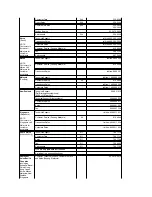
1024 x 768

256 

8

60 Hz

60 Hz, 70 Hz, 75 Hz, 85 
Hz

65,536  
(64 K)

16 (High Color)

60 Hz

60 Hz, 70 Hz, 75 Hz, 85 
Hz

1677721  
(16 Million)

24 (True Color)

60 Hz

60 Hz, 70 Hz, 75 Hz, 85 
Hz

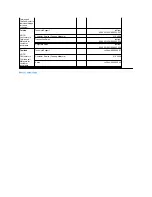
1280 x 1024*

256

8

60 Hz

60 Hz

NOTE: You can adjust the refresh rate only on an external monitor. If the 

NeoMagic

 tab is inactive, your external monitor adjusts 

the refresh rate automatically.

Содержание Latitude CS

Страница 1: ...Windows NT and MS DOS are registered trademarks of Microsoft Corporation Intel and Pentium are registered trademarks of Intel Corporation Other trademarks and trade names may be used in this document to refer to either the entities claiming the marks and names or their products Dell Computer Corporation disclaims any proprietary interest in trademarks and trade names other than its own Initial rel...

Страница 2: ...the AC Adapter 1 Connect the AC adapter s attached cable into the computer s AC adapter connector see Figure 1 2 Plug the AC power cable into the other end of the AC adapter 3 Plug the AC power cable into an electrical outlet Figure 1 Connecting the AC Adapter Turning On the Computer To turn on the computer press the power button Back to Contents Page Using the AC Adapter Connecting the AC Adapter...

Страница 3: ...ve power on the computer is to close the display when the computer is not in use When you close the display and an external Experimenting With Power Conservation Standby Mode Using Key Combinations Suspend to Disk Mode Closing the Display Power Management Properties for Microsoft Windows 98 Suspend Mode Power Management Properties for Microsoft Windows NT NOTE To use key combinations on an externa...

Страница 4: ...charges completely You can enter standby mode by pressing Fn Esc To resume operation from standby mode press the power button Suspend to Disk Mode Suspend to disk S2D mode copies all system data to a reserved area the S2D partition on the hard disk drive and then turns off all power to the computer When you resume normal operation the same programs will be running and the same files will be open t...

Страница 5: ...our computer the Low Battery and Critical Battery alarm options were not checked Dell recommends that you do not select these options l Power Meter allows you to view the percentage of battery life remaining when your computer is operating on battery power If your computer is operating on AC power the computer displays a message l Advanced allows you to display the Power Meter on the Windows 98 ta...

Страница 6: ...ium ion batteries you can charge the battery whenever you like without fear of reducing its charge capacity l A battery has a life span of up to 350 full charges and 2000 partial charges provided it is charged at normal room temperature Using the Battery The battery is partially charged when you receive it Dell recommends that you charge your battery to full capacity before using it to power the c...

Страница 7: ... AC adapter to the computer This safety feature is important because charging a hot battery shortens the battery s life span and may damage the battery and the computer l If the battery status indicator flashes alternately green and amber the battery is too hot to start charging If this occurs disconnect the computer from its electrical outlet and allow it and the battery to return to room tempera...

Страница 8: ...light up your battery has between 40 percent and 60 percent of its charge left Figure 2 Battery Charge Gauge Percentage of Charge The battery charge gauge uses its five indicator lights to show the percent of charge remaining in the battery l If one indicator lights up the battery has 1 to 20 percent of its charge remaining l If two indicators light up the battery has 21 to 40 percent of its charg...

Страница 9: ... hours If the computer is already in suspend mode when a final low battery warning occurs the computer enters S2D mode immediately If S2D mode has been disabled the computer reenters suspend mode NOTICE To avoid losing data and possibly corrupting data areas on your hard disk drive save your work immediately after a second low battery warning Then connect your computer to an electrical outlet or p...

Страница 10: ...m power conservation for your work environment Turning On the Computer To turn on the computer press the power button Back to Contents Page CAUTION Do not puncture or incinerate the battery NOTE This computer is supplied with a lithium ion battery Lithium ion batteries are longer lived than conventional batteries and do not require replacement as often Do not place spent batteries in common househ...

Страница 11: ...ng system disable the autoplay feature while you use the CD ROM or DVD ROM drive The autoplay feature can interfere with the computer s power management functions If Dell installed the operating system the autoplay feature has been disabled If you reinstall the operating system or if you installed it yourself be sure to disable the autoplay feature if you want to use the CD ROM or DVD ROM drive Fo...

Страница 12: ...e Differential Pulse Code modulation ADPCM l CD I mode 2 form 1 and form 2 l CD I Ready l CD Bridge l Photo CD CD recordable CD R single and multisession l Video CD l CD rewritable CD RW The 24x CD ROM and DVD ROM drives support reading CD RW discs This format is supported as read only neither the CD ROM nor the DVD ROM drive can write to CD RW discs l DVD 5 the DVD ROM drive supports the DVD 5 fo...

Страница 13: ...es and city codes For example to call Paris France from Montpellier France dial the area code plus the local number as shown in the following illustration The codes required depend on where you are calling from as well as the destination of your call in addition each country has a different dialing protocol If you need assistance in determining which codes to use contact a local or an internationa...

Страница 14: ...de Local Number or Toll Free Number Brazil Sales Customer Support Technical Support toll free 0800 90 3355 Canada North York Ontario NOTE Customers in Canada call the U S A for access to TechConnect BBS Automated Order Status System toll free 1 800 433 9014 AutoTech Automated technical support toll free 1 800 247 9362 Customer Care From outside Toronto toll free 1 800 387 5759 Customer Care From w...

Страница 15: ...ll free 91 800 900 37 toll free 91 800 904 49 Customer Service 525 228 7878 Main 525 228 7800 U S A Austin Texas Automated Order Status System toll free 1 800 433 9014 AutoTech Automated technical support toll free 1 800 247 9362 Dell Home and Small Business Group Customer Technical Support Return Material Authorization Numbers toll free 1 800 624 9896 Customer Service Credit Return Authorization ...

Страница 16: ... 05 Home Small Business Customer Care 01 795676 03 Preferred Accounts Corporate Customer Care 0660 8056 Home Small Business Technical Support 01 795676 04 Preferred Accounts Corporate Technical Support 0660 8779 Web site support euro dell com at E mail tech_support_germany dell com Belgium Brussels Technical Support 02 481 92 88 Customer Care 02 481 91 19 Home Small Business Sales toll free 0800 1...

Страница 17: ...y Langen Technical Support 06103 971 200 Technical Support Fax 06103 971 222 Home Small Business Customer Care 06103 971 530 Corporate Customer Care 06103 971 560 Preferred Accounts Customer Care 06103 971 420 TechConnect BBS 06103 971 666 Switchboard 06103 971 0 Web site http www dell de support E mail tech_support_germany dell com Ireland Bray NOTE Customers in Ireland call the U K for Home Smal...

Страница 18: ...0 581 8818 Web site support euro dell com nl Norway Lysaker NOTE Customers in Norway call Sweden for fax technical support Technical Support 671 16882 Customer Care 671 16881 Switchboard 671 16800 Fax Technical Support Upplands Vasby Sweden 590 05 594 Fax Switchboard 671 16865 Web site support euro dell com no E mail nor_support dell com Poland Warsaw Technical Support 22 60 61 999 Customer Care 2...

Страница 19: ...er systems toll free 1 800 633 559 Customer Care toll free 1 800 819 339 Corporate Sales toll free 1 800 808 385 Transaction Sales toll free 1 800 808 312 Fax toll free 1 800 818 341 Brunei NOTE Customers in Brunei call Malaysia for customer assistance Customer Technical Support Penang Malaysia 810 4966 Customer Service Penang Malaysia 810 4949 Transaction Sales Penang Malaysia 810 4955 China Xiam...

Страница 20: ...0 888 202 Corporate Sales toll free 1 800 888 213 New Zealand Technical Support Dell Dimension systems only 2 50 GST per call 0900 51010 Technical Support Other systems 0800 446 255 Customer Service 0800 444 617 Sales 0800 441 567 Fax 0800 441 566 Singapore Singapore NOTE Customers in Singapore call Malaysia for customer assistance Technical Support toll free 800 6011 051 Customer Service Penang M...

Страница 21: ...Support toll free 0080 651 226 0800 33 557 Customer Service Penang Malaysia 810 4949 Transaction Sales toll free 0080 651 228 0800 33 556 Corporate Sales toll free 0080 651 227 0800 33 555 Thailand NOTE Customers in Thailand call Malaysia for customer assistance Technical Support toll free 0880 060 07 Customer Service Penang Malaysia 810 4949 Sales toll free 0880 060 06 ...

Страница 22: ...tents Page Customizing Your Computer Dell Latitude CS CSx Portable Computers User s Guide Back to Contents Page Using the System Setup Program System Setup Options Power Management Settings Suspend to Disk Utility ...

Страница 23: ...st groups or subtests were completed successfully l Error messages that appear if any problems are detected When to Use the Dell Diagnostics Whenever a major component or device in your computer does not function properly you may have a component failure As long as the microprocessor and the input and output components of your computer the display keyboard and diskette drive are working you can us...

Страница 24: ... of the diagnostics appears see Figure 2 The main screen lists the diagnostic test device groups lists the devices of the selected device group and allows you to select categories from a menu From this screen you can enter two other types of screens Information on the main screen of the diagnostics is presented in the following five areas l Two lines at the top of the screen identify the version n...

Страница 25: ...o your computer Because your printer is a parallel communications device the computer recognizes the printer by its LPT1 address and identifies it as a parallel port You can test your printer connection in the Parallel Ports tests How to Use Dell Diagnostics Six comprehensive menu driven online Help categories provide instructions on how to use the program and explain each menu item test group sub...

Страница 26: ... Diskette recording capacities are small and access times are slow relative to hard disk drives but they provide a convenient means of storing and transferring data Test Category Test provides a thorough explanation of the subtest for each selected device group For example the following description is provided for the Diskette Drive Seek Test Diskette drive A Diskette Drive Seek Test This test ver...

Страница 27: ...eject button and damage the drive To remove a diskette from the drive press the eject button to release the diskette and then pull the diskette out of the drive When data is being accessed from the diskette drive the drive access indicator blinks Back to Contents Page NOTE As an alternative diskette drive configuration you can connect the diskette drive to the parallel connector on the back of the...

Страница 28: ...u Have Display Problems NOTE When you run the computer on battery power set your computer s brightness control to the lowest setting that affords comfortable viewing You can extend your battery life by using the minimum brightness setting Key Combinations Function Fn down arrow Decreases brightness Fn up arrow Increases brightness Fn right arrow Has no effect on this computer Fn left arrow Has no ...

Страница 29: ... does not support the computer automatically selects the next supported combination Customizing Video Resolution 1 Click the Start button point to Settings and then click Control Panel The Control Panel window appears 2 Double click the Display icon The Display Properties window appears 3 Click the Settings tab and then set the resolution by dragging the slider in the Desktop Area box In the Color...

Страница 30: ...Display and then click the Settings tab Two display icons appear in the Settings window 13 Click the display icon marked 2 14 When asked if you want to enable this monitor click Yes 15 Click Apply and then click OK If You Have Display Problems If your computer is receiving power but nothing appears on your display such as light text or graphics or the display image does not appear as you would exp...

Страница 31: ...uide Back to Contents Page Installing Microsoft Windows 95 and Windows 98 Drivers Installing Microsoft Windows NT Drivers NOTE For more information on using the operating system installed on your computer by Dell see the operating system user s guide that came with your computer ...

Страница 32: ...the computer and verify the media bay cable connection to the back of the CD ROM drive Reboot the computer If the problem persists run the CD ROM Drive tests in the Dell Diagnostics Data error The diskette or hard disk drive cannot read the data Run the appropriate utility to check the file structure of the diskette drive or hard disk drive See the documentation that came with your operating syste...

Страница 33: ...puter If the problem persists try another drive Then run the Hard Disk Drive tests in the Dell Diagnostics Invalid configuration information please run System Setup Program The system configuration information does not match the hardware configuration This message is most likely to occur after a memory module is installed Correct the appropriate options in the System Setup program Keyboard clock l...

Страница 34: ...he optional ROM apparently failed Call Dell for technical assistance Sector not found The operating system cannot locate a sector on the diskette or hard disk drive You probably have a bad sector or corrupted FAT on the diskette or hard disk drive Run the appropriate utility to check the file structure on the diskette or hard disk drive If a large number of sectors are defective back up the data i...

Страница 35: ...through 2 4 4 An installed memory module is not being properly identified or used Make sure that a memory module is installed in one of the memory module sockets on the system board The computer will not function unless at least one memory module is installed 3 1 1 Slave DMA register failure Run the System Set tests in the Dell Diagnostics If the program does not load call Dell for technical assis...

Страница 36: ...r COM4 IRQ4 Available for use by a PC Card unless the integrated serial port or infrared port is configured for COM1 the default or COM3 IRQ5 Available for use by the audio controller IRQ6 Generated by the diskette drive controller to indicate that the diskette drive requires the attention of the microprocessor IRQ7 Available for use by a PC Card or audio controller if the parallel port is disable...

Страница 37: ...ows 95 and Windows 98 click the Start button point to Settings and click Control Panel Double click the System icon Click the Device Manager tab and then double click Computer Address Device 0000 001F DMA controller 1 0020 003F Interrupt controller 1 0040 005F System timers 0060 0060 Keyboard controller 0061 0061 System speaker 0064 0064 Keyboard controller 0070 007F RTC and NMI enable 0080 009F D...

Страница 38: ......

Страница 39: ...and External Numeric Keypad AC Adapter USB Devices Audio Devices Parallel Devices External Media Options Docking Devices NOTES Some external devices require you to load software called device drivers into system memory before the devices will work These device drivers help your computer recognize the external device and direct its operation Instructions for installing this software are usually inc...

Страница 40: ...nector The parallel port sends and receives data in parallel format where eight data bits one byte are sent simultaneously over eight separate lines The port can be configured as a unidirectional output only port for devices such as a printer or as a bidirectional port for devices such as a network adapter The computer s integrated parallel port is designated as LPT1 The Microsoft Windows 95 and W...

Страница 41: ... place objects on top of it doing so could damage the drive motor Docking Devices You can attach your computer to Dell s C Port Family APR and C Dock Family Expansion Station docking devices through the docking connector For information on docking your computer see the documentation that came with your docking device External Monitor You can use the 15 hole video connector to attach an external mo...

Страница 42: ...ower to the DC power required by the computer You can connect the AC adapter with your computer turned either on or off The AC adapter works with electrical outlets worldwide However power connectors vary among countries Before using AC power in a foreign country you may need to obtain a new power cable designed for use in that country Audio Devices You can connect audio devices such as speakers m...

Страница 43: ......

Страница 44: ...Back to Contents Page Getting Help Dell Latitude CS CSx Portable Computers User s Guide Back to Contents Page Help Overview Contacting Dell ...

Страница 45: ...pport page including the following tools and information l Technical information Details on every aspect of your system including hardware specifications l Self diagnostic tools A system specific troubleshooting application for resolving many computer related issues by following interactive flowcharts l Drivers files and utilities The latest drivers and basic input output system BIOS updates to ke...

Страница 46: ...is sent within minutes to the fax number you designate For the TechFax telephone number to call refer to Contacting Dell TechConnect BBS Use your modem to access Dell s TechConnect bulletin board service BBS 24 hours a day seven days a week The service is menu driven and fully interactive The protocol parameters for the BBS are 1200 to 19 2K baud 8 data bits no parity 1 stop bit Automated Order St...

Страница 47: ...duct returned and you assume the risk of loss during shipment to Dell Collect On Delivery C O D packages are not accepted Returns that are missing any of the preceding requirements will be refused at our receiving dock and returned to you Before You Call Remember to fill out the Diagnostics Checklist If possible turn on your system before you call Dell for technical assistance and call from a tele...

Страница 48: ...ne the contents of the system s start up files If the computer is connected to a printer print each file Otherwise record the contents of each file before calling Dell Error message beep code or diagnostic code Description of problem and troubleshooting procedures you performed ...

Страница 49: ...uter Figure 4 identifies the system status and keyboard status indicators Figure 1 Front Right View of the Computer Figure 2 Back Left View of the Computer Overview Available Options Features Getting Help 1 Display 2 System status indicators 3 3 Integrated microphone 4 Audio jacks 2 5 PC Card slots 2 6 External media bay 7 Media bay cable attached to media bay connector on computer 8 Speaker 9 Har...

Страница 50: ...ble support and Sound Blaster software emulation capability l System memory consisting of synchronous dynamic random access memory SDRAM small outline dual inline memory modules SODIMMs Factory installed memory can range from 64 MB to a system maximum of 320 MB Depending on the memory already installed you may be able to increase memory by installing a 32 64 or 128 MB SDRAM SODIMM in the memory up...

Страница 51: ...change the system configuration l The Program Diskette Maker allows you to create program diskette sets of software that Dell installed on your computer s hard disk drive l Dell Diagnostics for evaluating the computer s components and devices Available Options Dell offers the following devices and upgrade options l C Port Family APRs and C Dock Family Expansion Stations l Additional batteries l Ex...

Страница 52: ...s available for your system visit the Dell World Wide Web site at http www dell com Getting Help If at any time you don t understand a procedure described in this guide or if your computer does not perform as expected Dell provides a number of tools to help you For more information on these help tools see Getting Help Back to Contents Page ...

Страница 53: ...he computer s display Table 2 Display Key Combinations Embedded Numeric Keypad Speaker Key Combinations Display Key Combinations System Function Key Combinations Power Conservation Key Combinations CD ROM and DVD ROM Drive Key Combinations Processing Speed Key Combinations NOTE On an external keyboard use Scroll Lock with the appropriate keys if the External Hot Key option is enabled in the System...

Страница 54: ... text mode it has no effect if the computer is running a graphical operating system or application program Fn F7 Toggles the computer s display between expanded video mode and regular video mode Fn F8 Switches the video image to the next display in the following sequence the display an external monitor or both displays simultaneously Fn d Turns off the display NOTES Contrast cannot be changed on a...

Страница 55: ...yboard use Scroll Lock with the appropriate keys if the External Hot Key option is enabled in the System Setup program Key Combinations Function Fn Page Up Increases the volume of the integrated speaker and the external speakers if attached Fn Page Dn Decreases the volume of the integrated speaker and the external speakers if attached Fn End Enables and disables the integrated speaker and the exte...

Страница 56: ... the external media bay contains a device remove the media bay cable from the back of the bay Then remove the device by sliding the release latch on the bottom of the bay to the release position holding it there and pulling the device out of the bay 3 Slide the new device firmly into the external media bay You should hear a click when the device is fully seated 4 Connect the media bay cable Positi...

Страница 57: ...Second Hard Disk Drive The first time you install a second hard disk drive in the external media bay you must format that drive For instructions see the documentation that came with the device Back to Contents Page ...

Страница 58: ...Back to Contents Page Media Options Dell Latitude CS CSx Portable Computers User s Guide Back to Contents Page External Media Bay CD ROM and DVD ROM Drives Diskette Drive ...

Страница 59: ... edge of the computer when installed If something strikes the exposed end of an installed card your system board can be damaged Because of space considerations you may have trouble using two PC Cards in your computer if one of them is an extended card It may be easier to use an extended card if you install it in the upper PC Card slot Always remove an extended PC Card before you pack the computer ...

Страница 60: ...indows 98 use the PC Card configuration utility on the taskbar to select and stop a card before you remove it If you do not remove the card in the configuration utility you could lose data from open application programs To remove a PC Card see Figure 2 perform the following steps Figure 2 Removing a PC Card 1 Press the PC Card eject button once to pop the button out and then press the button in ag...

Страница 61: ...The operating system automatically detects a PC Card and opens the Add New Hardware menu from the Control Panel For information see the PC Card operating system documentation Back to Contents Page ...

Страница 62: ...Back to Contents Page Powering Your Computer Dell Latitude CS CSx Portable Computers User s Guide Back to Contents Page AC Adapter Power Management Settings Batteries ...

Страница 63: ... tools Dell provides to assist you if you have a problem with the computer and explains how and when to call Dell for technical assistance Warranty and Return Policy Information Dell Computer Corporation Dell manufactures its hardware products from parts and components that are new or equivalent to new in accordance with industry standard practices For information about the Dell warranty and retur...

Страница 64: ... the diskette in drive A l Filenames and directory names are presented in lowercase bold Examples autoexec bat and c windows l Syntax lines consist of a command and all its possible parameters Commands are displayed in lowercase bold variable parameters those for which you substitute a value are displayed in lowercase italics constant parameters are displayed in lowercase bold The brackets indicat...

Страница 65: ...ay want to put down a protective mat before turning over the computer 2 Remove the old hard disk drive from the drive bay Close the display and turn the computer over Using a 0 very small Phillips head screwdriver remove the two screws in the hard disk drive door see Figure 1 Save the screws for use later in this procedure With the computer still upside down press upward on the hard disk drive doo...

Страница 66: ...e computer for the removal or installation of a memory module perform the following steps NOTICE Ground yourself by touching an unpainted metal surface of a connector on the back of the computer While you work periodically touch the connector to dissipate any static electricity that might harm internal components 1 Turn off the computer and any attached devices Do not install memory modules while ...

Страница 67: ...Remove the module and reinstall it Do not force the memory module cover to close because you may damage your computer 6 Reconnect your computer and devices to their electrical outlets and turn them on As the computer boots it detects the presence of additional memory and automatically updates the system configuration information 7 In one of the following ways verify that the System Memory option i...

Страница 68: ... in the following cases l If Dell did not install MS DOS on your hard disk drive l If you increase the amount of system memory by adding a memory module l If you used the rms2d exe file to remove the original S2D partition and now want to recreate the partition l If your hard disk drive becomes corrupted l If you install a new hard disk drive l If you received the system utilities separately on di...

Страница 69: ...The S2D partition was successfully created Back to Contents Page ...

Страница 70: ... an Administrator Password The administrator password is designed to give system administrators or service technicians in large companies access to computers for repair or reconfiguration The administrators or technicians can assign identical administrator passwords to groups of computers as they are unpacked and configured leaving the primary password free to be assigned by the user When you set ...

Страница 71: ...ear the back see Figure 1 Description of Security Cable Slots The security cable slot allows you to attach a commercially available antitheft device to the computer Antitheft devices for portable computers usually include a segment of metal stranded cable with an attached locking device and associated key You can use a security cable on your computer when it is undocked and also when it is docked ...

Страница 72: ... Util and press Enter 3 Type asset and press Enter Assigning an Asset Tag An asset tag can have up to ten characters any combination of characters is valid except those that begin with a forward slash or a question mark Spaces count as characters To assign or change an asset tag perform the following steps 1 Click the Start button point to Programs and click MS DOS Prompt 2 Type cd c Dell Util and...

Страница 73: ...the command line options you can use with the Asset Tag utility To use one of these options open an MS DOS prompt type asset and a space followed by the option and then press Enter Table 1 Asset Tag Utility Commands Back to Contents Page NOTE For security reasons you cannot set change or delete the owner tag if either the primary or the administrator password is set Asset Tag Command Function asse...

Страница 74: ... External Hot Key option is enabled To exit the System Setup program press Esc If you change the setting of an option that requires rebooting to take effect exit the operating system before rebooting The Help text in the upper right corner of System Setup screens 1 2 and 4 tells you if the computer must be rebooted For more information see System Setup Options Using the System Setup Program The Sy...

Страница 75: ...ue depending on your display l Help The box on the upper right half of screens 1 2 and 4 displays help information for the option with a currently highlighted field l Computer data The box in the lower right corner of screens 1 2 and 4 displays information about your computer l Key functions The line of boxes across the bottom of all screens lists keys and their functions within the System Setup p...

Страница 76: ... level of security for the data in your computer However they are not foolproof If your data requires more security you should obtain and use additional forms of protection such as data encryption programs or PC Cards with encryption features Alarm Resume Alarm Resume directs the computer to resume normal operation when it is in suspend mode and detects an alarm from the real time clock RTC Such a...

Страница 77: ... can see the battery gauge illustration at any time by pressing Fn F3 BIOS Version BIOS Version displays the version number and release date of the basic input output system BIOS in your computer A service technician may ask you for this version number if you call Dell for technical assistance Boot First Device Boot First device determines which disk device your computer uses to find the software ...

Страница 78: ...tified in Boot Second device it will search the device named in Boot Third device Settings for the option are l None the default l Internal HDD Causes your computer to attempt to boot from the hard disk drive l Diskette Drive Causes your computer to attempt to boot from the diskette drive l CD ROM DVD ROM Drive Causes your computer to attempt to boot from a bootable CD l Ext Media Bay HDD Causes y...

Страница 79: ...rating system To change the date press the right arrow key to increase the number in the highlighted field or press the left arrow key to decrease the number If you prefer you can type numbers in the month and day of the month fields Disk Time out Disk Time out lets you determine how long your hard disk drive remains idle before the drive motor turns off to conserve battery power The AC option is ...

Страница 80: ...se Display Close lets you determine whether your computer enters suspend mode when the display is closed or whether only the display is turned off l Suspend the default Allows the computer to enter suspend mode when the display is closed l Active Turns off the display but does not put the computer into suspend mode Display Time out Display Time out lets you decide how long the computer operates wi...

Страница 81: ...oid resource conflicts by disabling or remapping the address of the infrared port on the Dell Latitude C Port Family APR or C Dock Family Expansion Station The COM1 COM2 COM3 and COM4 settings allow you to take advantage of the computer s infrared support Settings for this option are l Disabled Disables the infrared data port and makes the direct memory access DMA IRQ and I O resources available f...

Страница 82: ...lt l Serial Mouse Disables the touch pad and allows you to use a mouse connected to the serial connector on the I O port If you want to use a serial mouse you must first set the Pointing Device option to Serial Mouse For a change in Pointing Device to take effect you must reboot your computer Power Management Power Management Page 4 of the System Setup screens allows you to enable or disable power...

Страница 83: ... not in the System Setup program and your computer is running in Advanced Power Management APM mode you can activate S2D mode at any time by pressing Fn a Press the power button to resume operation from S2D mode Serial Port Serial Port allows you to disable or remap the address of the serial port on the Dell Latitude C Port Family APR or C Dock Family Expansion Station When the computer is undocke...

Страница 84: ... If you are not in the System Setup program you can activate suspend mode at any time by pressing Fn Esc The computer resumes normal operation automatically when you press the power button System Memory System Memory displays the total amount of synchronous dynamic random access memory SDRAM installed in your computer No user selectable settings are available for this option The amount of memory d...

Страница 85: ... must reboot to make the change apparent to the operating system Universal Connect The Universal Connect option functions with the Dell Latitude C Port Family APR and or C Dock Family Expansion Station if the computer uses Windows 95 or Windows 98 Set this option to Enabled the default if you often use more than one C Port APR and or C Dock Expansion Station and want to minimize the initialization...

Страница 86: ...us controller PC Card slots two supports type I and type II cards in any combination type III cards can be used only in the lower slot the upper slot supports ZV cards on computers running the Microsoft Windows 95 or Windows 98 operating system Cards supported 3 3 V and 5 V PC Card connector size 68 pins Data width maximum PCMCIA 16 bits CardBus 32 bits Memory Architecture SDRAM Memory module sock...

Страница 87: ...External microphone in minijack headphones speakers out minijack Speaker 2 5 ohm speaker Internal speaker amplifier 500 mW Controls volume can be controlled through key combinations application program menus or the Speaker window in the Dell Control Center Windows 95 only Video Video type 256 bit hardware accelerated Data bus AGP Video controller NeoMagic MagicMedia 256 ZX Video memory 4 0 MB Disp...

Страница 88: ...ry Capacity 34 WH for standard battery 46 WH for high capacity battery Charge time approximate 2 Computer on 1 5 hr for standard battery 1 hr 50 minutes for high capacity battery Computer off About 1 hour Life span approximate 2 350 discharge charge cycles Battery life2 From 2 5 to 3 hours for fully charged standard battery up to 50 percent more time for fully charged high capacity battery Tempera...

Страница 89: ...ment Maximum shock 3 Operating 152 4 cm sec 60 0 inches sec less than or equal to a pulse width of 2 ms Storage 203 2 cm sec 80 inches sec less than or equal to a pulse width of 2 ms Altitude maximum Operating 18 to 3048 m 59 to 10 000 ft Storage 18 to 10 600 m 59 to 35 000 ft Touch Pad Interface PS 2 compatible with Microsoft mouse driver X Y position resolution Minimum 40 points mm 1000 points i...

Страница 90: ...memory modules from older models of Dell portable computers such as the Latitude CP XP XPi CD or LM It only supports SDRAM modules and does not support EDO memory modules 2 Battery performance features such as charge time and life span can vary according to the conditions under which the computer and battery are used 3 Measured with the hard disk drive in head parked position 4 Latitude CS system ...

Страница 91: ...age Setup and Operation Dell Latitude CS CSx Portable Computers User s Guide Back to Contents Page AC Adapter Batteries Display Media Options Keyboard PC Cards Touch Pad Securing Your Computer Connecting External Devices ...

Страница 92: ...pad and move the selected object by sliding your finger across the surface l To double click an object position the cursor on the object and then tap twice Customizing the Touch Pad To customize the touch pad perform the following steps 1 Click the Start button point to Settings and click Control Panel 2 Double click the Mouse icon to open the Mouse Properties window and click the Touch tab 3 Sele...

Страница 93: ...ws Dell technical assistance personnel to identify the computer and its configuration quickly if you call for assistance If Your Computer Is Lost or Stolen If your computer is lost or stolen Dell suggests that you perform the following steps 1 Call a law enforcement agency to report the lost or stolen computer Include the service tag in your description of the computer Ask that a case number be as...

Страница 94: ... a charged battery or the AC adapter and power cable available in case you are asked to turn on the computer l Do not check the computer as baggage NOTICE Have airport security personnel check the computer by hand If the computer passes through a metal detector data loss may occur If you must pass the computer through a metal detector first remove the hard disk drive l Do not put the computer thro...

Страница 95: ...ays have a charged battery available if traveling abroad l Credit card holders should check with their credit card companies for information about the kinds of emergency travel assistance they offer to users of portable computers Many companies provide services that help you solve problems such as quickly locating 3 5 inch diskettes or providing a direct dial telephone line for your modem connecti...

Страница 96: ...Back to Contents Page Troubleshooting Your Computer Dell Latitude CS CSx Portable Computers User s Guide Back to Contents Page Dell Diagnostics Error Messages and Flash Codes ...

Страница 97: ...a network you must install the appropriate drivers to use with a network expansion card in the C Port Family APR or C Dock Family Expansion Station See the documentation for your docking option for more information Installing Video Drivers for Windows 95 Video drivers control features such as screen resolution and the number of screen colors To install the video drivers for Windows 95 perform the ...

Страница 98: ...your computer After installing the video drivers and restarting your computer set the display parameters by performing the following steps 1 Click the Start button point to Settings and then click Control Panel The Control Panel window appears 2 Double click the Display icon The Display Properties window appears 3 Click the Settings tab 4 Change the Color palette option from 256 colors to True Col...

Страница 99: ... Double click the Display icon The Display Properties window appears 3 Click the Settings tab 4 Change the Color palette option from 256 colors to True Color 24 bit 5 Set the Desktop area for your display to 1024 x 768 6 Click Apply Installing Audio Drivers Dell provides audio drivers so that you can customize the audio features of yoru computer To install the audio drivers perform the following s...

Страница 100: ...te drive 3 Click the Start button and then click Run The Run dialog box appears 4 Type a setup and then click OK or press Enter to install the utility on your hard disk drive 5 Follow the instructions on your display and when prompted restart your computer to activate the drivers Installing Infrared Drivers Windows 95 Only An infrared port lets you transfer files from your computer to another infr...

Страница 101: ... Windows 98 For Windows 95 you must install the infrared drivers before you can enable them Windows 98 already includes infrared support For both Windows 95 and Windows 98 you must enable Microsoft infrared support before you can use it To enable Microsoft infrared support perform the following steps 1 Click the Start button point to Settings and then click Control Panel 2 Double click the Add New...

Страница 102: ...tte into the diskette drive 3 Click the Start button point to Settings and then click Control Panel The Control Panel window appears 4 Double click the Display icon The Display Properties window appears 5 Click the Settings tab 6 Click Display Type The Display Type window appears 7 In the Adapter Type box click Change 8 The Change Display window appears 9 Click Have Disk 10 Verify that a is displa...

Страница 103: ... for the following features l Hot docking and warm undocking a Latitude CS CSx portable computer from supported docking stations l Hot swapping devices such as diskette hard disk large storage DVD ROM and CD ROM drives to and from your portable computer s external media bay and the C Dock Family Expansion Station s media bay l Compatibility with the Power Management Controller which allows you to ...

Страница 104: ...w appears 9 Verify that NeoMagic MagicMedia 256 is highlighted and then click OK The Audio dialog box appears 10 Click OK 11 After installation is completed restart your computer to activate the drivers Installing Touch Pad Drivers Touch pad drivers and associated utilities allow you to use and customize the integrated touch pad or an external mouse To install the touch pad drivers perform the fol...

Страница 105: ...oftware Wavetable The software wavetable allows you to customize certain audio features To install the software wavetable perform the following steps 1 Save your work in all open application programs because you will need to restart your computer at the end of this procedure to complete the installation 2 Insert the first software wavetable diskette into the diskette drive 3 Click the Start button...

Отзывы: