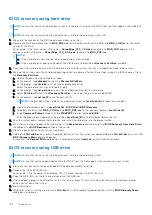
BIOS recovery using hard drive
NOTE:
Ensure that you have the previous version and the latest version of the BIOS from the Dell support site available to
use.
NOTE:
Ensure that you have the file type extensions visible in the operating system (OS).
1. Browse to the location of the BIOS update executable (.exe) files.
2. Rename the BIOS executable files to
BIOS_PRE.rcv
for the earlier version of the BIOS and
BIOS_CUR.rcv
for the latest
version of the BIOS.
For example, if the latest version’s file name is
PowerEdge_T30_1.0.0.exe
, rename it to
BIOS_CUR.rcv
and if the
previous version’s file name is
PowerEdge_T30_0.0.9.exe
, rename it to
BIOS_PRE.rcv
NOTE:
a. If the hard drive is new, there will be no operating system installed.
b. If the hard drive has been partitioned at the Dell factory, there will be a
Recovery Partition
available.
3. Disconnect the hard drive and install the hard drive into another system that has a full operational operating system.
4. Start up the system and in the Windows operating system environment follow these steps to copy the BIOS recovery file to
the
Recovery Partition
.
a. Open a Windows Command Prompt window.
b. At the prompt, type
diskpart
to start the
Microsoft DiskPart
.
c. At the prompt, type
list disk
to list out the available hard drives.
Select the hard drive that was installed in Step 3.
d. At the prompt, type
list partition
to view the available partitions on this hard drive.
e. Select
Partition 1
which is the
Recovery Partition
. The size of the partition will be 39 MB.
f. At the prompt, type
set id=07
to set the partition ID.
NOTE:
The partition will be visible to the operating system as
Local Disk (E)
to read and write data.
g. Create the following folders in
Local Disk (E)
,
E:\EFI\Dell\BIOS\Recovery
.
h. Copy both the BIOS files
BIOS_CUR.rcv
and
BIOS_PRE.rcv
to the recovery folder on
Local Disk (E)
.
i.
In the
Command Prompt
window, at the
DISKPART
prompt, type
set id=DE
.
After the executing this command, the partition
Local Disk (E)
will not be accessible by the OS.
5. Shut the system down, remove the hard drive, and install the hard drive into the original system.
6. Start the system up and boot to System Setup, in the
Maintenance
section ensure that
BIOS Recovery from Hard Drive
is enabled in the
BIOS Recovery
section of the setup.
7. Press the power button to shut the system down.
8. Holding the
Ctrl and Esc
keys, press the power button to start the system up. Keep holding the
Ctrl and Esc
keys until the
BIOS Recovery Menu
page is displayed.
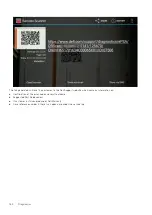
Ensure that the
Recover BIOS
radio button is selected and click
Continue
to start the BIOS recovery.
BIOS recovery using USB drive
NOTE:
Ensure that you have the file type extensions visible in the operating system.
NOTE:
Ensure that you have downloaded the latest BIOS from the Dell support site and save it on your system.
1. Browse to the location of the downloaded BIOS update executable (.exe) file.
2. Rename the file to BIOS_IMG.rcv.
For example, if the file name is PowerEdge_T30_0.0.5.exe, rename it to BIOS_IMG.rcv
3. Copy the BIOS_IMG.rcv file to the root directory of the USB key.
4. If not plugged in, plug in the USB drive, restart the system, press F2 to enter the System Setup, and then press power
button to shut down the system.
5. Start the system.
6. While the system is starting up, press the
Ctrl+Esc
keys while holding the power button until the
BIOS Recovery Menu
dialog box is displayed.
166
Diagnostics
Содержание Latitude 5424 Rugged
Страница 19: ...130W Technology and components 19 ...
Страница 20: ...LED and Cable 20 Technology and components ...

